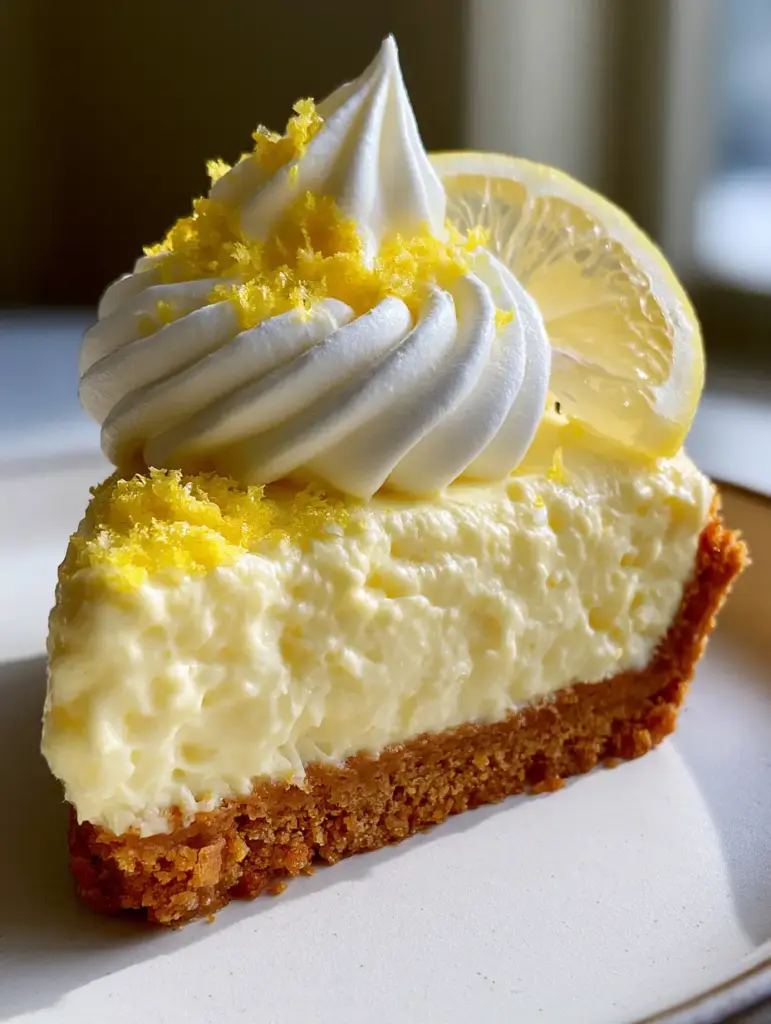
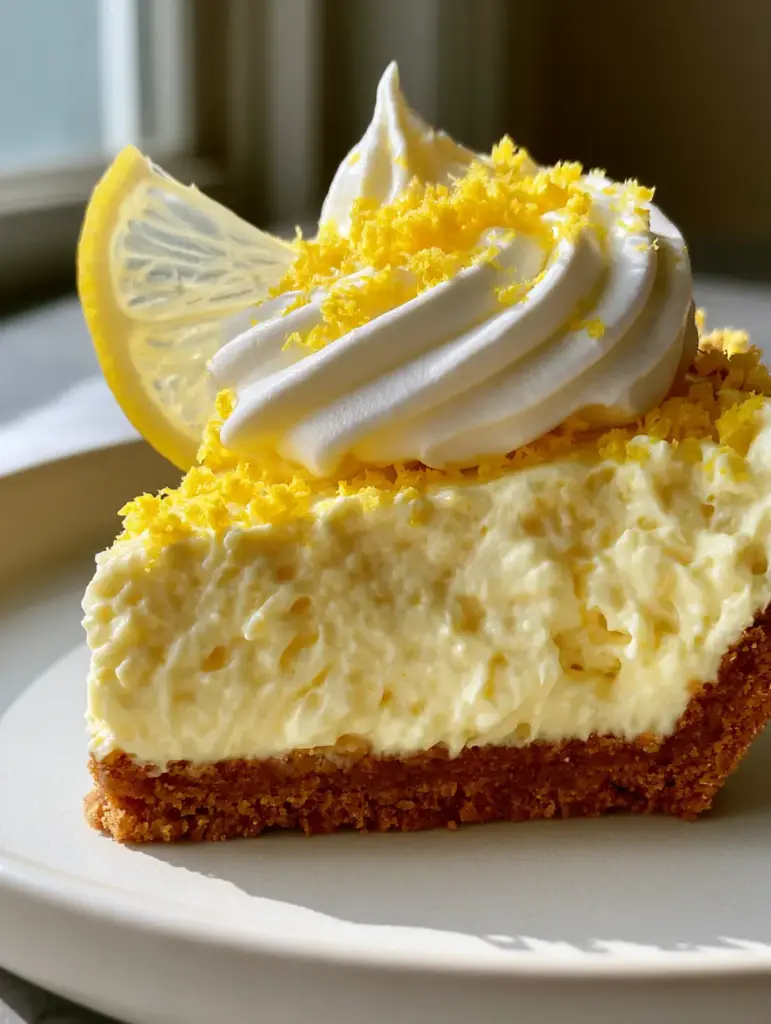
This no-bake lemon pie is the ultimate solution for those craving a high-end, patisserie-quality dessert without ever turning on the oven. Featuring a voluminous, pale yellow filling and a deep golden crust, it is as visually stunning as it is delicious.
The magic of this recipe lies in the contrast between the silky, dense lemon custard and the pillowy, stiff-peak whipped cream topping. Every bite offers a bright burst of citrus, balanced perfectly by the salty-sweet crunch of a homemade graham cracker base.
Whether you are hosting a summer garden party or simply need a refreshing treat to keep in the fridge, this no-bake lemon pie delivers professional results with minimal effort. Let’s dive into the culinary science that makes this citrus masterpiece possible.
Why This No-Bake Lemon Pie Recipe Always Wins
- Unmatched Texture: The filling is a scientifically balanced hybrid of a dense custard and a light mousse, ensuring it holds its shape while melting on the tongue.
- Deep Golden Architecture: We use a specific ratio of butter to graham cracker crumbs to ensure a crust that is visible, crumbly, and structurally sound without baking.
- Bright Citrus Profile: By utilizing both fresh juice and a heavy dusting of neon-yellow zest, we achieve a multi-dimensional lemon flavor that cuts through the richness.
- Visual Sophistication: Garnished with translucent lemon segments and stiff peaks, this pie looks like it belongs in a professional food blog’s macro photography session.
The Anatomy of a Perfect Golden Graham Cracker Crust
A truly great no-bake lemon pie starts from the bottom up. While many store-bought crusts are pale and flavorless, our crust is a deep, honeyed gold that provides a sturdy foundation for the voluminous filling.
We achieve this by using 1.5 cups (180g) of finely crushed graham cracker crumbs. Ensure they are processed until they resemble coarse sand; too large, and the crust will crumble; too fine, and it becomes a paste.
The “glue” of our crust is 6 tbsp (85g) of melted unsalted butter. As the butter chills, it solidifies, locking the crumbs into a rigid, buttery shell that shatters beautifully when pressed with a fork.
A pinch of salt and 2 tbsp (25g) of granulated sugar are essential. The sugar helps with the structural “snap,” while the salt enhances the toasted notes of the graham crackers, much like the base of a luxury banana pudding cheesecake.
Foundational Ingredients for the Silky Lemon Custard
The main filling of this no-bake lemon pie is a voluminous, pale yellow whipped lemon cream. To achieve that specific “silky and dense” look from our visual blueprint, we rely on the reaction between citrus and protein.
We use 14 oz (396g) of sweetened condensed milk. This is the structural backbone of the pie, providing a milky sweetness and a thick, syrupy consistency that sets firmly when acidified.
Next, 1/2 cup (120ml) of freshly squeezed lemon juice is non-negotiable. The citric acid reacts with the proteins in the milk, causing them to thicken—a process known as “denaturing” that results in a stable custard without eggs or heat.
To get that “voluminous” height seen in the macro photo, we fold in 1 cup (240ml) of heavy cream that has been whipped to stiff peaks. This aerates the dense milk mixture, creating that pale yellow, cloud-like aesthetic.
The Secret to Stiff-Peak Whipped Cream Toppings
A common mistake in citrus pies is a topping that weeps or slumps. For this no-bake lemon pie, we need large, pillowy swirls that maintain their architectural integrity even after hours in the fridge.
Use 1 cup (240ml) of very cold heavy whipping cream. Cold fat molecules bond more easily, trapping air bubbles more effectively to create those sharp, stiff peaks that catch the light in your photos.
Add 2 tbsp (15g) of powdered sugar and a 1/2 tsp (2.5ml) of vanilla extract. The cornstarch often found in powdered sugar acts as a minor stabilizer, ensuring your swirls don’t deflate before serving.
For those looking for even more stability, similar to the techniques used in specialty cold foam toppings, ensure your bowl and whisk are chilled in the freezer for ten minutes before you begin.
Essential Equipment for a Professional Finish
To replicate the high-end food blog aesthetic of our visual prompt, you don’t need a professional kitchen, but you do need the right tools. A 9-inch (23cm) springform pan or deep-dish pie plate is the first requirement.
A rubber spatula is vital for the “folding” process. When combining the lemon mixture with the whipped cream, you must move in a “J” motion to keep the air intact, much like making creamy overnight oats.
A microplane or fine zester is necessary for those “neon-yellow zest flakes.” Grating the lemon directly over the pie ensures the oils hit the cream, providing both scent and a vivid visual pop.
Finally, a sharp mandoline or a very thin serrated knife is needed to create that single, translucent half-moon slice of fresh lemon. You want it thin enough to see the juice vesicles glowing through the fruit.
Step-By-Step Guide to the Ultimate No-Bake Lemon Pie
Constructing the Buttery Graham Base
Combine your graham cracker crumbs, sugar, and melted butter in a medium bowl. Stir until the mixture looks like wet sand and holds its shape when squeezed in your palm.
Press the mixture firmly into the bottom and up the sides of your pie dish. Use the bottom of a flat measuring cup to pack it tightly; a well-compressed crust is the key to clean, photographic slices.
Place the crust in the freezer for 15-20 minutes. This “flash-chill” sets the butter immediately, ensuring the crust doesn’t migrate when you pour in the heavy filling.
Whipping the Voluminous Lemon Filling
In a large glass bowl, whisk together the sweetened condensed milk and the fresh lemon juice. You will see the mixture thicken almost instantly as the acid goes to work.
In a separate chilled bowl, beat your heavy cream until it reaches stiff peaks. You’ll know it’s ready when you lift the whisk and the cream stands straight up without curling over.
Gently fold the whipped cream into the lemon mixture. Do not stir vigorously; you want to maintain the volume so the filling looks “silky and dense” rather than flat and heavy.
The Setting Phase and Final Garnish
Pour the filling into the chilled crust and smooth the top. Refrigerate for at least 4 hours, though overnight is preferred for the cleanest slices and best flavor development.
Once set, pile the remaining whipped cream on top in a large, pillowy swirl. Dust heavily with the bright neon-yellow lemon zest, ensuring it covers the peaks of the cream.
Carefully place your translucent half-moon lemon slice in the center. The juice vesicles should be visible, catching the light just like in our favorite pie recipes collection.
Expert Tips for a Picture-Perfect Result
- The Temperature Trick: Always use cold heavy cream and room-temperature condensed milk. This prevents the fats from seizing and ensures a perfectly smooth emulsion.
- Zest First, Juice Second: Always zest your lemons before cutting them. It is nearly impossible to get those “neon flakes” from a spent, juiced lemon half.
- Cleaning the Knife: For those macro-shot worthy slices, dip your knife in hot water and wipe it clean between every single cut. This keeps the pale filling from smearing onto the golden crust.
- Don’t Skip the Salt: A heavy pinch of sea salt in the crust balances the intense sweetness of the condensed milk, elevating this from a simple dessert to a gourmet experience.
Storage and Serving Suggestions
This no-bake lemon pie should be kept refrigerated until the moment of serving. Because it relies on dairy stability, it can soften if left in a warm room for more than 30 minutes.
Leftovers can be stored in the fridge for up to 3 days. Cover it loosely with plastic wrap, using toothpicks to prop up the wrap so it doesn’t crush your beautiful whipped cream swirls.
You can also freeze this pie for a semi-frozen “semifreddo” experience. If you love cold treats like birthday cake oats, you will find the frozen version of this pie incredibly refreshing.
What to Serve With This Citrus Delight
To round out a dessert table, pair this pie with something chocolatey to contrast the acid. Our salted brownie crinkle cookies provide a deep, cocoa-heavy counterpoint to the lemon.
For a brunch spread, serve a slice of this pie alongside a glass of refreshing homemade green juice to keep the palate light and vibrant.
If you are looking for more no-bake inspiration, this pie sits perfectly next to a bowl of classic homemade banana pudding, offering your guests a variety of creamy textures.
Frequently Asked Questions
This specific recipe relies on the chemical reaction between sweetened condensed milk and lemon juice. For a dairy-free version, you would need to use sweetened condensed coconut milk and a stable plant-based heavy cream.
Yes, you can, but for the deep golden, buttery flavor and crumbly texture seen in our photos, we highly recommend the 15-minute homemade version using real butter and salt.
Start with very cold heavy cream and a chilled metal bowl. Whisk on medium-high speed until the cream holds its shape when the beaters are lifted. Avoid over-beating, or it will turn into butter.
Because it is a no-bake dairy-based pie, it should not sit out for more than 30-45 minutes. For the best texture and safety, serve it straight from the refrigerator.
The most common reason is using bottled lemon juice instead of fresh. Fresh lemon juice has the necessary acidity levels to denature the proteins in the condensed milk, which is what creates the firm, custard-like set.
The Complete No-Bake Lemon Pie Recipe

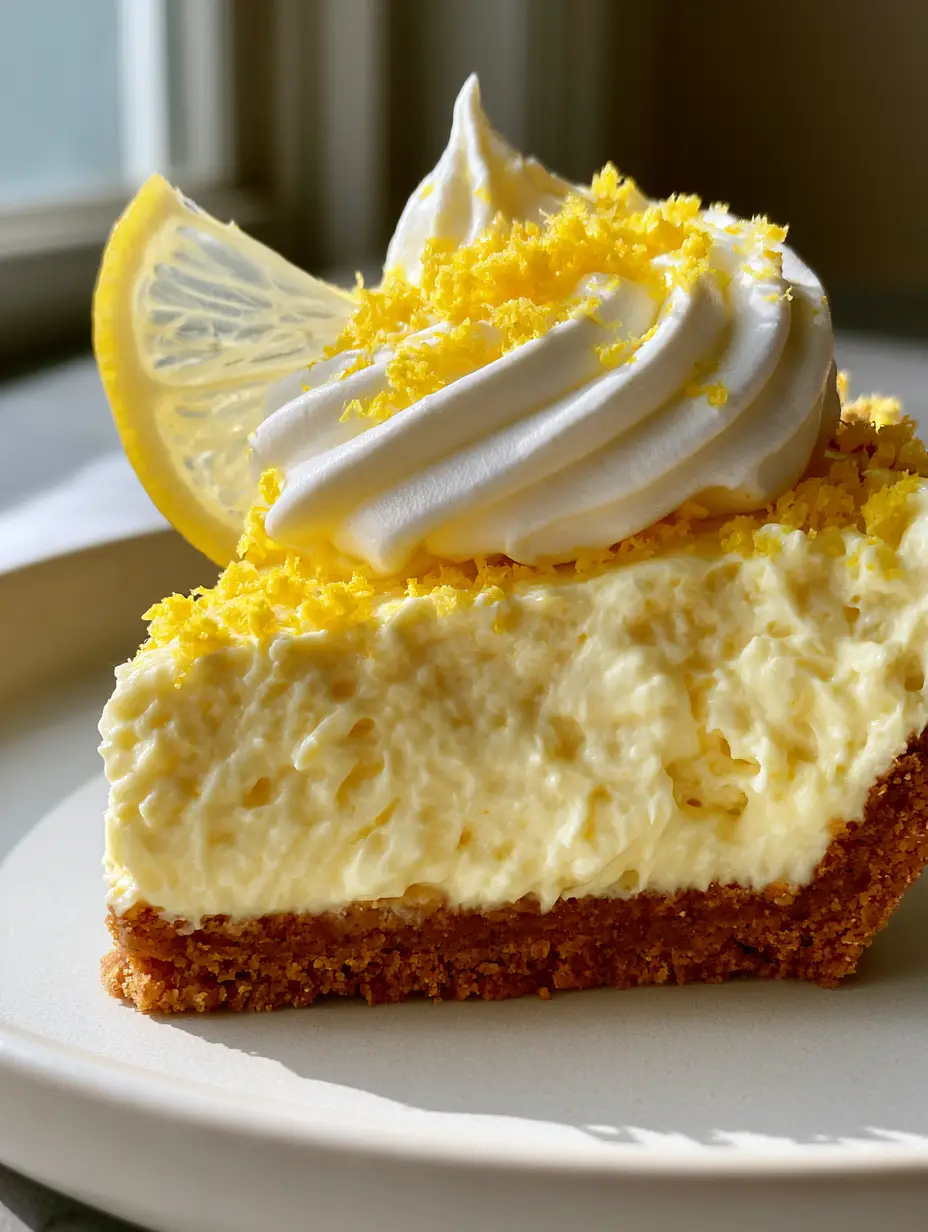
No-Bake Lemon Pie with a Buttery Graham Cracker Crust
Ingredients
Equipment
Method
- In a medium bowl, combine graham cracker crumbs, sugar, salt, and melted butter until it resembles wet sand.
- Press the mixture firmly into a 9-inch pan and freeze for 20 minutes to set the structure.
- Whisk sweetened condensed milk and lemon juice together until thickened and pale yellow.
- In a chilled bowl, beat 1 cup of heavy cream to stiff peaks.
- Gently fold the whipped cream into the lemon mixture using a spatula until no white streaks remain.
- Pour filling into crust and refrigerate for at least 4 hours.
- Beat remaining cream with powdered sugar to stiff peaks and swirl on top of the set pie.
- Garnish with a heavy dusting of lemon zest and a single translucent lemon slice.
Notes
Use a hot, clean knife for the most photographic slices.
Final Thoughts on This No-Bake Masterpiece
Creating a high-end dessert doesn’t require a hot kitchen. This no-bake lemon pie proves that with the right culinary science and attention to visual detail, you can produce a bakery-standard treat at home.
The combination of the deep golden graham crust and the pale, silky lemon filling creates a sensory experience that is both nostalgic and sophisticated. It is a recipe that invites you to slow down and savor the bright, citrusy notes of summer.
If you enjoyed this recipe, please leave a comment below and let us know how your pie turned out! Don’t forget to follow us on Pinterest for more visual recipe inspiration and share your creations with our community.