There is nothing quite as nostalgic or soul-satisfying as a true Homemade Banana Pudding, specifically one that honors the deep-rooted traditions of Southern dessert craft. Forget the instant mixes and the artificial yellow dyes; we are diving into a world of pure, unadulterated decadence where the “caviar” of vanilla beans meets the creamy sweetness of ripe bananas.
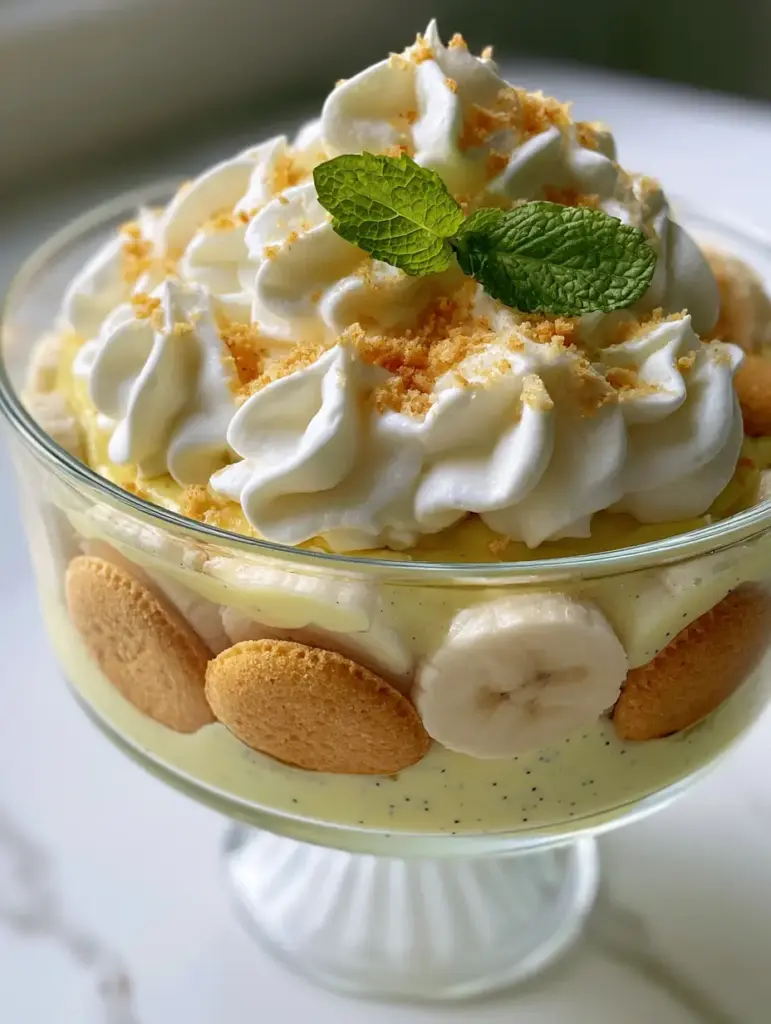
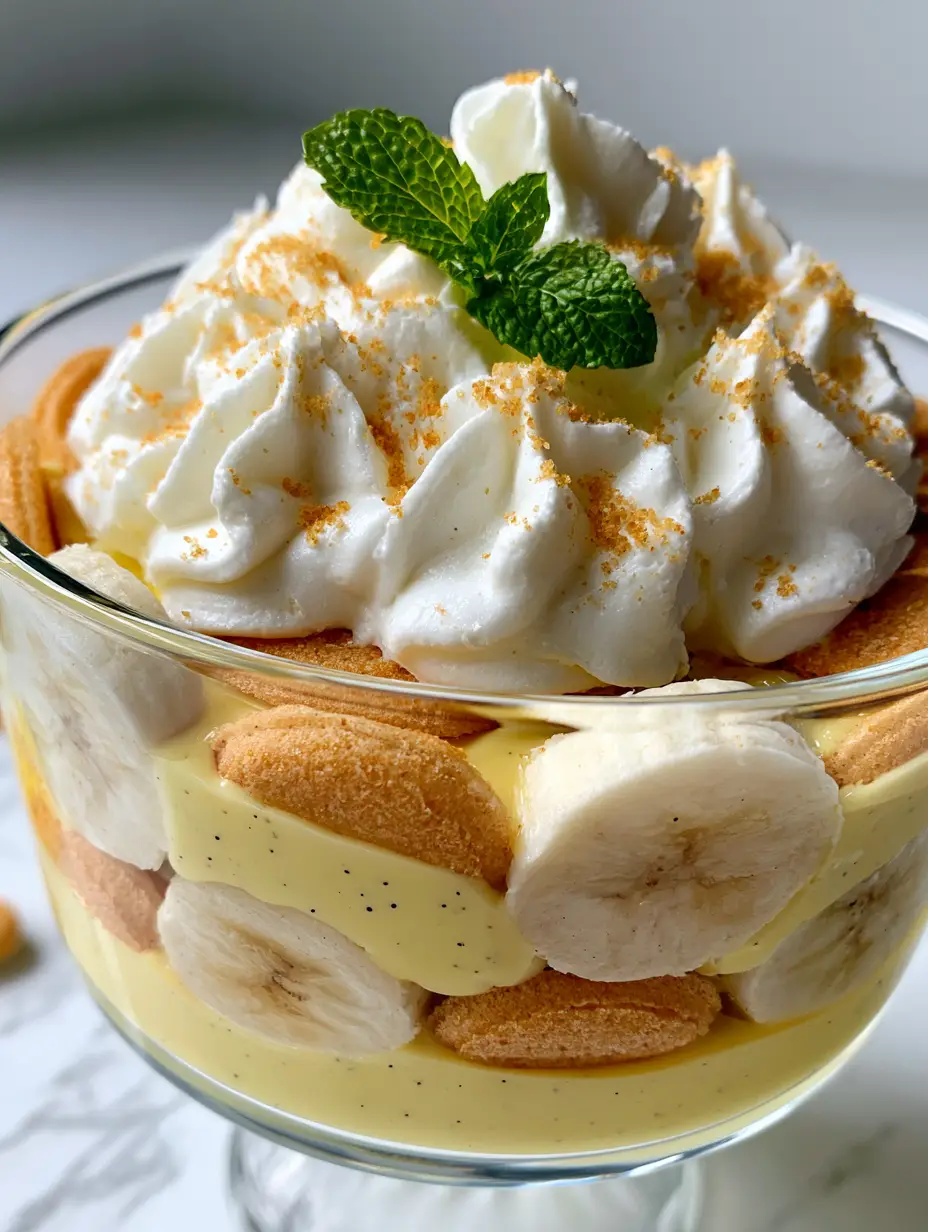
Imagine standing in a sun-drenched kitchen, looking at a clear glass trifle bowl that reveals a stunning architectural marvel of layers. Each layer tells a story of texture: the snap of a golden wafer, the velvet of a hand-tempered custard, and the airy billows of freshly whipped cream that look like clouds captured in glass.
This Homemade Banana Pudding isn’t just a recipe; it is a culinary masterpiece designed for those who appreciate the finer details, like the tiny black specks of real vanilla bean and the way a chilled custard perfectly coats the back of a spoon. Let’s build this masterpiece together, step by step.
The Anatomy of a Perfect Southern Trifle
- Thick Vanilla Bean Custard: This is a cooked-from-scratch pastry cream base that uses real egg yolks for a rich, pale yellow hue and authentic vanilla beans for complex flavor and visual elegance.
- Structural Integrity: Unlike watery versions, this pudding features a dense, stable custard that holds up the weight of whole wafers and circular banana slices without turning into mush.
- Contrasting Textures: From the “stiff-peak” whipped cream mountain on top to the crunch of fine golden wafer crumbs, every bite offers a different sensory experience.
- Visual Precision: We use fresh mint sprigs for a pop of color against the creamy whites and yellows, ensuring the dish is as beautiful as it is delicious.
The Essential Ingredients for Gourmet Pudding
To achieve the macro-level detail seen in high-end culinary photography, we must select the highest quality components for our Homemade Banana Pudding. Here is what you will need:
Whole Milk and Heavy Cream: A combination of 3 cups (720ml) whole milk and 1 cup (240ml) heavy cream creates the fatty foundation necessary for a luxurious, thick custard mouthfeel.
Granulated Sugar: You will need 3/4 cup (150g) of sugar to sweeten the custard without overpowering the natural floral notes of the vanilla bean.
Cornstarch: Use 1/4 cup (32g) of cornstarch as our primary thickening agent; it provides that clean, glossy finish that makes the custard look professional in a clear bowl.
Egg Yolks: Four large egg yolks provide the essential emulsifiers and the signature pale yellow color that defines a classic Southern custard.
Vanilla Bean Paste or Whole Pod: One whole vanilla bean, split and scraped, provides those beautiful black specks that signal “homemade” to anyone who sees the dish.
Golden Vanilla Wafers: One 11oz (312g) box of whole wafers; these act as the “bones” of the trifle, absorbing just enough moisture to become cake-like while retaining a slight bite.
Ripe Bananas: Five large bananas, sliced into uniform 1/4-inch (6mm) circles; choose fruit that is yellow with just a few brown freckles for the best sugar-to-acid balance.
Stabilized Whipped Cream: 2 cups (480ml) of heavy whipping cream and 1/4 cup (30g) of powdered sugar, whipped until they form stiff, billowy peaks that won’t weep over time.
Fresh Mint: A single, vibrant green sprig serves as the crown jewel, offering a refreshing aromatic contrast to the rich dairy.
Professional Tools for Trifle Success
Achieving a “side-profile macro” look requires a 3-quart (2.8L) clear glass trifle bowl or large glass bowl. This allows the layers to be visible from the outside, creating that iconic striped appearance.
You will also need a heavy-bottomed saucepan to prevent the milk from scorching, a fine-mesh sieve to strain any potential egg bits from your custard, and a high-speed whisk to reach those stiff peaks for the cream.
How to Make the Ultimate Homemade Banana Pudding
Crafting the Vanilla Bean Custard Base
Begin by whisking your sugar, cornstarch, and salt in your saucepan. Slowly stream in the milk and 1 cup (240ml) of cream while whisking constantly to ensure no clumps of starch remain.
Split your vanilla bean lengthwise and scrape the seeds into the pot. Drop the pod in as well for extra infusion. Heat over medium heat until the mixture begins to steam and bubbles just start to break the surface.
In a separate bowl, whisk your egg yolks. “Temper” the eggs by slowly drizzling in one cup of the hot milk mixture while whisking the eggs vigorously. This prevents them from scrambling. Pour the tempered eggs back into the main pot.
Continue cooking for 2-3 minutes until the custard is thick enough to coat the back of a wooden spoon. Remove from heat, stir in a knob of butter for gloss, and strain through a sieve into a clean bowl. Press plastic wrap directly onto the surface to prevent a skin from forming and chill until cold.
Architectural Layering for Visual Impact
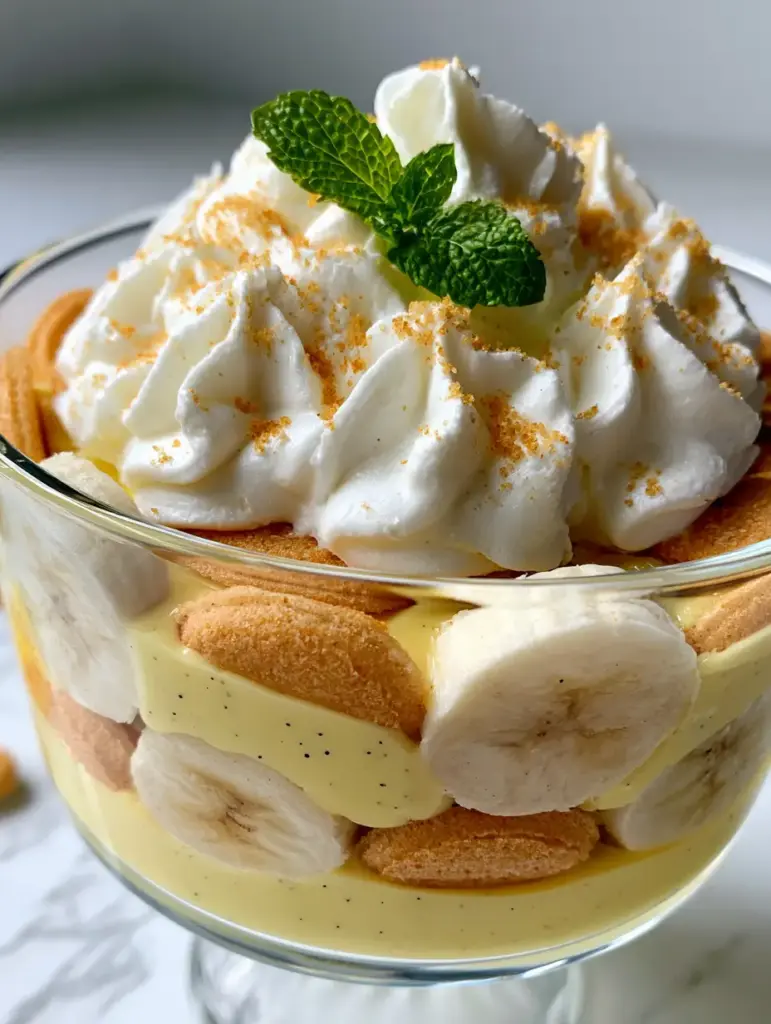
Once the custard is fully chilled and set, it’s time to assemble. Start with a thin layer of custard at the bottom of your glass bowl to act as an anchor. Place a single layer of whole golden wafers over the custard.
Next, place your circular banana slices. For a professional look, press a few slices against the glass walls of the bowl so they are visible from the side. Pour over a generous layer of the vanilla bean custard, ensuring it fills the gaps between the wafers and fruit.
Repeat these layers—wafer, banana, custard—until you reach the top of the bowl. The final layer should be custard, providing a flat, stable surface for the whipped cream mountain.
Designing the Stiff-Peak Whipped Cream Topping
Whip your remaining heavy cream and powdered sugar in a chilled bowl. You are looking for “stiff peaks”—this means when you lift the whisk, the cream stands straight up without drooping. This creates that billowy, airy texture mentioned in our visual blueprint.
Pile the cream high in the center of the trifle. Use a spatula to create soft “swirls” and “valleys” in the cream, which will catch the light beautifully. Just before serving, sprinkle finely crushed wafer crumbs over the top and place your mint sprig off-center.
Expert Tips for the Perfect Chilled State
- The 4-Hour Rule: This pudding needs at least 4 hours (and up to 8) in the refrigerator. This allows the wafers to soften into a “cake” texture while the custard sets firmly.
- Preventing Brown Bananas: Ensure your banana slices are completely submerged or covered by the custard. The lack of air exposure prevents oxidation and keeps them creamy white.
- Straining is Vital: Even the best chefs sometimes have a tiny bit of egg cook too fast. Straining the custard through a fine-mesh sieve ensures a velvet-smooth profile.
- Vanilla Quality: If you can’t find whole beans, use a high-quality vanilla bean paste to ensure those visible black specks remain a focal point.
The Science of Storage and Make-Ahead Prep
Because this Homemade Banana Pudding relies on fresh bananas and whipped dairy, it is best consumed within 24-48 hours. Store it in the refrigerator with plastic wrap tightly sealed against the top edge of the bowl.
We do not recommend freezing this dish. The custard will separate upon thawing, and the bananas will lose their structural integrity, resulting in a watery mess rather than a thick, creamy delight.
What to Serve with Southern Banana Pudding
This rich dessert pairs beautifully with other classic treats. If you are hosting a large gathering, consider offering a variety of textures. You might serve this alongside some Oatmeal Chocolate Chip Cookies for a chewy contrast.
For those who love the flavor profile but want something different, our Banana Pudding Cheesecake offers a more dense, tangy alternative. If you’re looking for a morning version of these flavors, try these Banana Pudding Overnight Oats.
If you find yourself with extra bananas, you can also whip up some Chunky Monkey Overnight Oats for a quick breakfast the next day. To balance the sweetness of the pudding, a refreshing glass of Green Juice can provide a nice palate cleanser between bites.
Frequently Asked Questions
You can make the custard up to 2 days in advance. However, the assembly should be done 4-12 hours before serving to maintain the best fruit and cream texture.
Yes, you can substitute 1 tablespoon of vanilla bean paste or high-quality extract, but you will miss the signature black specks and the deep floral intensity of the whole bean.
The key is to prevent oxygen exposure. By fully submerging the banana slices in the thick custard, you create a vacuum seal that keeps them creamy white.
For the best texture, let it chill for at least 4 to 8 hours. This allows the wafers to absorb moisture from the custard, giving them a cake-like consistency.
This usually happens if the custard wasn’t cooked long enough to fully hydrate the cornstarch or if the bananas were overripe and released too much moisture. Ensure the custard coats the back of a spoon before cooling.
The Ultimate Homemade Banana Pudding Recipe Card
Homemade Banana Pudding with Thick Vanilla Bean Custard
Ingredients
Equipment
Method
- Whisk sugar, cornstarch, and milk/cream in a saucepan. Add vanilla bean seeds and pod. Heat until steaming.
- Slowly whisk 1 cup of hot milk into egg yolks, then return the mixture to the saucepan. Cook until thick enough to coat a spoon.
- In a glass bowl, alternate layers of chilled custard, whole wafers, and banana slices. Press bananas against the glass for a macro visual effect.
- Whip cream to stiff peaks. Pile onto the pudding. Garnish with crushed wafers and a mint sprig.
Notes
Use a fine-mesh sieve to ensure the custard is perfectly smooth.
Share This Southern Classic!
Mastering the art of Homemade Banana Pudding is a rite of passage for any home cook. Its combination of humble ingredients and sophisticated techniques results in a dessert that transcends generations. Whether you’re serving this at a summer potluck or a holiday dinner, its visual appeal and creamy depth will make it the star of the table.
If you enjoyed this recipe, please leave a comment below and tell us how yours turned out! Did you manage to get those perfect vanilla bean specks? Don’t forget to follow us and share your creations to Pinterest to inspire other bakers in our community. Happy whisking!