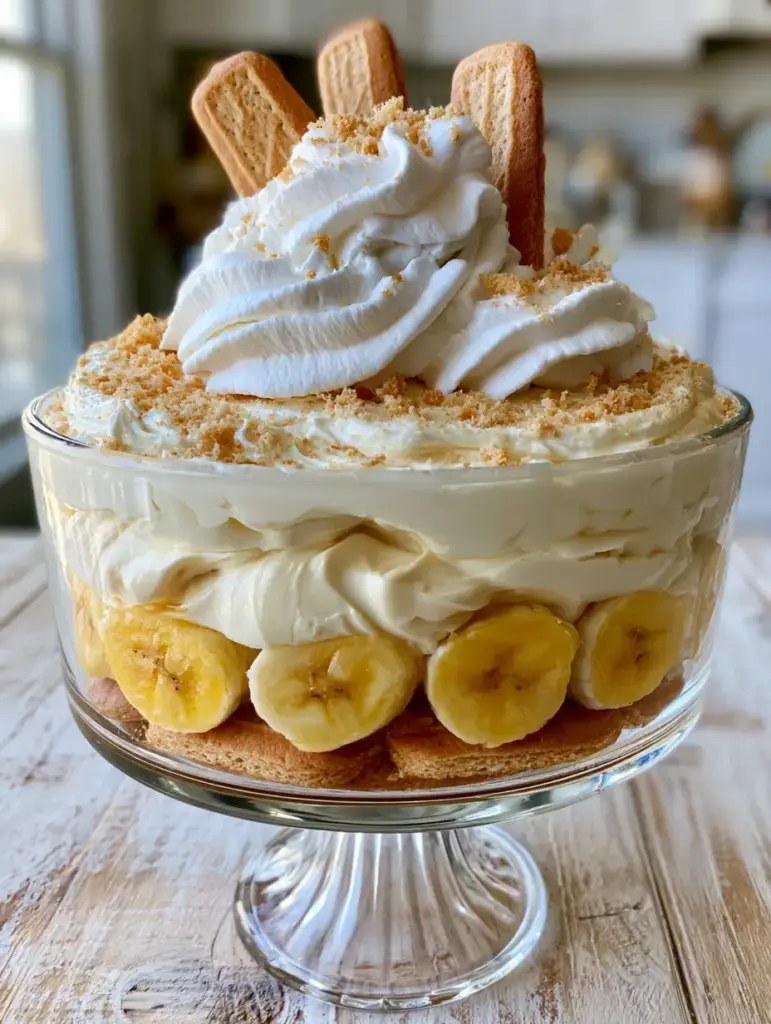
No bake banana pudding is the quintessential comfort dessert, evoking memories of southern potlucks and the iconic bakeries of New York City. This specific version is engineered to recreate that legendary, sky-high trifle bowl appearance seen in the most famous bakeries.
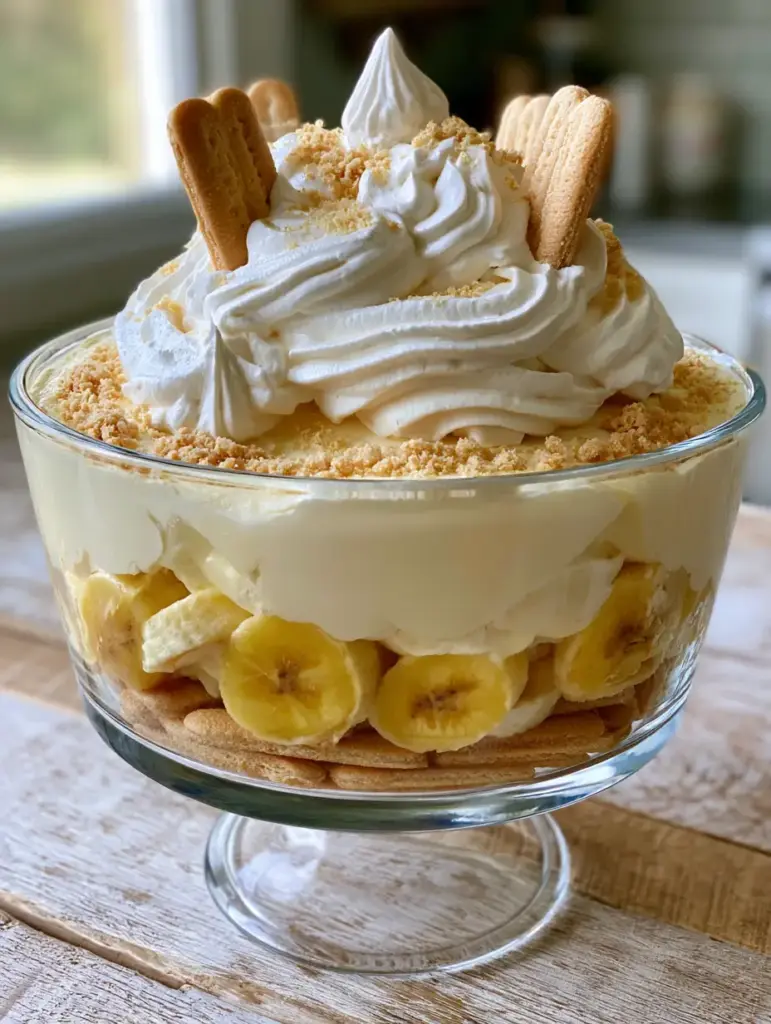
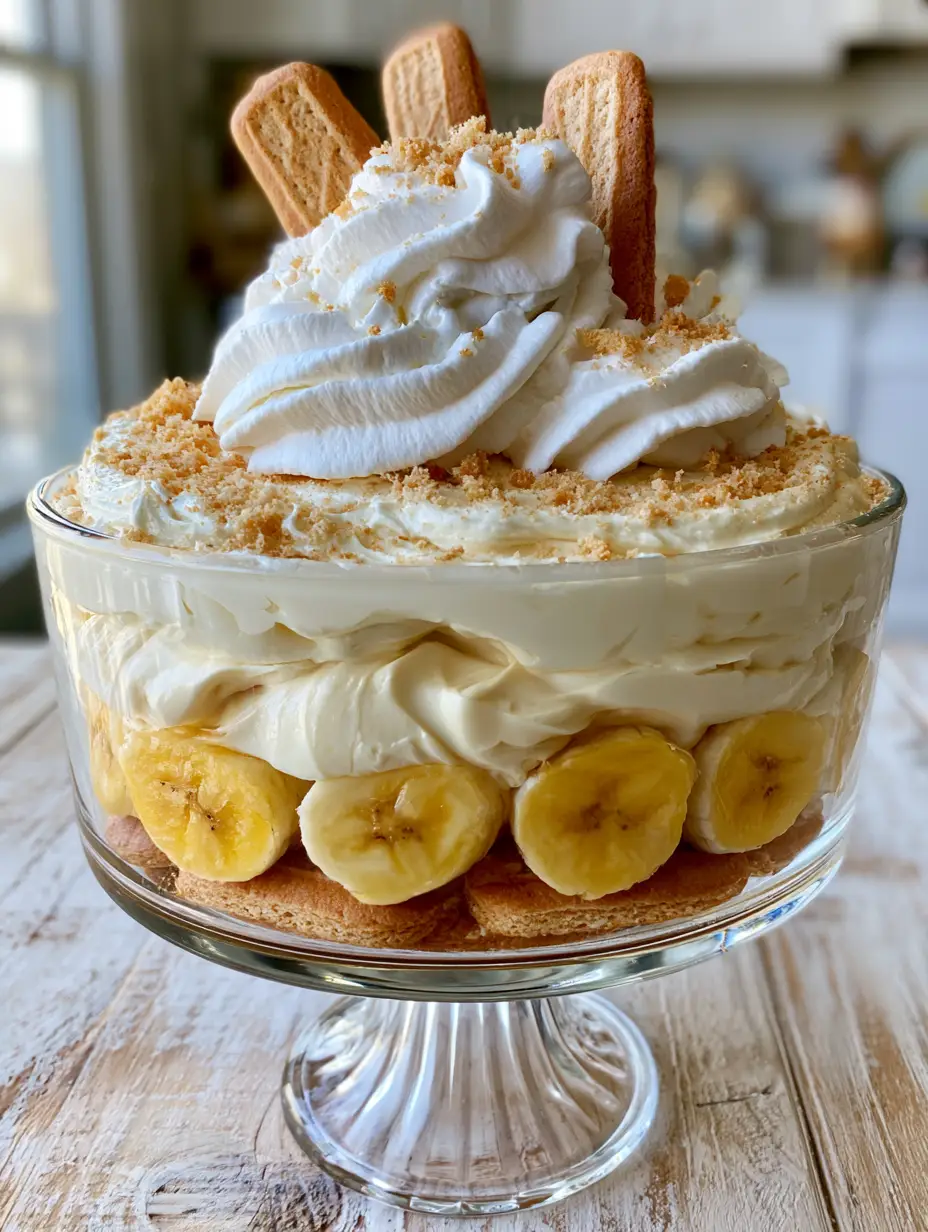
Imagine a vertical, high-detail presentation where distinct layers of golden-brown wafers and thick, moisture-rich banana slices are suspended in a sea of ultra-creamy, pale-ivory vanilla pudding. The result is a dessert that is not just a treat for the palate, but a visual masterpiece of culinary architecture.
By following this forensic approach to layering, you will achieve a stable, non-runny texture that holds its shape even when scooped. Whether you are a fan of a traditional homemade banana pudding or looking for something more decadent like a banana pudding cheesecake, this no-bake method is the gold standard.
The Structural Secrets of a Perfect Banana Trifle
- Stable Cream Architecture: Unlike runny puddings, this recipe uses a specific ratio of heavy cream and condensed milk to ensure stiff whipped cream peaks that don’t collapse.
- Moisture-Rich Fruit Layers: We use thick sliced ripe bananas that offer a substantial bite and contrast against the velvety pudding.
- The Dual-Texture Cookie Component: We utilize both whole Nilla wafers for the structural foundation and fine golden cookie crumbs for a professional, rustic finish.
- Dense Vanilla Foundation: A specific chilling period ensures the vanilla pudding reaches a dense, scoopable consistency rather than a liquid state.
The Foundation: Essential Ingredients for Stability and Flavor
Sweetened Condensed Milk (14 oz / 396g): This is the secret to the pudding’s “dense” character; it provides a silky mouthfeel and acting as a structural binder for the cream.
Instant Vanilla Pudding Mix (3.4 oz / 96g): While we love scratch cooking, the stabilizers in instant mix are scientifically necessary to achieve the “pale-ivory” look and thick texture seen in professional displays.
Cold Filtered Water (1.5 cups / 355ml): Using water instead of milk to bloom the pudding mix actually creates a cleaner vanilla flavor profile that allows the creaminess of the dairy to shine later.
Heavy Whipping Cream (3 cups / 710ml): You must use high-fat cream to achieve the stiff peaks required for the rustic swirls on top of the trifle bowl.
Pure Vanilla Bean Paste (1 tsp / 5g): This adds those beautiful tiny black specks and a deep, aromatic “Experience” that elevates the pudding beyond basic store-bought versions.
Ripe Bananas (4-6 large): Look for bright yellow bananas with just a few brown spots; they must be firm enough to hold their shape when sliced thick.
Nilla Wafers (11 oz / 312g box): You will need a full box to ensure enough whole wafers for the layers and the vertical accents, plus extra for the crumb topping.
Precision Tools for a High-Detail Finish
Chilled Glass Trifle Bowl: A large, clear glass bowl is non-negotiable for revealing the distinct, beautiful layers from the side view.
Electric Hand Mixer or Stand Mixer: To achieve the “stiff peaks” described in the visual prompt, you need the mechanical power to aerate the heavy cream properly.
Offset Spatula: This tool allows you to create the rustic swirls of cream on the top layer without deflating the volume.
Fine Mesh Sieve or Food Processor: Essential for creating the sprinkle of fine golden cookie crumbs that finishes the dish.
The Step-by-Step Blueprint for Layered Perfection
Phase 1: Hydrating the Pudding Base
In a large mixing bowl, whisk together the sweetened condensed milk and cold water until the mixture is completely homogenous and smooth.
Slowly sprinkle the instant vanilla pudding mix over the liquid while whisking constantly to prevent any lumps from forming.
Cover the bowl with plastic wrap and refrigerate for at least 4 hours, or ideally overnight, until the mixture is thick, stable, and completely set.
Phase 2: Constructing the Pale-Ivory Cream
In a separate chilled bowl, pour in your cold heavy whipping cream and vanilla bean paste. Using your mixer, beat on medium-high speed until you reach stiff peaks.
Listen for the sound of the whisk leaving tracks in the cream; when the cream stands straight up without curling over, it is ready.
Gently fold the set pudding mixture into the whipped cream using a large rubber spatula. Use a “cut and fold” motion to maintain the airy, non-runny texture.
Phase 3: The Forensic Layering Process
Start with a foundation of golden-brown Nilla wafers at the bottom of your chilled glass trifle bowl. Arrange them tightly to create a solid base.
Add a layer of thick sliced ripe bananas. Ensure the slices are at least 1/4 inch (0.6cm) thick so they remain “moisture-rich” and don’t disappear into the pudding.
Pour a massive layer of the ultra-creamy pudding over the bananas, using about one-third of your total mixture. Smooth it out to the edges of the glass.
Repeat the layers—wafers, bananas, pudding—until you reach the top of the bowl. Aim for three complete cycles of layering for maximum visual impact.
Phase 4: Finishing with Rustic Elegance
Top the final layer of pudding with the remaining stiff whipped cream. Use your spatula to create a rustic swirl, pulling the cream upward into peaks.
Tuck a few whole Nilla wafers vertically into the cream at irregular angles. This adds height and a professional “handheld smartphone photo” aesthetic.
Crush a handful of wafers into fine crumbs and sprinkle them across the top. This provides a color contrast against the pale-ivory cream.
Expert Tips for Visual and Flavor Success
- The 24-Hour Rule: For the best texture, let the assembled pudding sit in the fridge for at least 4-8 hours. This allows the wafers to soften into a “cake-like” consistency without becoming mushy.
- Banana Oxidation Hack: If you are making this for a party, toss your banana slices in a tiny amount of lemon juice. This keeps them “bright yellow” as described in the Midjourney prompt.
- Temperature Control: Always use a chilled bowl for whipping cream. If the cream is too warm, it will never reach the stiff peaks needed for that stable, non-runny texture.
- Texture Variations: If you enjoy a bit of a twist, you can try incorporating elements from our chunky monkey overnight oats like a drizzle of dark chocolate between the layers.
Managing Your Masterpiece: Storage and Shelf Life
No bake banana pudding is best enjoyed within 48 hours of assembly. After this point, the bananas may begin to release excess moisture and the wafers can lose their structural integrity.
Store the trifle bowl in the refrigerator, tightly covered with plastic wrap. Do not freeze this recipe, as the emulsion of the pudding and whipped cream will break upon thawing, resulting in a grainy texture.
What to Serve With This Creamy Classic
Since this is a rich and decadent dessert, it pairs beautifully with a light, acidic beverage. Consider serving it alongside a refreshing green juice to cleanse the palate.
If you are hosting a brunch, this pudding makes an excellent follow-up to a hearty cinnamon roll recipe or even some cinnamon muffins.
For a complete dessert table, contrast the creamy texture with the crunch of our salted brownie crinkle cookies or a classic oatmeal chocolate chip cookie.
Frequently Asked Questions
Absolutely! The layering process remains the same; just ensure you use a clear glass jar to showcase the distinct ivory pudding and golden wafer layers.
Yes, but ensure it is a thick custard style. The instant mix contains specific food starches that help achieve the stable, non-runny texture required for a layered trifle.
Toss the thick slices in a small amount of lemon or pineapple juice. The acidity prevents oxidation, keeping the bananas a bright yellow color.
The key is to use sweetened condensed milk and let the pudding mixture chill completely for at least 4 hours before folding it into heavy cream that has been whipped to stiff peaks.
Banana pudding needs time to ‘cure.’ For the classic soft, cake-like texture, the assembled dish should sit in the refrigerator for at least 4 to 8 hours.
The Ultimate No Bake Banana Pudding Recipe
No Bake Banana Pudding: The Ultimate Magnolia Bakery Copycat Recipe
Ingredients
Equipment
Method
- In a large bowl, whisk sweetened condensed milk and water. Add pudding mix and whisk until smooth. Chill for 4 hours to set.
- Beat heavy cream and vanilla bean paste until stiff peaks form and the cream is stable.
- Gently fold the chilled pudding into the whipped cream until a pale-ivory, uniform mixture forms.
- Line the bottom of the trifle bowl with whole Nilla wafers, followed by a layer of thick banana slices and 1/3 of the pudding.
- Repeat layers twice more. Top with rustic whipped cream swirls, vertical wafers, and crushed cookie crumbs.
Notes
Toss bananas in lemon juice to prevent browning.
Join the Recipe Root Community
We hope this no bake banana pudding becomes a staple in your kitchen! The combination of thick bananas and stable cream is a crowd-pleaser every single time. If you enjoyed this “Forensic Visual” guide, please leave a comment below and let us know how your layers turned out.
Don’t forget to share your creations with us on Pinterest and sign up for our newsletter to get more professional recipe blueprints delivered to your inbox.