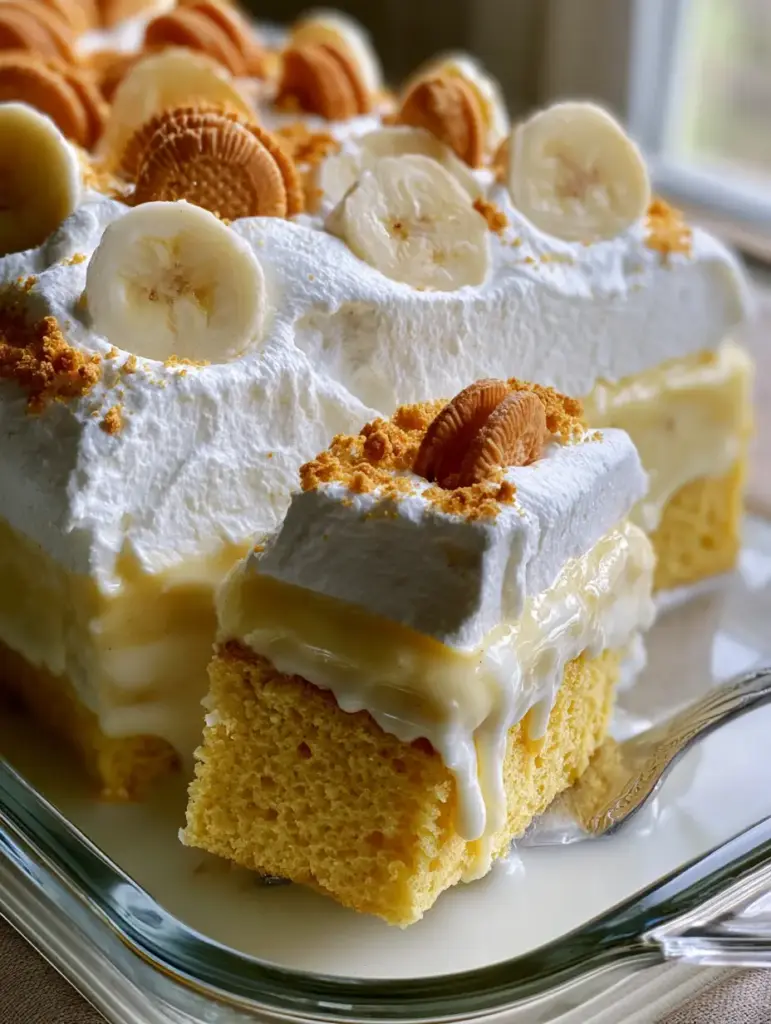
Imagine the most comforting Southern classic colliding with the most decadent Latin American staple. This Banana Pudding Tres Leches is not just a cake; it is a structural marvel of saturated yellow sponge, velvety custard, and airy whipped cream. When you slide a silver cake server into this clear glass dish, you aren’t just serving dessert—you are unveiling a masterpiece of moisture and texture.
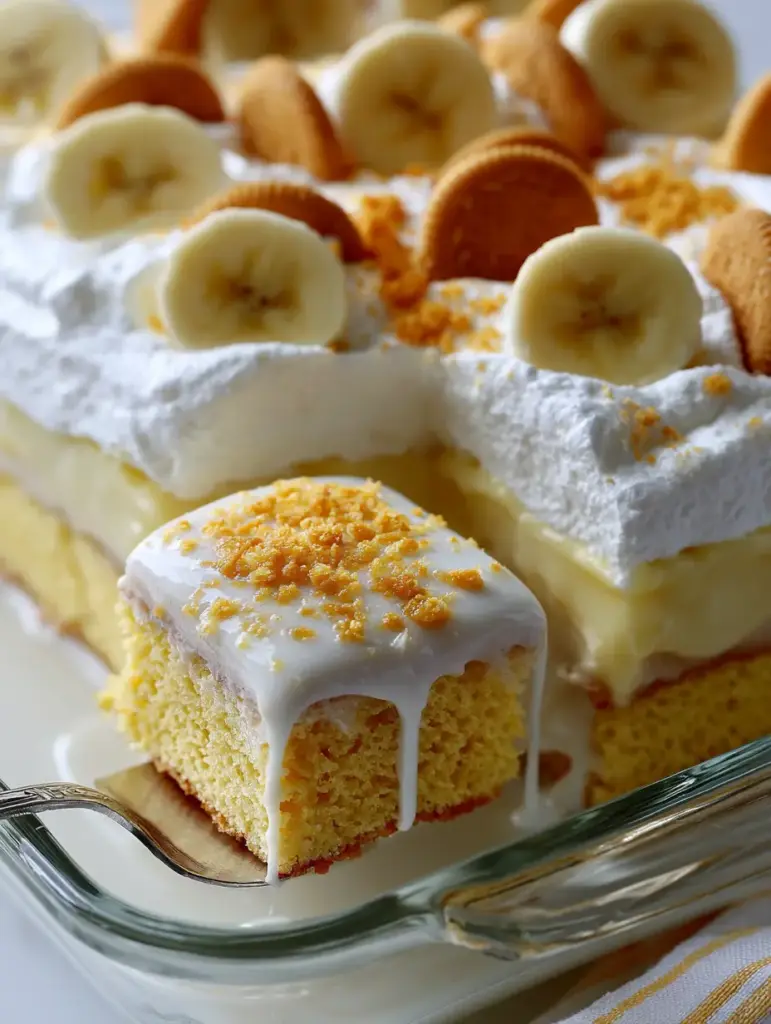
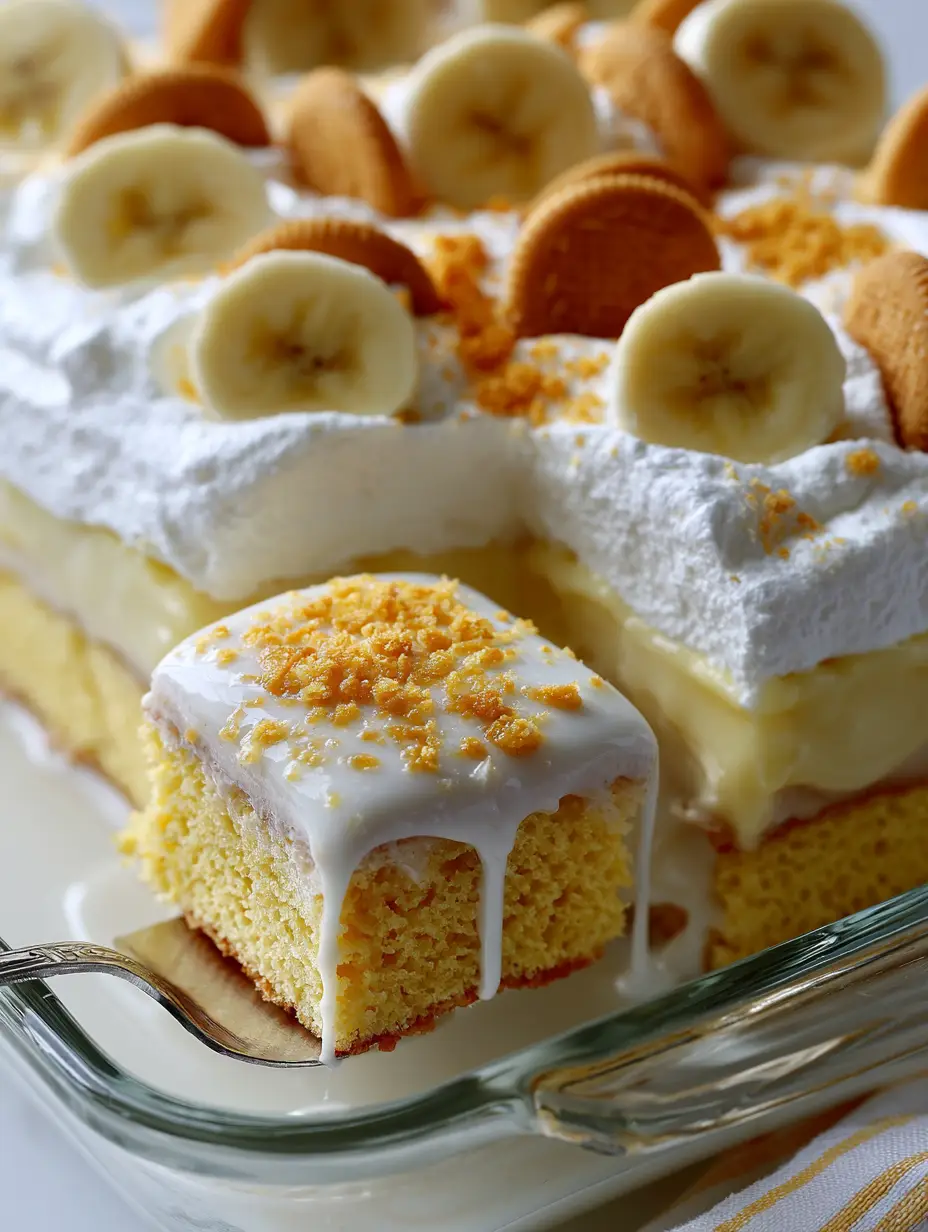
The magic happens in the cross-section. You see the distinct layers: a porous sponge visibly drenched in a three-milk soak, topped with a thick layer of banana pudding that holds its own, and finished with a cloud-like whipped cream. It is a handheld smartphone photo-worthy moment that looks as good as it tastes under soft, natural afternoon sunlight.
Whether you are a fan of traditional banana pudding or you live for the creamy soak of a classic tres leches, this hybrid recipe is the answer to your dessert cravings. Let’s dive into how to build this layered beauty from the bottom up.
Why You Will Fall in Love With This Banana Pudding Tres Leches
- Unmatched Moisture: The yellow sponge cake acts like a sponge, absorbing every drop of the creamy three-milk soak without becoming mushy.
- Textural Contrast: You get the crunch of whole Nilla Wafers, the silkiness of banana pudding, and the fluffiness of stiff-peak whipped cream in every bite.
- Visual Showstopper: Between the perfectly circular fresh banana slices and the golden wafer crumbs, this dish is designed to be the centerpiece of any gathering.
- Flavor Harmony: The subtle saltiness of the wafers balances the rich, sweetened condensed milk and the aromatic vanilla-banana layers.
The Anatomy of a Perfect Banana Pudding Tres Leches
To achieve the “saturated yellow” look of the sponge and the “velvety pale-yellow” pudding seen in professional food photography, we need specific high-quality ingredients. Each component serves a scientific purpose in the cake’s structural integrity.
Foundational Sponge Ingredients
All-Purpose Flour: 1.5 cups (190g). This provides the necessary gluten structure to hold the weight of the milk soak without collapsing.
Large Eggs: 5 units, separated. Whipping the whites to stiff peaks is what creates the “porous” nature of the cake, allowing the milk to penetrate every crumb.
Granulated Sugar: 1 cup (200g). Sugar not only sweetens but also tenderizes the crumb, ensuring a soft mouthfeel after the cake is chilled.
Baking Powder: 1.5 tsp (7g). This is the chemical leavener required to give the sponge its height and airy texture before the liquid is added.
Whole Milk: 0.33 cup (80ml). A small amount of liquid in the batter helps hydrate the flour and keeps the yellow sponge vibrant.
The Triple-Milk Liquid Gold
Sweetened Condensed Milk: 14 oz (396g). This is the primary sweetener of the soak, providing a thick, syrupy consistency that clings to the sponge.
Evaporated Milk: 12 oz (354ml). Evaporated milk adds a concentrated dairy flavor and a creamy tan hue without the heaviness of cream.
Heavy Cream: 0.25 cup (60ml). This thins the soak just enough so it can travel into the center of the cake while adding a rich fat content.
The Velvety Banana Pudding Layer
Instant Vanilla Pudding Mix: 5.1 oz (144g). Using a large box of high-quality mix ensures a “thick, velvety” consistency that won’t run when the cake is sliced.
Cold Whole Milk: 2 cups (480ml). Using full-fat milk is essential for that pale-yellow color and rich flavor profile.
Banana Extract: 1 tsp (5ml). This amplifies the fruit flavor, ensuring the pudding tastes distinctly of fresh bananas.
The Crown: Cream and Garnishes
Heavy Whipping Cream: 2 cups (480ml). This must be chilled to achieve the “stiff peaks” described in our visual blueprint.
Powdered Sugar: 0.25 cup (30g). Stabilizes the whipped cream so it remains a “generous cloud” even after hours in the fridge.
Nilla Wafers: 1 box (311g). You will need whole wafers for tucking into the cream and crushed crumbs for the final golden dusting.
Fresh Bananas: 3-4 medium units. These should be sliced into “perfectly circular rounds” just before serving to prevent browning.
Essential Equipment for Professional Results
To replicate the handheld smartphone photo aesthetic, you need the right vessels and tools. A 9×13 inch (23x33cm) clear glass baking dish is non-negotiable, as it allows you to see the saturated layers from the side.
An electric hand mixer or stand mixer is required for achieving the stiff peaks in both the egg whites and the final whipped topping. Finally, a silver cake server is the perfect tool for lifting a square slice while showing the “milk slowly dripping” from the porous edges.
Step-by-Step Instructions to Dessert Perfection
Crafting the Porous Yellow Sponge
Preheat your oven to 350°F (175°C) and grease your glass dish. In a large bowl, whisk the egg yolks with 0.75 cups (150g) of sugar until they are pale and ribbon-like. This step is vital for that “saturated yellow” visual.
In a separate clean bowl, whip the egg whites to stiff peaks, gradually adding the remaining sugar. Fold the dry ingredients and the egg whites into the yolk mixture with extreme care. You want to maintain the air bubbles; these bubbles will later become the reservoirs for your milk soak.
Bake for 25-30 minutes until a toothpick comes out clean. The cake should be golden-yellow and springy to the touch. Let it cool completely before moving to the next stage.
Executing the Three-Milk Saturation
Once the cake is cool, use a fork to poke holes across the entire surface. Do not be shy—the more holes you poke, the better the absorption. In a pitcher, whisk together the condensed milk, evaporated milk, and heavy cream.
Slowly pour the mixture over the cake. Focus on the edges first, then fill the center. Cover the dish and refrigerate for at least 4 hours, though overnight is best. You will know it is ready when the liquid has been almost entirely absorbed, leaving the cake “visibly saturated.”
Layering the Banana Pudding and Cream
Prepare your pudding by whisking the mix, cold milk, and banana extract for 2 minutes. Let it set in the fridge for 5 minutes until it reaches a thick, velvety consistency. Spread this in an even layer over the soaked sponge.
Whip your heavy cream and powdered sugar until stiff peaks form. Spread this over the pudding layer, creating “fluffy white” mounds. If you want to get fancy, you can pipe the edges, but a rustic, cloud-like spread matches the handheld photo style perfectly.
The Final Decorative Flourish
Just before serving, slice your bananas into uniform rounds. Tuck whole Nilla Wafers into the whipped cream at a slight angle. Sprinkle the crushed wafer crumbs over the top for a variety of textures. The contrast of the golden wafers against the white cream is what makes this Banana Pudding Tres Leches so visually arresting.
Expert Tips for Success
- Prevent Soggy Wafers: Only add the Nilla Wafers and fresh bananas right before you plan to serve the cake. This keeps the wafers crunchy and the bananas bright yellow.
- Temperature Matters: Ensure your milk soak is cold when you pour it over the room-temperature cake. This helps the sponge absorb the liquid without breaking down the structure.
- The “Drip” Factor: For that perfect silver server shot where the milk “slowly drips,” do not let the cake sit for more than 24 hours before the first slice. After 48 hours, the milk is fully integrated into the crumb.
- Stabilize Your Cream: If you are serving this at an outdoor event, add a tablespoon of instant vanilla pudding mix to your whipped cream to help it hold those “stiff peaks” in the heat.
Storage and Make-Ahead Advice
This Banana Pudding Tres Leches actually tastes better as it sits. You can bake the sponge and apply the soak up to two days in advance. However, the pudding and whipped cream layers are best added within 24 hours of serving.
Store leftovers in the refrigerator, tightly covered with plastic wrap, for up to 3 days. We do not recommend freezing this cake, as the milk soak will separate and the bananas will become mushy upon thawing. If you enjoy layered desserts, you might also like our banana pudding lush or creamy banana pudding.
What to Serve With Banana Pudding Tres Leches
Because this dessert is incredibly rich and creamy, it pairs beautifully with a strong cup of black coffee or a glass of cold milk. If you are hosting a large dessert bar, consider offering variety with banana pudding bars or individual Nilla wafer banana pudding cups.
For a seasonal twist, this cake fits right in alongside pumpkin snickerdoodle cookies during the fall, or a light Hawaiian carrot pineapple cake for a summer brunch.
Frequently Asked Questions
While you can use a boxed yellow cake mix, a homemade sponge is preferred because it is more porous, allowing it to absorb the three-milk soak more effectively without becoming overly mushy.
Yes, you can fold in half a cup of mashed bananas, but be aware it may slightly loosen the ‘velvety’ texture of the pudding layer.
Slice and add the bananas just before serving. You can also lightly toss them in lemon juice or pineapple juice to slow down oxidation.
For the best results, soak the cake for at least 4 hours, though overnight (8-12 hours) is ideal for maximum flavor penetration and the signature ‘dripping’ texture.
Sogginess usually occurs if the cake isn’t porous enough or if it sits for more than 3 days. Ensure you whip your egg whites to stiff peaks to create those air pockets.
The Ultimate Banana Pudding Tres Leches Recipe
Banana Pudding Tres Leches: The Ultimate Southern-Mexican Fusion Dessert
Ingredients
Equipment
Method
- Whisk egg yolks with 0.75 cups sugar until pale yellow and thick.
- In a separate bowl, whip egg whites to stiff peaks with remaining sugar.
- Fold ingredients together and bake in a 9x13 dish at 350°F (175°C) for 25-30 minutes.
- Poke holes all over the cooled cake with a fork.
- Whisk the three milks and pour slowly over the cake. Chill for at least 4 hours.
- Whisk pudding mix with milk and extract; spread over the soaked cake.
- Whip cream and powdered sugar to stiff peaks; spread over pudding.
- Top with fresh banana rounds, whole Nilla Wafers, and crushed wafer crumbs just before serving.
Notes
Garnish right before serving to keep wafers crisp and bananas fresh.
Closing & Call to Action
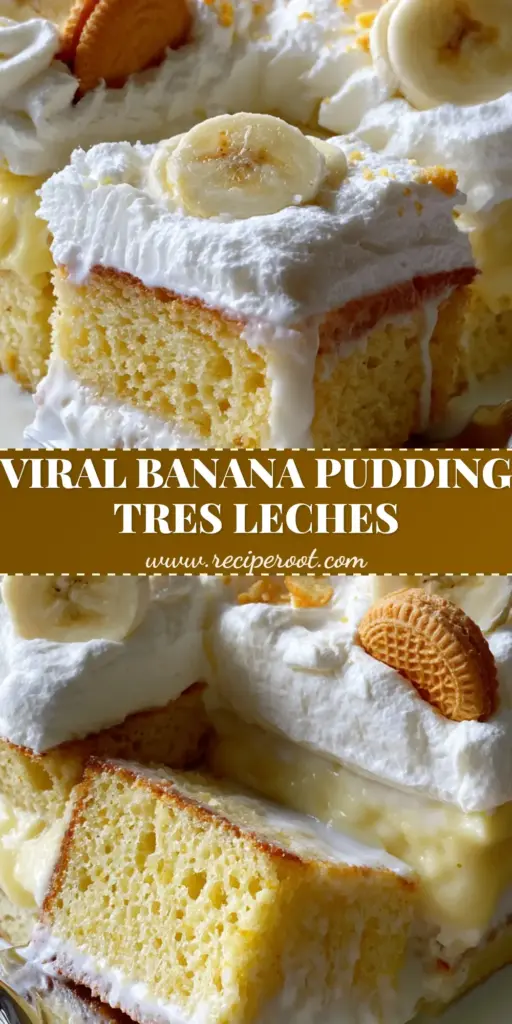
This Banana Pudding Tres Leches is a true labor of love that rewards you with every dripping, creamy bite. It bridges the gap between two iconic desserts, creating something entirely new and utterly addictive. The combination of the saturated yellow sponge and the thick banana pudding layer is a culinary match made in heaven.
If you made this recipe, we want to hear about it! Did your soak result in that perfect drip? Leave a comment below and let us know. Don’t forget to share your photos and tag us on Pinterest to show off your decadent creation!


