The Banana Pudding Lush is the crown jewel of no-bake desserts, offering a symphony of textures that range from a buttery, golden-brown crunch to a velvet-like, creamy finish. If you have ever craved the nostalgic comfort of a classic pudding but wanted the structural elegance of a layered lasagna, this recipe is your answer. In just 10 minutes, you can transform humble pantry staples into a show-stopping centerpiece that looks just as good as it tastes.
Imagine sliding a silver spoon into a clear glass dish and emerging with a messy, dripping scoop that reveals every distinct layer: the dense sweetened cream cheese, the vibrant yellow vanilla pudding, and those moisture-rich banana slices. This isn’t just a dessert; it is a sensory experience designed to capture the bright, natural daylight of a perfect afternoon gathering. Whether you are a seasoned baker or a kitchen novice, this recipe delivers professional-grade results without ever turning on the oven.
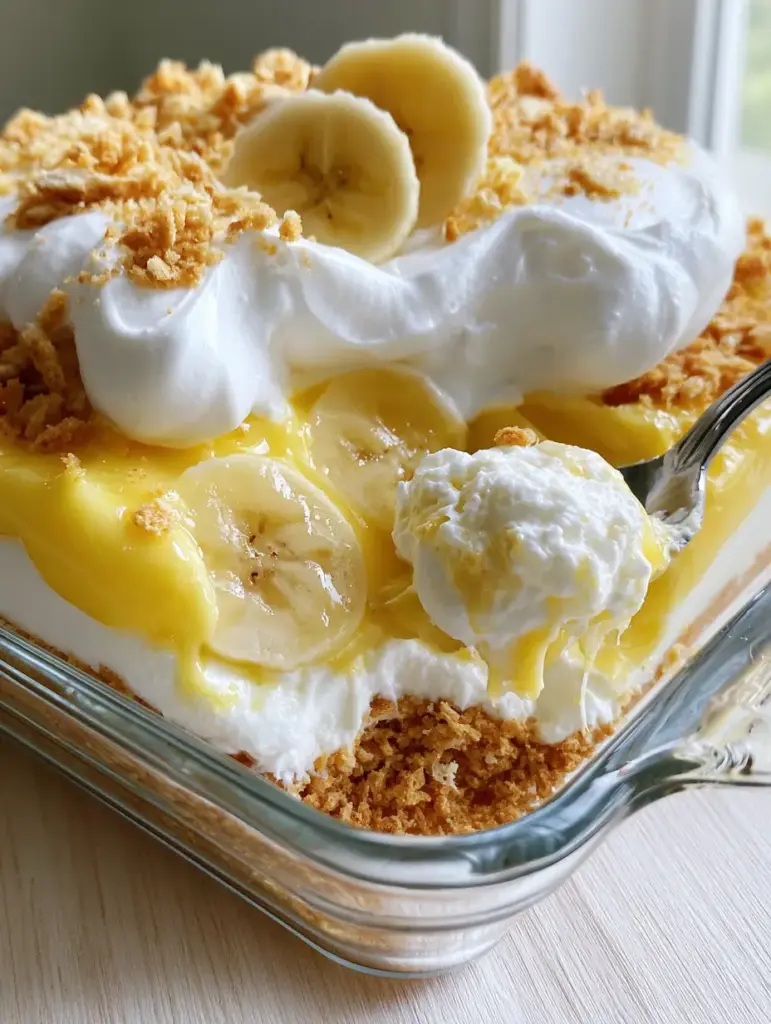
Why This Layered Banana Masterpiece Works
- Textural Contrast: You get the crunch of golden wafer crumbs against the airy texture of fresh whipped cream.
- Rapid Execution: This is a true 10-minute recipe, utilizing smart shortcuts like instant pudding without sacrificing that “from-scratch” flavor profile.
- Visual Sophistication: The clear glass assembly showcases the vibrant yellow and white layers, making it a perfect candidate for your next social media post.
- Make-Ahead Friendly: The flavors actually deepen and the wafers soften into a cake-like consistency if left to chill, similar to a traditional creamy banana pudding.
The Anatomy of a Perfect Banana Pudding Lush
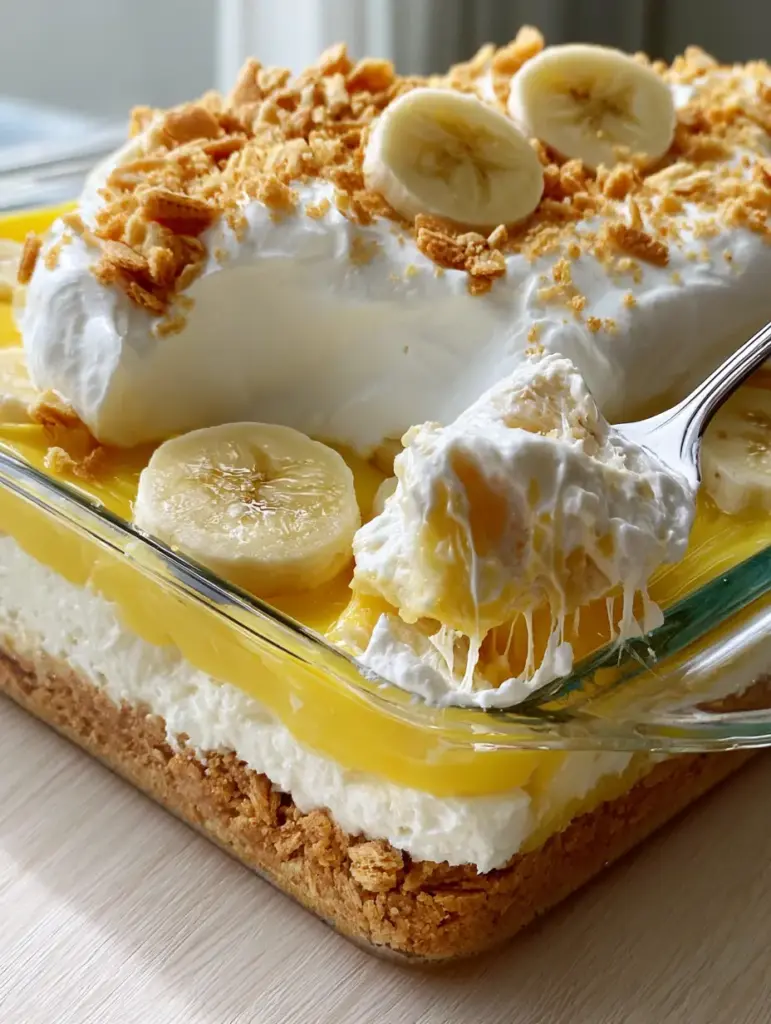
To achieve the specific visual and structural results of a true lush, each ingredient must play its part perfectly. We aren’t just looking for flavor; we are looking for the “structural integrity” that allows for that perfect, messy-yet-defined scoop shown in the blueprint.
Nilla Wafers (3 cups / 255g): These provide the foundation. When finely crushed and combined with butter, they create a golden-brown crust that stands up to the creamy layers above.
Unsalted Butter (1/2 cup / 115g): Once melted, this acts as the “glue” for your crust. It adds a rich, savory backnote that cuts through the sweetness of the pudding.
Cream Cheese (8 oz / 225g): Ensure this is fully softened to room temperature. It provides the dense, tangy white layer that acts as a moisture barrier between the crust and the pudding.
Powdered Sugar (1 cup / 120g): This sweetens the cream cheese layer while providing stability, ensuring the dessert doesn’t collapse when sliced.
Instant Vanilla Pudding (2 small boxes / 100g each): Using instant pudding is the secret to the 10-minute timeline. It sets quickly to a thick, vibrant yellow consistency.
Whole Milk (3 cups / 710ml): Cold milk is essential for the chemical reaction with instant pudding. Whole milk provides the richest mouthfeel.
Fresh Bananas (4 large): Look for bananas with tiny brown spots—they are at peak sweetness but still firm enough to hold their circular shape when sliced.
Heavy Whipping Cream (2 cups / 480ml): Beaten to stiff peaks, this creates the massive, pillowy cloud that tops the dish. You can also use stabilized whipped topping for a faster version.
Essential Equipment for Visual Success
To replicate the “handheld smartphone photo” aesthetic, you need the right vessels. A 9×13 inch (23×33 cm) clear glass baking dish is non-negotiable, as it allows the internal textures and the velvet-like consistency of the pudding lasagna to be visible from the side.
You will also need a food processor or a rolling pin to achieve those specific “golden wafer crumbs” for the garnish. A sturdy stand mixer or hand mixer is vital for whipping the cream cheese layer until it is light and airy, preventing any lumps from ruining the aesthetic of the white sweetened layer.
Step-by-Step Construction of the Banana Pudding Lush
Crafting the Golden-Brown Wafer Crust
Begin by pulsing your Nilla Wafers in a food processor until they reach the consistency of coarse sand. You want some tiny chunks remaining to provide that “thick, golden-brown crust” described in the visual prompt. Pour in 1/2 cup (115g) of melted butter and stir until the crumbs are evenly coated and resemble wet sand.
Press this mixture firmly into the bottom of your glass dish. Use the bottom of a measuring cup to pack it down tightly; this ensures that when you lift that “large, messy scoop,” the crust stays attached to the bottom of the bite rather than crumbling away entirely.
Whipping the Sweetened Cream Cheese Foundation
In a large bowl, beat the 8 oz (225g) of softened cream cheese with the powdered sugar until completely smooth. Fold in 1 cup (240ml) of your prepared whipped cream to lighten the density. Spread this over the crust using an offset spatula.
This layer is the “bridge” of the dessert. It needs to be a “dense layer of sweetened white cream cheese” that supports the heavier pudding layer. If you’ve ever made banana pudding cheesecakes, you’ll recognize the importance of this stabilization step.
The Vibrant Yellow Pudding and Fruit Layer
Whisk the two boxes of instant vanilla pudding with the 3 cups (710ml) of cold milk for exactly two minutes. You will see it begin to thicken and take on that “vibrant yellow” hue. Before it fully sets, gently fold in your circular banana slices.
Pour the pudding mixture over the cream cheese layer. The bananas should be “packed” into this layer, ensuring that every single bite contains a moist fruit piece. This technique is similar to what you might find in Not Yo’ Mama’s Banana Pudding, where the fruit is the star of the show.
The Final Cloud and Garnish
Top the entire dish with the remaining whipped cream, creating a “massive, pillowy cloud.” Use the back of a large spoon to create swoops and peaks in the cream, which will catch the “soft, bright natural daylight” in your kitchen. Finally, sprinkle the remaining golden wafer crumbles across the top and place two fresh banana rounds right in the center for a professional finish.
Expert Tips for Culinary Forensic Perfection
- Prevent Browning: Toss your banana slices in a tablespoon (15ml) of lemon juice before layering. The acid prevents oxidation, keeping the fruit “moist and fresh” for hours.
- Temperature Control: Ensure your milk is ice-cold. Instant pudding relies on a specific starch reaction that occurs best at low temperatures.
- Crust Integrity: If you have an extra 5 minutes, bake the crust at 350°F (175°C) for 8 minutes and let it cool. This “sets” the butter and makes the crust much crispier, though it’s not strictly necessary for the no-bake version.
- The Clean Scoop: To get the “dripping scoop” look from the prompt, serve the lush immediately. If you want clean, square slices, chill the dessert for at least 4 hours.
Structural Storage and Make-Ahead Advice
The Banana Pudding Lush is a living dessert. Within the first 2 hours, it is at its most “airy” and “pillowy.” By the 24-hour mark, the wafers will have absorbed moisture from the pudding, turning into a texture similar to banana pudding tres leches.
Store leftovers in the refrigerator, tightly covered with plastic wrap. Because of the fresh dairy and bananas, this dish is best consumed within 2 to 3 days. We do not recommend freezing this dessert, as the pudding texture can become grainy and the bananas will turn mushy upon thawing.
What to Pair With Your Lush
Since this dessert is incredibly rich and creamy, it pairs beautifully with items that offer a bit of acidity or a different flavor profile. If you are hosting a large gathering, consider serving it alongside strawberry crunch banana pudding for a colorful contrast.
For a complete dessert table, you might also include chocolate chip pudding cookies to offer a handheld option that echoes the pudding theme. The lightness of the lush also makes it a great follow-up to a heavy meal like BBQ or fried chicken, much like the classic Paula Deen’s banana pudding.
Frequently Asked Questions
Yes, you can use Graham Crackers or Golden Oreos, but Nilla Wafers provide the traditional flavor profile that defines a classic banana lush.
For this 10-minute version, instant pudding is required. Cook-and-serve pudding must be heated and then completely cooled, which would add hours to the prep time and could melt the cream cheese layer.
The best way is to toss the circular banana slices in a little lemon or pineapple juice. The acidity prevents oxidation, keeping the fruit looking fresh and moist within the pudding layer.
Due to the high dairy content and fresh bananas, it should not sit out for more than 2 hours. Keep it chilled until the moment you are ready to serve.
This usually happens if the cream cheese wasn’t beaten enough with powdered sugar for stability, or if the pudding hasn’t had at least 30 minutes to set in the fridge. For a perfect scoop, ensure the crust is pressed firmly.
The Complete Banana Pudding Lush Recipe
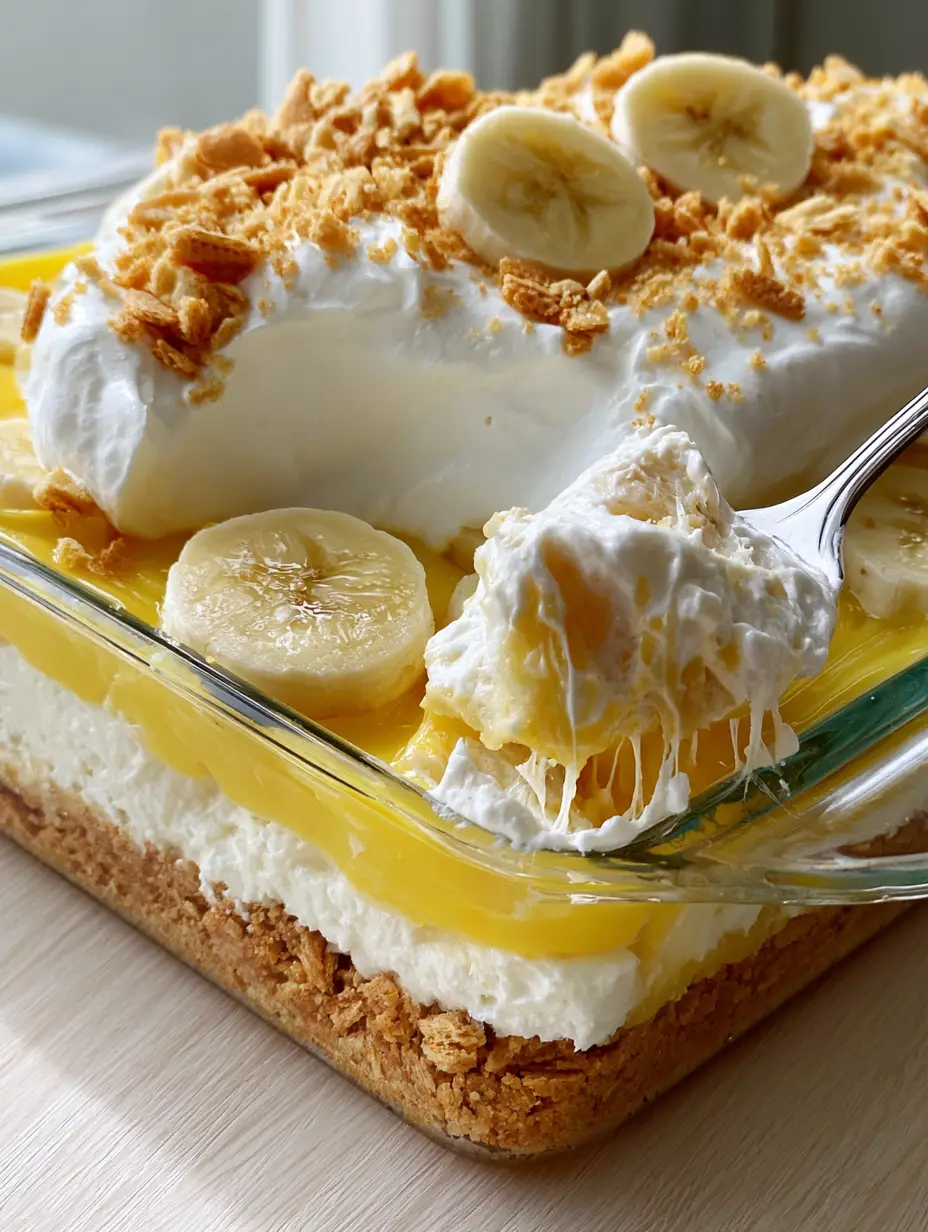
Banana Pudding Lush: The Ultimate 10-Minute No-Bake Layered Dessert
Ingredients
Equipment
Method
- Combine crushed Nilla Wafers and melted butter in a bowl. Press firmly into the bottom of a 9x13 glass dish until a thick, golden-brown crust forms.
- Beat softened cream cheese and powdered sugar until smooth. Fold in 1 cup of whipped cream. Spread evenly over the wafer crust.
- Whisk instant pudding mix and cold milk for 2 minutes until thick. Gently fold in the moisture-rich banana slices. Pour over the cream cheese layer.
- Spread the remaining whipped cream in a massive cloud over the top. Garnish with golden wafer crumbs and two fresh banana rounds for the final visual touch.
Notes
Use cold milk for the pudding to ensure it thickens properly within the 10-minute window.
Conclusion: The Ultimate No-Bake Win
Mastering the Banana Pudding Lush is all about respecting the layers. From the buttery Nilla Wafer base to the velvet-like pudding lasagna interior, every element is designed for maximum flavor and visual impact. This recipe proves that you don’t need hours in the kitchen to create a dessert that looks like it belongs on the cover of a magazine.
If you enjoyed this recipe, please leave a comment below and tell us how your layers turned out! Don’t forget to share your photos and tag us, and be sure to pin this recipe to your favorite boards on Pinterest so you never lose it.


