Chocolate cake pops are the ultimate bite-sized indulgence, combining the richness of a gourmet truffle with the playful spirit of a dessert on a stick. If you have been searching for the perfect Chocolate cake pops recipe that yields a professional, high-gloss finish and an incredibly fudgy interior, you have arrived at the right place. This recipe moves away from the dry, crumbly textures of standard store-bought treats and focuses on a dense, moist center that mimics the finest brownies.
Whether you are preparing these for a sophisticated party or a cozy weekend treat, the combination of tempered dark chocolate, microscopic chocolate shavings, and a touch of flaky sea salt creates a flavor profile that is both complex and deeply satisfying. Learning how to make cake pops like a pro is all about the details, from the temperature of your coating to the matte finish of the lollipop sticks.
Why These Fudgy Chocolate Cake Pops Stand Out
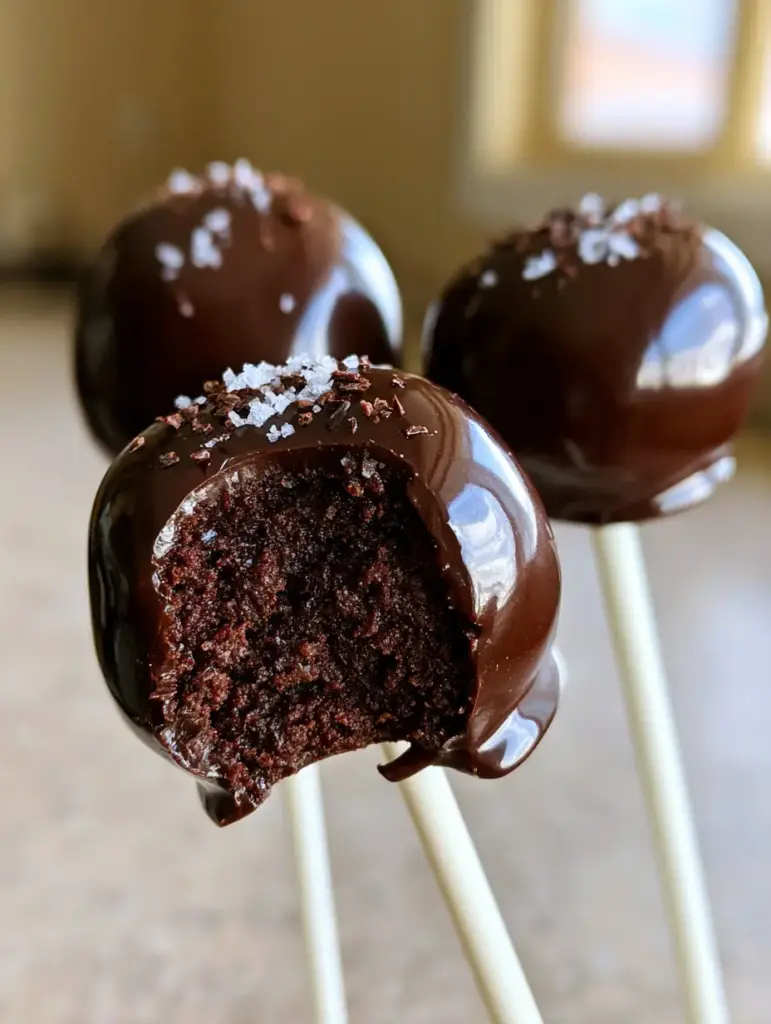
- Professional Gloss: We use a specific tempering technique to ensure your Chocolate cake pops have a thick, perfectly smooth, high-gloss dark chocolate shell.
- Ultra-Dense Interior: Unlike traditional methods that use excess frosting, our technique creates a moist, fudgy dark chocolate cake interior with absolutely no crumbs.
- Sophisticated Garnish: The addition of microscopic chocolate shavings and flaky sea salt balances the sweetness and adds a gourmet aesthetic.
- Pinterest-Ready Visuals: Using clean, matte white lollipop sticks provides a modern contrast to the deep, rich chocolate coating.
The Core Ingredients for Gourmet Success
Creating the perfect Chocolate cake pops requires high-quality ingredients. Each component serves a culinary purpose to ensure the texture and flavor are world-class.
For the Fudgy Cake Base: You will need a base that is inherently moist. We recommend starting with moist chocolate cupcakes or a dense chocolate sheet cake. You will need about 4 cups (approx. 400g) of prepared cake crumbs.
The Binding Agent: Instead of canned frosting, use a rich chocolate buttercream frosting or a simple chocolate ganache. You need 1/2 cup (120ml) to 3/4 cup (180ml) depending on your cake’s moisture level. This creates the “fudge” consistency.
Dark Chocolate Coating: Use 12 oz (340g) of high-quality dark chocolate (60% cacao or higher). Couverture chocolate is preferred for its high cocoa butter content, which creates that professional tempered shine.
The Finishing Touches: You will need 1 tablespoon (approx. 5g) of microscopic chocolate shavings and a pinch of high-quality flaky sea salt (like Maldon). Don’t forget 24 matte white lollipop sticks for that clean handheld perspective.
Step-by-Step Instructions for Perfect Chocolate Cake Pops
1. Preparing the Fudgy Cake Foundation
Start by crumbling your completely cooled chocolate cake into a large mixing bowl. You want to break it down until no large chunks remain. To achieve the incredibly dense, moist, fudgy dark chocolate cake interior seen in our visuals, you must mix the crumbs with your binder thoroughly.
Add 1/2 cup (120ml) of frosting to the crumbs. Use a stand mixer with the paddle attachment or your clean hands to mix until the dough reaches the consistency of chilled chocolate chip cookie dough. It should be pliable and hold its shape perfectly when squeezed, without any visible crumbs.
2. Rolling and Chilling the Spheres
Scoop about 2 tablespoons (approx. 30g) of the mixture and roll it between your palms to form a perfectly smooth sphere. Repeat this process until you have 24 uniform balls. Place them on a parchment-lined baking sheet.
Pro Tip: Chill the balls in the refrigerator for at least 2 hours. Do not freeze them, as the extreme temperature change can cause the chocolate coating to crack later. If you are in a rush, a quick 10-minute stint in the microwave for other desserts like a microwave brownie won’t help here; patience is key for cake pops!
3. The Art of the Tempered Dark Chocolate Coating
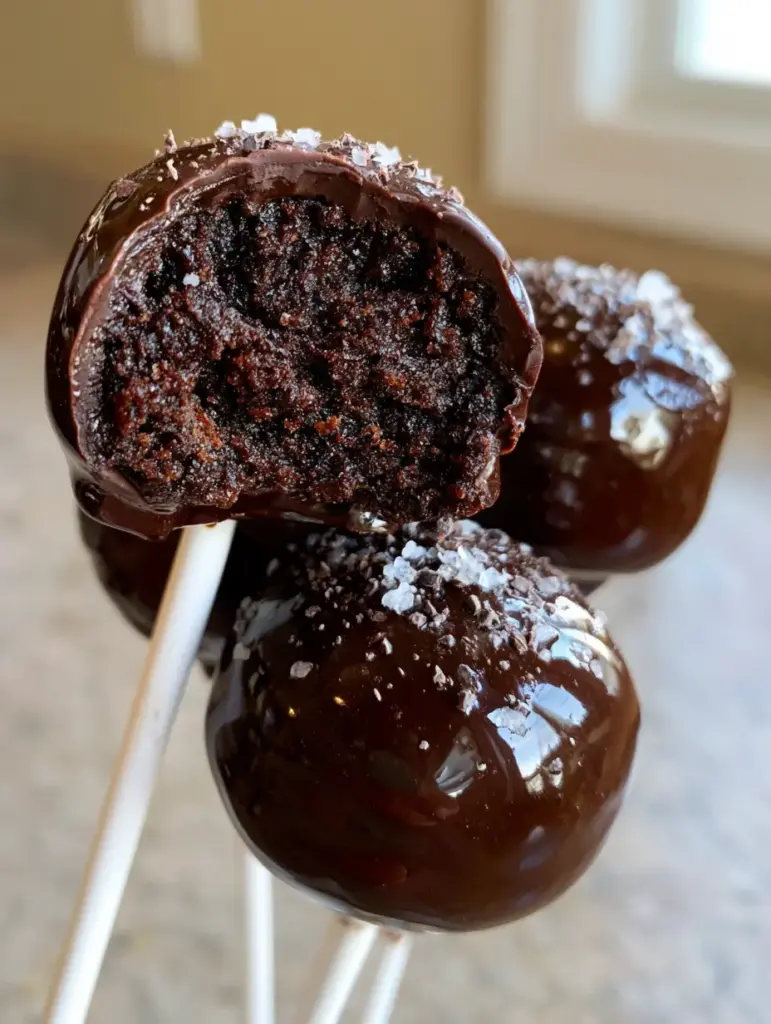
To get that thick, perfectly smooth, high-gloss dark chocolate shell, you must melt your chocolate carefully. Place 2/3 of your dark chocolate in a microwave-safe bowl. Heat in 30-second intervals, stirring constantly, until it reaches 115°F (46°C).
Remove from heat and “seed” the chocolate by adding the remaining 1/3 of un-melted chocolate. Stir vigorously until smooth and the temperature drops to 88°F-90°F (31°C-32°C). This process ensures the chocolate sets with a professional tempered shine and a satisfying “snap” when bitten.
4. Dipping and Achieving the Flawless Finish
Dip the tip of a matte white lollipop stick into the melted chocolate, then insert it halfway into a chilled cake ball. This acts as “glue.” Let it set for 1 minute.
Submerge the Chocolate cake pops vertically into the chocolate until the cake is fully covered and the chocolate meets the stick. Lift it straight up and gently tap your wrist to remove excess chocolate. The shell should look flawless with a soft reflection of light.
5. Garnishing with Precision
While the chocolate is still slightly wet, immediately sprinkle a few tiny, delicate flakes of sea salt and a dusting of microscopic chocolate shavings onto the top. The salt enhances the dark cocoa notes, while the shavings add a layer of texture that mimics gourmet truffles.
Place the stick into a cake pop stand or a block of styrofoam to allow the coating to harden completely at room temperature.

Expert Tips for Success
- Avoid Over-Mixing: While we want a fudgy interior, over-working the dough can make it oily. Mix just until it holds together.
- The Dip Test: If your chocolate is too thick, add 1 teaspoon (5ml) of melted cocoa butter or coconut oil to thin it out without losing the shine.
- Keep it Clean: Use a damp paper towel to wipe the matte white sticks if any chocolate drips down. A clean stick is essential for the authentic culinary aesthetic.
- Room Temp Setting: Allow the tempered chocolate to set at room temperature. Refrigerating them immediately can dull the high-gloss finish.
Storage, Reheating & Freezing
Storage: These Chocolate cake pops can be stored in an airtight container at room temperature for up to 3 days. For longer storage, keep them in the refrigerator for up to 7 days.
Freezing: You can freeze the undipped cake balls for up to 3 months. Once dipped in chocolate, freezing is not recommended as the chocolate shell may sweat or crack upon thawing.
What to Serve With This
These decadent pops are quite rich, so they pair beautifully with lighter, fruit-forward desserts. Consider serving them alongside funfetti cake pops for a color contrast, or a slice of strawberry sponge cake to provide a refreshing palate cleanser.
For a drink pairing, a cold glass of milk is classic, but a gourmet coffee or an espresso will highlight the dark chocolate’s depth.
Frequently Asked Questions
Yes! If you use a very moist, under-baked brownie or a dense chocolate cake, the natural moisture may allow the crumbs to bind without extra frosting, resulting in an even fudgier texture.
A high-gloss finish is achieved through proper tempering. Melt your dark chocolate to 115°F, then seed it with fresh chocolate until it drops to 88°F-90°F before dipping.
These are ultra-fine bits of chocolate. You can create them by using a microplane or a very fine grater on a cold bar of dark chocolate, providing a delicate, professional aesthetic.
Cracking usually happens when there is a significant temperature difference between the cake balls and the melted chocolate. Ensure your cake pops are chilled (refrigerated) but not frozen before dipping.
The Ultimate Chocolate cake pops Recipe
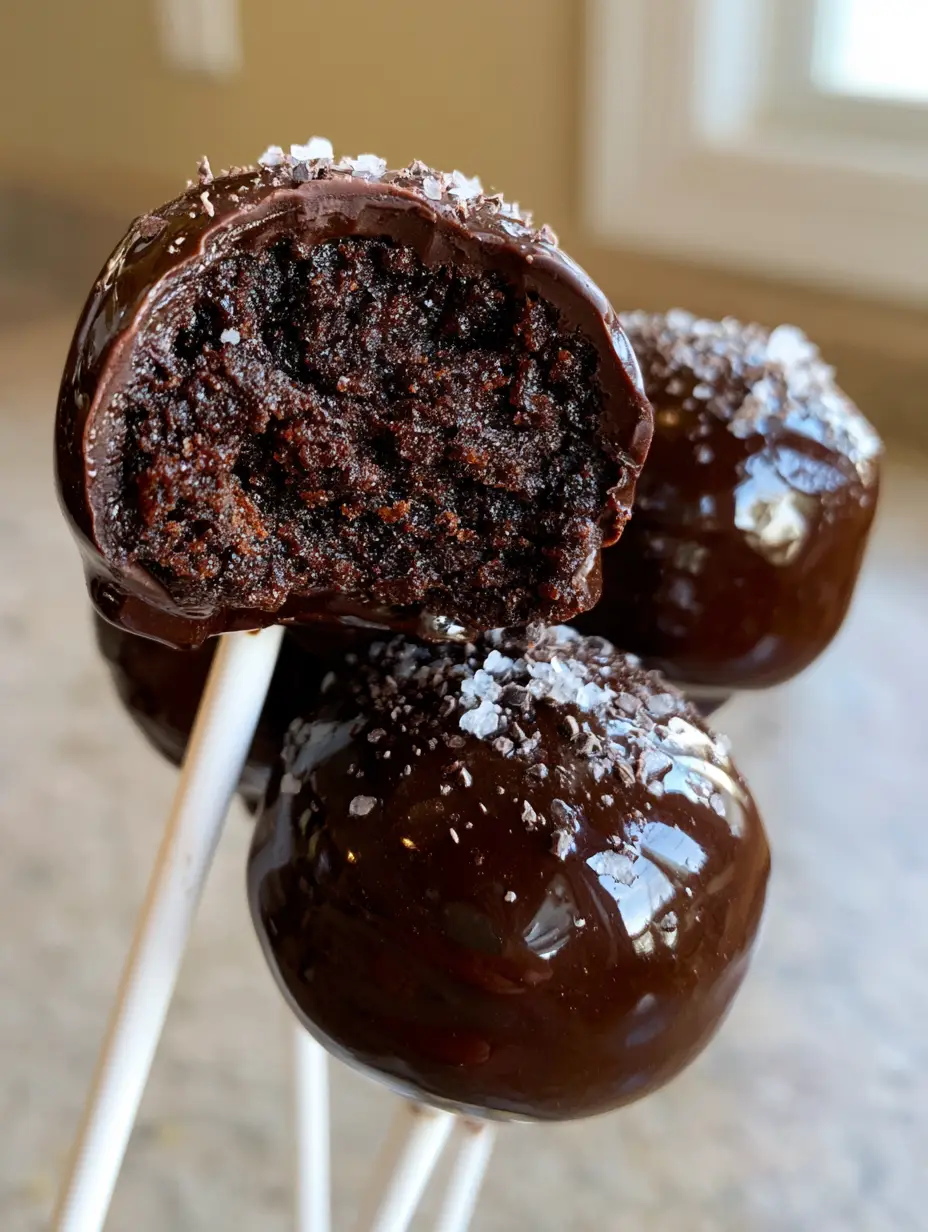
Chocolate cake pops with Tempered Dark Chocolate and Sea Salt
Ingredients
Equipment
Method
- In a large bowl, crumble the chocolate cake until no large pieces remain. Add the chocolate buttercream and mix until a dense, fudgy dough forms with no crumbs visible.
- Roll the dough into 24 smooth spheres (approx. 30g each). Place on parchment paper and refrigerate for 2 hours until firm.
- Melt 2/3 of the dark chocolate to 115°F (46°C), then seed with the remaining 1/3, stirring until the temperature reaches 88°F-90°F (31°C-32°C) for a high-gloss finish.
- Insert a matte white stick into each ball using a bit of melted chocolate as glue. Submerge each pop into the tempered chocolate, tap off excess, and immediately top with microscopic shavings and sea salt.
Notes
Use high-quality couverture chocolate for the best shine and snap.
Save, Share, and Enjoy!
If you loved this guide to making the ultimate Chocolate cake pops, make sure to save this post to your “Dessert Goals” board on Pinterest! We love seeing your creations—take a smartphone photo of your glossy cake pops and share it in the comments below. Don’t forget to follow recipe_root for more gourmet inspiration and leave a 5-star rating if these became your new favorite treat!