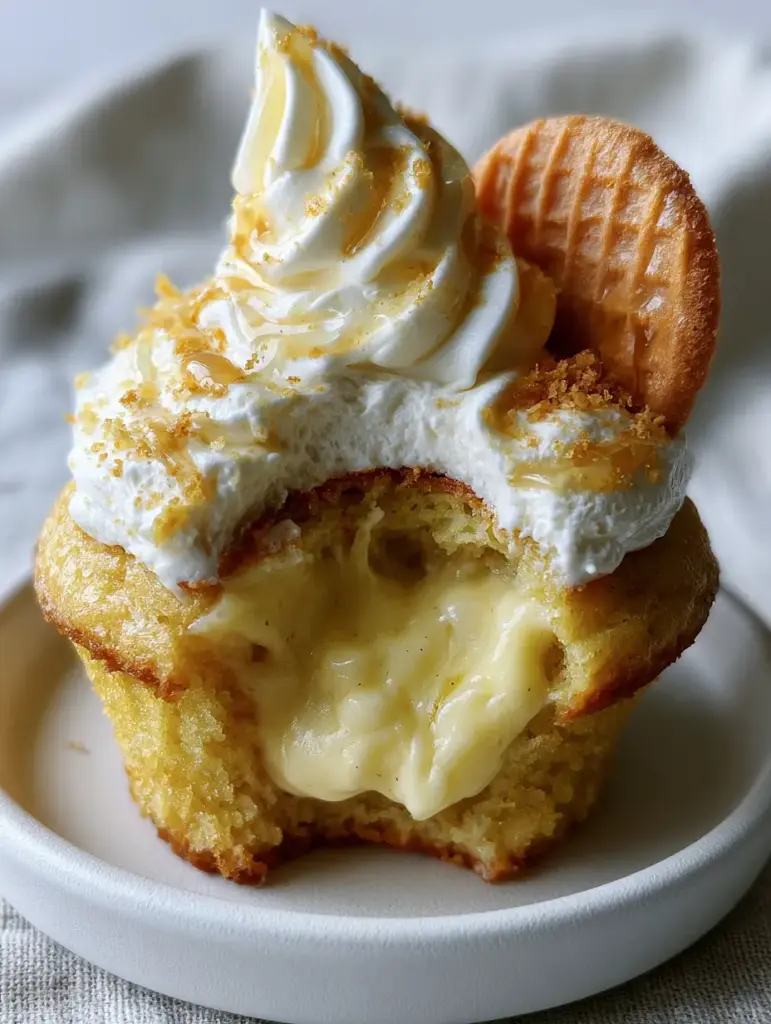
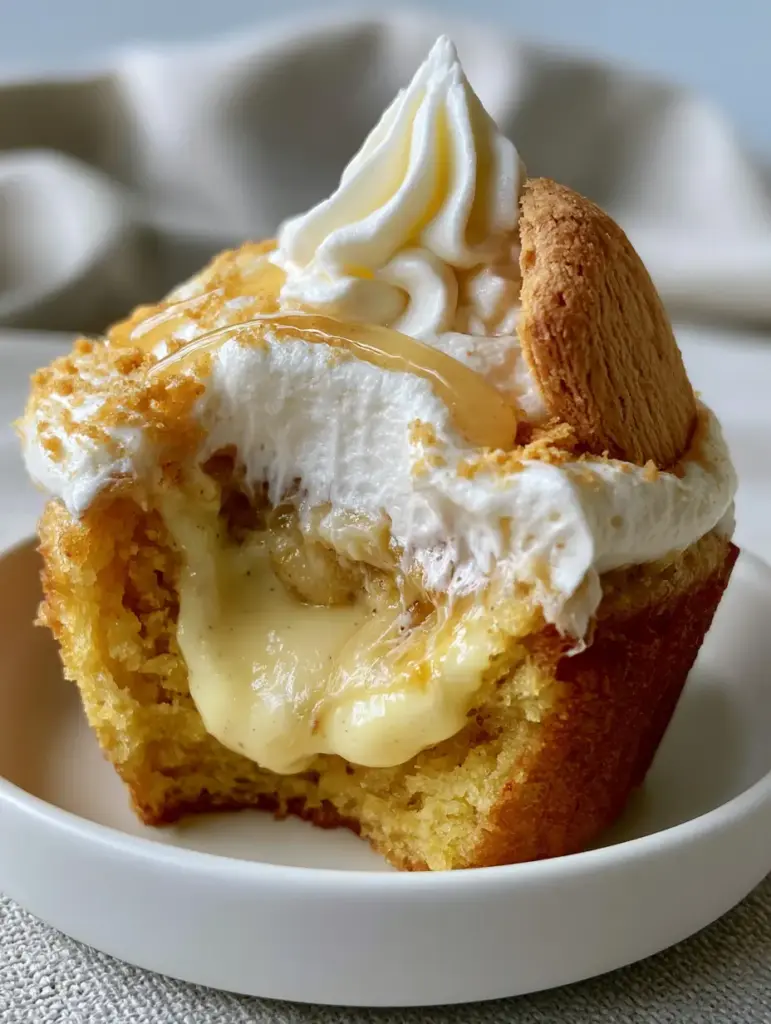
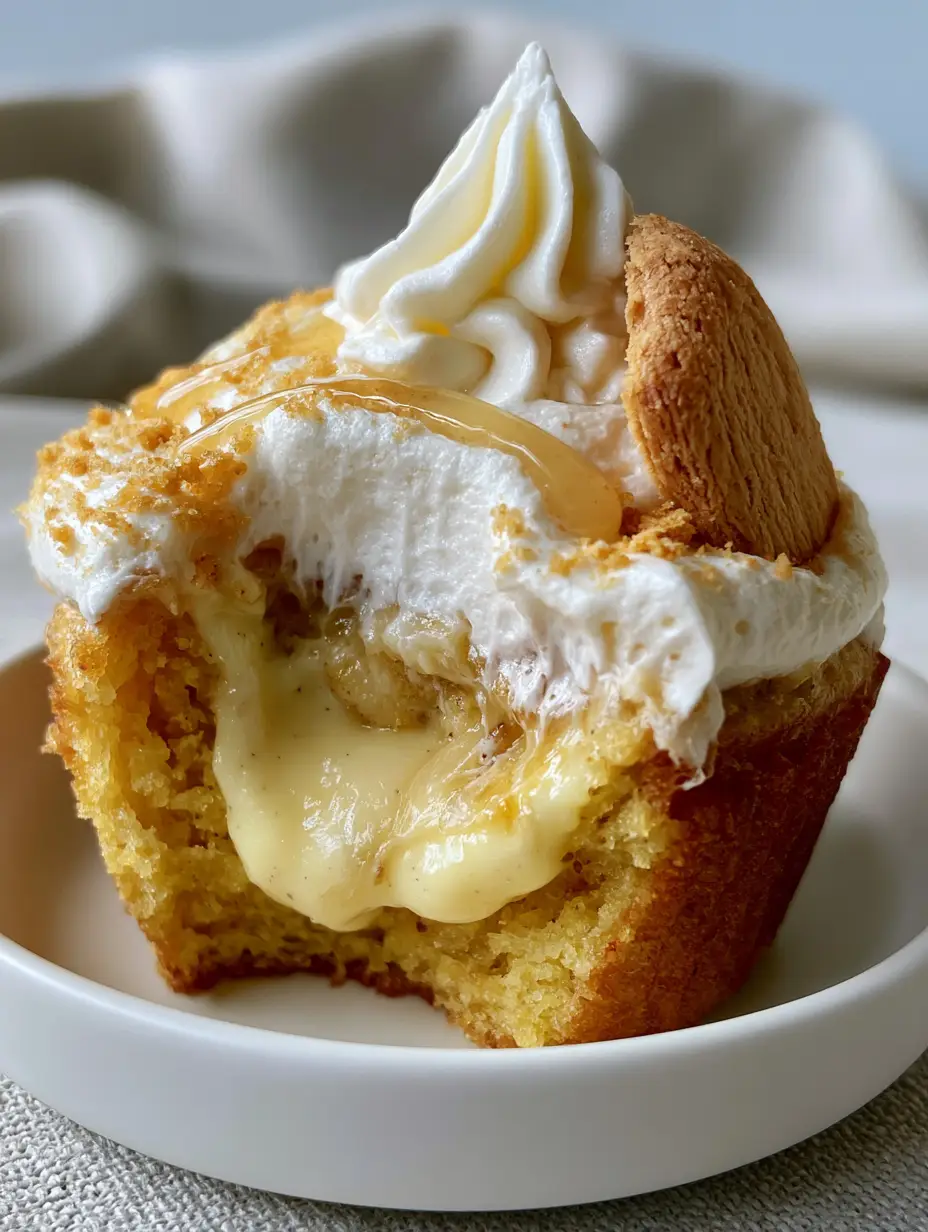
There is nothing quite like the first bite of these banana cream cupcakes. Imagine sinking your teeth through a high, swirling mound of fluffy white whipped buttercream, past a crunchy vanilla wafer, and into a moist, golden-yellow banana sponge. Just as you reach the center, an explosion of thick, pale yellow vanilla bean pastry cream spills out, creating a texture profile that is as sophisticated as it is nostalgic.
These cupcakes aren’t just a dessert; they are a culinary architecture project designed to mimic the classic banana pudding experience in a handheld format. The visual contrast between the honey-colored banana glaze and the pristine white frosting makes them the centerpiece of any dessert table. Whether you are hosting a summer garden party or looking for the perfect nostalgic treat, this recipe delivers on every sensory promise.
Why These Banana Cream Cupcakes Outperform Every Other Recipe
- The Internal Reveal: Unlike standard cupcakes, these feature a generous core of real, stovetop-cooked vanilla bean pastry cream that stays creamy even after refrigeration.
- Textural Harmony: We combine the “snap” of a whole vanilla wafer cookie with the “yielding crumb” of a butter-based banana sponge.
- Visual Precision: Every element, from the 45-degree angled wafer to the translucent banana glaze drizzle, is designed for professional-grade presentation.
- The Flavor Bridge: We use real vanilla beans and overripe bananas to ensure the flavor is deep, natural, and never artificial.
The Anatomy of a Perfect Banana Cream Cupcake
To achieve the “extreme close-up” quality seen in professional food photography, every ingredient must serve a structural and flavor purpose. We don’t just use “bananas”; we use chemically transformed fruit that provides the moisture needed for that visible crumb texture.
The Golden-Yellow Banana Sponge Base
1 ½ cups (190g) All-Purpose Flour: This provides the structural framework. We use a moderate protein count to ensure the cupcake can hold the heavy pastry cream center without collapsing.
1 cup (200g) Granulated Sugar: Sugar does more than sweeten; it hygroscopically holds moisture in the sponge, ensuring it remains “moist” as described in our visual blueprint.
1 tsp (5g) Baking Soda & ½ tsp (2.5g) Baking Powder: This dual-leavening approach ensures a high rise and an airy internal crumb that contrasts beautifully with the thick filling.
1 cup (225g) Mashed Overripe Bananas: The star of the show. The bananas must be heavily spotted with black to ensure the natural sugars have developed into a deep, aromatic syrup.
½ cup (115g) Unsalted Butter, Softened: We cream the butter to incorporate air, which is essential for that “fluffy” mouthfeel.
2 Large Eggs (100g): These provide the protein to set the cake’s structure and the yolks contribute to the “golden-yellow” hue.
¼ cup (60ml) Sour Cream: The acidity in sour cream reacts with the baking soda to create a tender, soft texture that melts on the tongue.
The Thick Vanilla Bean Pastry Cream Filling
1 cup (240ml) Whole Milk: The fat content in whole milk is non-negotiable for a rich, “pale yellow” pudding center.
3 Large Egg Yolks (54g): Yolks provide the emulsifiers that create a silky-smooth, thick custard texture.
¼ cup (50g) Granulated Sugar: Just enough to sweeten the custard without overpowering the natural banana flavor of the cake.
2 tbsp (15g) Cornstarch: This is our thickening agent. It ensures the filling is “overflowing” but stable enough not to run out like water.
1 Whole Vanilla Bean (Scraped): Using a real bean provides those beautiful black specks visible in the “thick, pale yellow” cream.
The Architecture of the Toppings
1 cup (225g) Unsalted Butter (for Frosting): Beaten for 8 full minutes to achieve the “white” color and “fluffy” texture.
3 cups (360g) Powdered Sugar: Sifted to ensure there are no lumps in your “high, swirling mound.”
2 tbsp (30ml) Heavy Cream: Added at the end to “whip” the buttercream into a cloud-like consistency.
12 Whole Vanilla Wafer Cookies: One per cupcake, tucked at a 45-degree angle for that iconic look.
Honey-Colored Banana Glaze: A mixture of ½ cup (120ml) honey and 1 tsp (5ml) banana extract, simmered until translucent.
Essential Equipment for Professional Results
To replicate the hand-held smartphone photo quality of an elite bakery, you will need a 12-cup standard muffin tin. An apple corer or a small paring knife is essential for creating the “internal layers” by hollowing out the center. Finally, a large star piping tip (like an Open Star tip) is required to achieve the “high, swirling mound” of frosting that supports the wafer cookie.
Step-by-Step Culinary Forensics: Building the Cupcake
Phase 1: Engineering the Moist Banana Sponge
Preheat your oven to 350°F (175°C). Line your muffin tin with high-quality paper liners. In a medium bowl, whisk together your flour, baking soda, baking powder, and salt.
In a large stand mixer, cream the softened butter and sugar until the mixture is pale and doubled in volume—this usually takes about 3-5 minutes. Add the eggs one at a time, ensuring each is fully emulsified before adding the next. This prevents the batter from breaking.
Fold in the mashed bananas and sour cream. Gradually add the dry ingredients, mixing only until “just combined.” You want to see a visible crumb texture, which is achieved by not overworking the gluten. Bake for 18-22 minutes until a toothpick comes out with a few moist crumbs. Let them cool completely; a warm cupcake will melt your pastry cream.
Phase 2: Crafting the Vanilla Bean Pastry Cream
While the cakes cool, whisk your egg yolks, sugar, and cornstarch in a heat-proof bowl until pale. In a saucepan, bring the milk and the scraped vanilla bean seeds to a gentle simmer. You’ll know it’s ready when small bubbles form around the edges and the scent of vanilla fills the room.
Slowly “temper” the egg mixture by drizzling in a small amount of hot milk while whisking constantly. Return the entire mixture to the pan and cook over medium heat. Whisk vigorously until the mixture thickens into a “thick, pale yellow” pudding. Remove from heat, stir in a knob of butter for shine, and press plastic wrap directly onto the surface to prevent a skin from forming. Chill for at least 2 hours.
Phase 3: Assembly and Visual Styling
Once the cupcakes are cool, use an apple corer to remove the center of each cupcake, going about two-thirds of the way down. Spoon or pipe the chilled pastry cream into the hole until it is slightly overflowing. This ensures the “internal layers” are visible when someone takes that first large bite.
Whip your buttercream until it is stark white and fluffy. Pipe a high, swirling mound onto each cupcake. Take a whole vanilla wafer and tuck it into the side of the frosting at a 45-degree angle. Sprinkle finely crushed wafer crumbs over the top for texture.
Finally, garnish with a fresh banana slice. To finish, drizzle the honey-colored banana glaze in thin, translucent lines across the top. The glaze should catch the light, creating that “bright, natural morning light” highlight.
Expert Tips for Bakery-Quality Success
- The Ripeness Rule: If your bananas aren’t black-spotted, roast them in their skins at 300°F (150°C) for 15 minutes to concentrate the sugars.
- Temperature Control: Ensure your pastry cream is completely cold before filling, or it will soak into the sponge and ruin the “internal layers.”
- The Glaze Glisten: Apply the banana glaze just before serving to prevent it from dissolving the crushed wafer crumbs.
- Internal Link Inspiration: If you love this flavor profile, you might also enjoy our banana pudding tiramisu for your next gathering.
Storage and Preservation
Because of the fresh pastry cream and banana garnish, these cupcakes must be stored in the refrigerator. Place them in an airtight container for up to 3 days. If you are preparing them in advance, wait to add the “fresh banana slice garnish” and the “whole vanilla wafer cookie” until just before serving to maintain the crunch and prevent browning.
For those who love stuffed desserts, you might want to try our peanut butter cup stuffed brookies for a different textural experience that also keeps well in the fridge.
What to Serve with Banana Cream Cupcakes
These cupcakes are rich and creamy, making them the perfect partner for refreshing beverages. For a summer afternoon, pair them with a dragon fruit lemonade to cut through the sweetness of the buttercream.
If you are serving these at an adult gathering or an outdoor wedding, consider pairing them with spiced rum cocktails which complement the warm notes of the banana and vanilla bean.
Frequently Asked Questions
While you can, a homemade vanilla bean pastry cream provides a thicker, more stable ‘pale yellow’ center and a superior flavor that elevates the cupcake to bakery quality.
Simmer honey with a drop of banana extract and a teaspoon of water. This creates a thin, pourable syrup that sets with a high-shine finish without being opaque.
To maintain the crunch, add the whole vanilla wafer and the crushed crumbs just before serving. Moisture from the frosting will eventually soften the cookie over time.
This usually happens if the batter is overmixed or the oven door is opened too early. Ensure you mix until ‘just combined’ and keep the door closed until the 18-minute mark.
The Ultimate Banana Cream Cupcakes Recipe
Banana Cream Cupcakes: The Ultimate Vanilla Bean Pastry Cream Filled Dessert
Ingredients
Equipment
Method
- Cream softened butter and sugar in a stand mixer for 5 minutes until pale and fluffy.
- Fold in bananas and flour mixture. Bake at 350°F (175°C) for 18-22 minutes until golden-yellow.
- Whisk yolks, milk, and vanilla bean over medium heat until a thick, pale yellow pastry cream forms.
- Remove the cupcake centers and pipe in the chilled pastry cream.
- Top with a swirl of buttercream, tuck in a wafer at a 45-degree angle, and drizzle with banana glaze.
Notes
Keep pastry cream chilled until the moment of assembly to maintain internal layers.
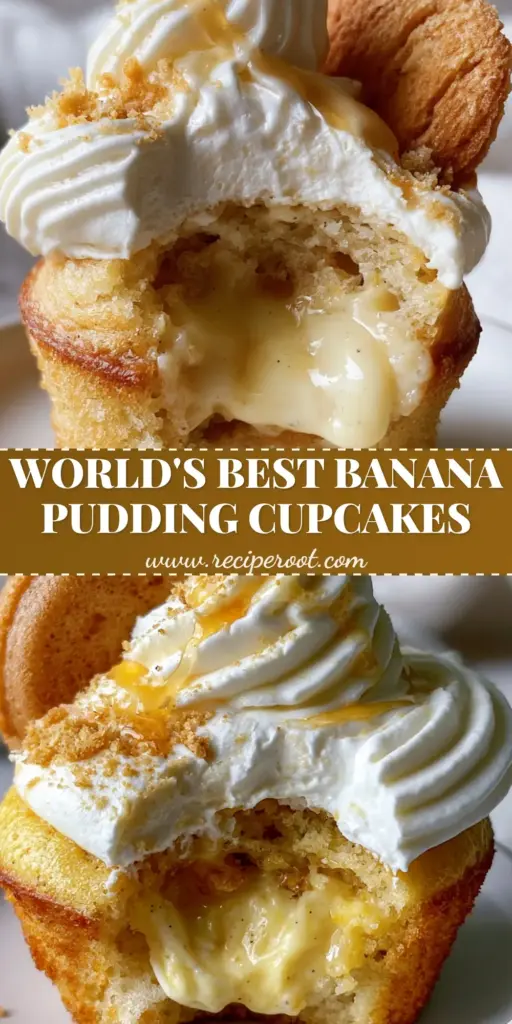
These banana cream cupcakes represent the pinnacle of home baking—combining technical pastry skills with the soulful comfort of a classic pudding. They are a testament to how simple ingredients like bananas and wafers can be elevated into a gourmet experience. If you enjoyed this recipe, please leave a comment below and share your creations with us on Pinterest!