There is a specific kind of magic found in the bottom of a paper cone or a vintage glass during the height of July. Nostalgic summer drinks aren’t just about hydration; they are a sensory portal back to carnival midways, poolside afternoons, and the electric neon glow of local snack shacks. This dual-layered blue raspberry and cherry slushie is a culinary homage to those vibrant memories, engineered to look as hyper-saturated as a Technicolor dream.
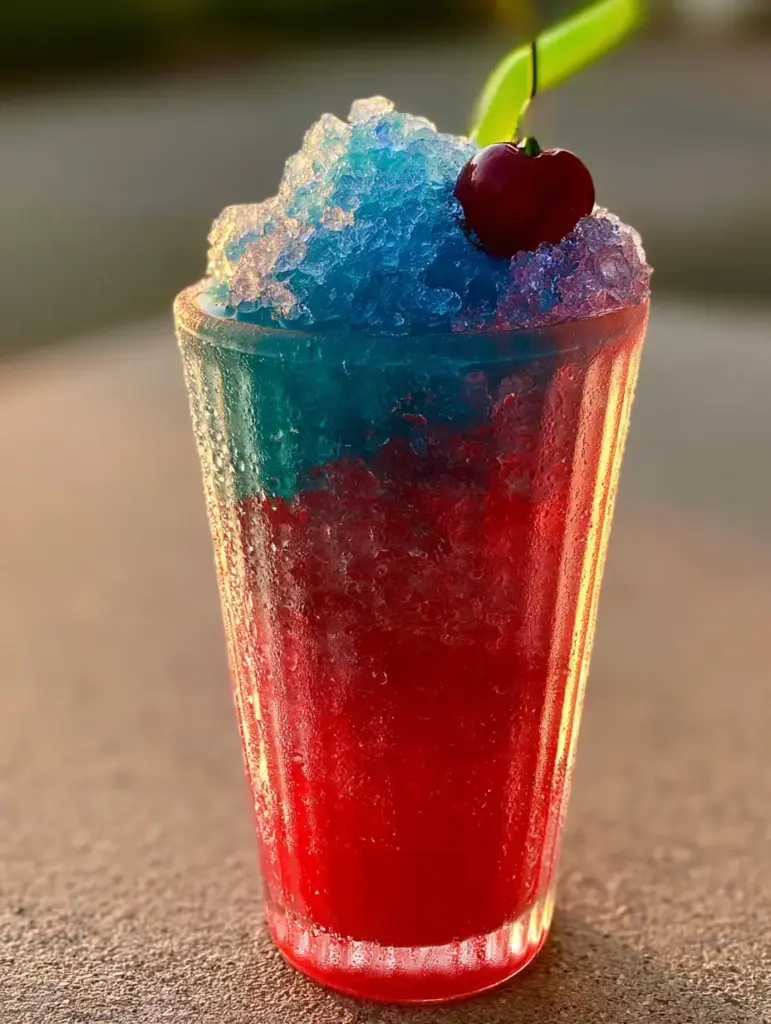
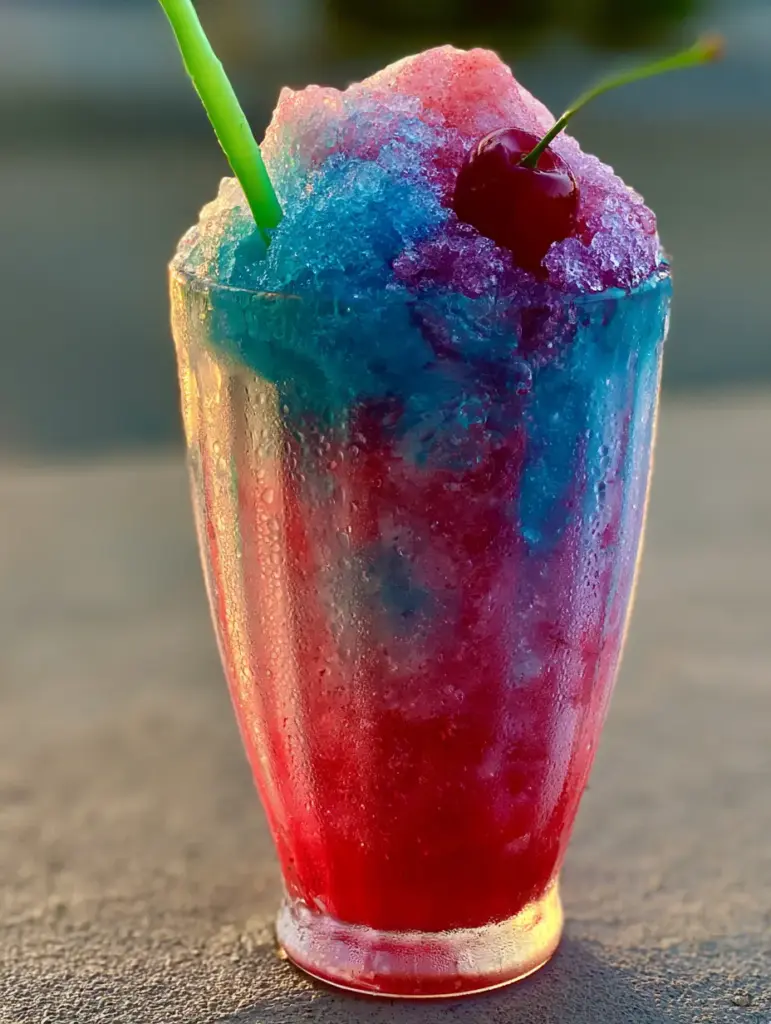
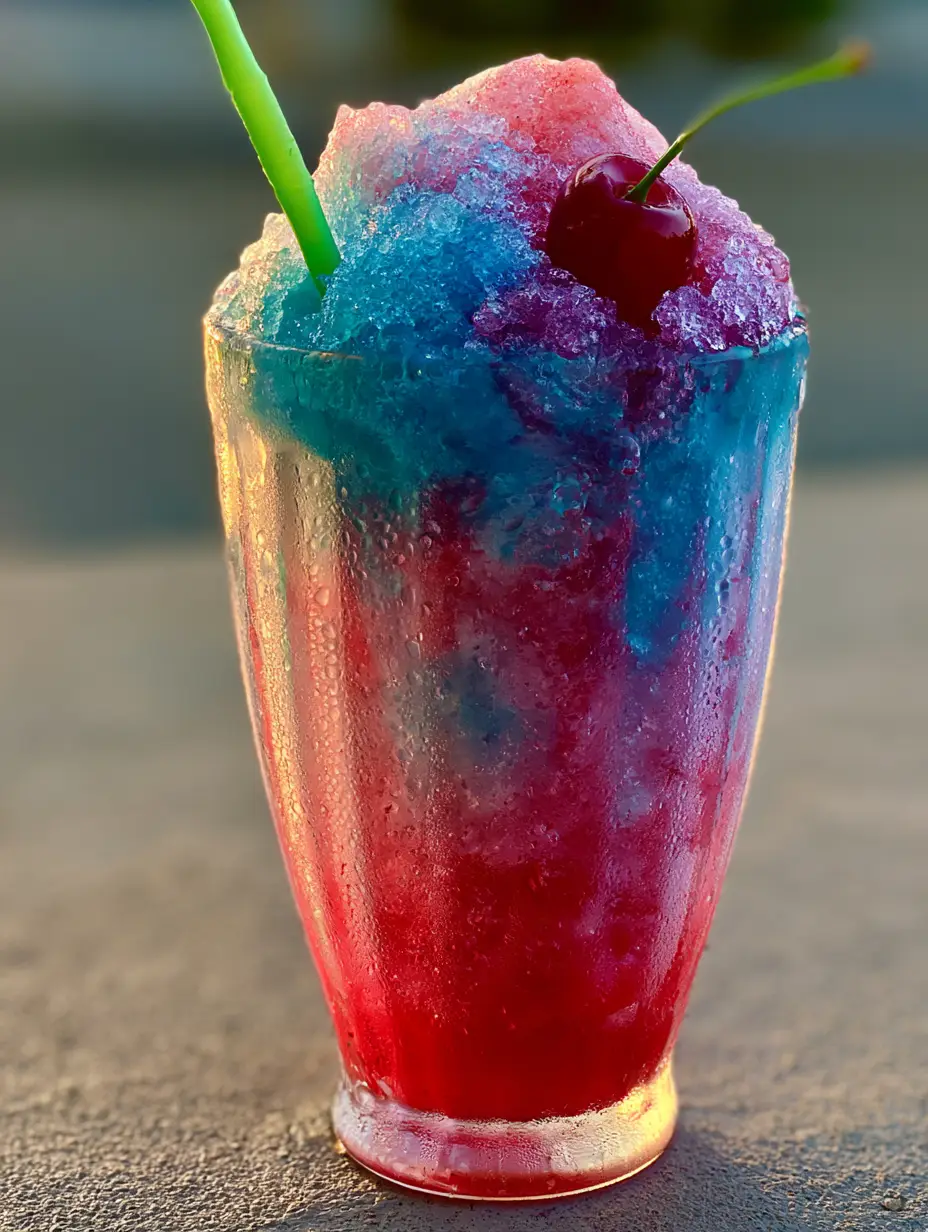
The visual appeal of this drink is undeniable, featuring a tall, ribbed vintage glass that highlights the meticulously detailed crystalline texture of the ice. We aren’t just making a cold beverage; we are crafting a masterpiece of texture and temperature. From the heavy condensation beads coating the glass to the high-gloss maraschino cherry perched on top, every element is designed to evoke that specific summer longing.
Achieving the perfect “electric” look requires more than just pouring syrup over ice. It demands an understanding of liquid density and the physics of ice crystal formation. In this guide, we will break down the science of the slush, ensuring your home version looks and tastes exactly like the professional-grade treats of your childhood.
Why This Neon Slushie Defines The Nostalgic Summer Experience
- Hyper-Saturated Visuals: We use specific syrup concentrations to achieve that glowing, electric red and neon blue contrast that pops against any summer backdrop.
- Precision Ice Texture: Our technique focuses on creating granular, crystalline ice that holds its structure without immediately turning into a watery mess.
- The Vintage Aesthetic: Using ribbed glassware and a neon plastic bendy straw creates a nostalgic silhouette that is perfect for modern photography.
- Dual-Layered Flavor: By managing the temperature of the syrups, we create distinct layers that don’t immediately bleed into a purple hue.
- Professional Condensation: We provide the secrets to getting those thick, realistic water beads on the outside of your glass for the ultimate “cold” visual cue.
Essential Components For The Perfect Icy Glow
Finely Crushed Crystalline Ice: You need high-clarity ice cubes as your base to ensure the final slush has a granular, gemstone-like appearance. Avoid “cloudy” ice if possible, as it results in a muddled color profile once the syrups are added.
Neon Blue Raspberry Syrup: This isn’t just for flavor; it provides that iconic, hyper-bright blue glow. Look for syrups with high-quality pigments that maintain their vibrancy even when diluted by the melting ice.
Electric Red Cherry Syrup: The counterpart to the blue, this syrup provides a deep, saturated red that sits beautifully at the base of the glass. The contrast between these two primary colors is what creates the “wow” factor.
Maraschino Cherry with Stem: A glossy, bright red cherry with a long green stem is the mandatory crown for this drink. It provides a organic, polished texture that contrasts against the crystalline ice.
Neon Green Plastic Bendy Straw: This is a non-negotiable accessory for DIY summer drinks that want to lean into the retro-cool aesthetic. The green color provides a complementary pop against the blue and red layers.
Foundational Liquid (The Secret Ingredient): A small amount of filtered water or lemon-lime soda is essential. This acts as a lubricant for the ice crystals, allowing them to pack together into that perfect “slush” consistency without being a solid block.
Must-Have Equipment For Professional Slushie Results
To achieve the “extreme detail on ice crystals” seen in high-end food photography, a standard blender often isn’t enough. You need a high-powered blender with a “pulse” function or a dedicated home shaved-ice machine. These tools allow you to control the exact micron-size of the ice granules.
Additionally, you will need a set of tall, ribbed vintage glasses. The ridges in the glass do more than just look pretty; they provide more surface area for heavy condensation beads to form. This “sweating glass” look is a hallmark of refreshing non-alcoholic summer drinks.
The Culinary Science Of The Perfect Layered Pour
Preparing The Crystalline Ice Foundation
Start by taking 4 cups (950ml) of hard-frozen ice cubes. Place them in your blender and pulse in short, 1-second bursts. You are looking for a “granular” texture where the crystals are about 1-2mm in size—small enough to suck through a straw but large enough to reflect light like tiny diamonds.
If the ice looks like snow, you’ve gone too far. If there are large chunks, keep pulsing. The goal is that “slushy peak” that can support the weight of a maraschino cherry without sinking.
Chilling Your Ribbed Glassware For Maximum Condensation
Place your vintage ribbed glasses in the freezer for at least 20 minutes before assembly. When the cold glass hits the humid summer air, it will instantly begin to form those realistic water beads. This visual cue tells the brain the drink is ice-cold before the first sip is even taken.
For an even more dramatic effect, you can lightly mist the outside of the glass with a fine spray of water before placing it in the freezer. This creates a base for the condensation to build upon, resulting in those thick, heavy beads.
Executing The Dual-Layered Saturated Color
Pour 1/4 cup (60ml) of the electric red cherry syrup into the bottom of the chilled glass. Carefully spoon in your crushed ice until the glass is half-full. Gently press the ice down with the back of a spoon to create a flat surface.
Slowly drizzle another 2 tablespoons (30ml) of cherry syrup over this first layer of ice. This ensures the color is “hyper-saturated” from top to bottom. Now, add more crushed ice until you reach the rim, creating a slight “icy peak” at the top.
Finishing With The Neon Blue Raspberry Glow
Very slowly, pour 1/4 cup (60ml) of the neon blue raspberry syrup over the top half of the ice. The syrup will naturally seep down but should stop at the denser red layer. This creates that stunning dual-layered effect that defines the best nostalgic summer drinks.
Tuck your neon green bendy straw into the side of the icy peak at a slight angle. Finally, place the maraschino cherry right on the summit, ensuring the green stem is visible and pointing upwards for that “glossy” finished look.
Expert Tips For Slushie Success
- Temperature Control: Ensure your syrups are room temperature while your ice is sub-zero. This temperature differential helps the ice maintain its crystalline structure longer.
- Straw Placement: Insert the straw *before* the final syrup pour. This prevents the straw from displacing the ice and ruining the layered look.
- Syrup Density: If your layers are mixing too quickly, try mixing a teaspoon of simple syrup into the bottom (red) layer to make it slightly denser than the top (blue) layer.
- The “Golden Hour” Lighting: To replicate the visual prompt, serve these drinks during the late afternoon. The “warm rim light” from the sun will make the neon colors appear to glow from within.
Storage And Pre-Preparation Advice
Because these are ice-based, they are best served immediately. However, you can prepare the crystalline ice in large batches and store it in a sealed container in the deepest part of your freezer for up to 24 hours. If the ice clumps together, simply give it a quick pulse in the blender to break it back into granules.
Do not attempt to pre-assemble the drinks and store them in the freezer. The syrups contain sugar, which lowers the freezing point of the ice, causing the layers to bleed and the texture to become “slushy” in an unappealing, liquid way. Freshness is the key to that nostalgic summer drinks appeal.
What To Serve With These Icy Treats
These vibrant slushies are the ultimate party companions. They pair perfectly with other summer staples like electric blue lemonade for a full “blue-themed” beverage bar. If you’re hosting a larger event, consider offering these alongside festive non-alcoholic party drinks to ensure there is something for everyone.
For a sweet treat pairing, the tartness of the cherry and raspberry syrups goes surprisingly well with chocolate. Try serving them with vibrant M&M cookies or even decadent stuffed cookies for a nostalgic dessert spread that will be the talk of the neighborhood.
Frequently Asked Questions About Summer Slushies
Absolutely! You can mix 1.5 oz (45ml) of vodka or white rum into the syrups before layering. Be aware that alcohol will cause the ice to melt slightly faster.
The key is syrup density and ice packing. Press the first layer of ice down firmly to create a barrier, and pour the second syrup very slowly over the back of a spoon to break the fall.
No, blue raspberry is a flavor profile created in the mid-20th century, typically using esters to mimic a tart raspberry while using Brilliant Blue FCF dye to differentiate it from cherry and strawberry flavors.
Use a high-powered blender and use the ‘pulse’ function. If you hold the button down, the friction creates heat which melts the ice into snow; pulsing keeps the granules sharp and crystalline.
Condensation requires a temperature differential. Ensure your glass is frozen (below 32°F/0°C) and the surrounding air is humid. In very dry climates, you may need to mist the glass with water first.
The Ultimate Nostalgic Summer Slushie Recipe
Nostalgic Summer Drinks: The Ultimate Dual-Layered Neon Blue Raspberry and Cherry Slushie
Ingredients
Equipment
Method
- Place ice cubes and water into a high-powered blender. Pulse in 1-second intervals until the ice reaches a crystalline, granular texture, similar to coarse salt.
- Place the ribbed glass in the freezer for 10 minutes to encourage heavy condensation beads once filled.
- Pour the cherry syrup into the bottom of the chilled glass. Spoon in half of the crystalline ice, pressing gently to create a level layer.
- Add the remaining ice to the top, creating a slight peak. Slowly drizzle the blue raspberry syrup over the top half of the ice.
- Insert the neon bendy straw and place the maraschino cherry on top of the icy peak. Serve immediately while the glass is still sweating.
Notes
Do not over-blend the ice or it will turn into a liquid slurry instead of crystalline granules.
Closing Thoughts On The Perfect Summer Sip
Creating these nostalgic summer drinks is an exercise in edible art. By focusing on the “crystalline” texture of the ice and the “hyper-saturated” colors of the syrups, you transform a simple beverage into a core summer memory. The combination of the cold, ribbed glass and the neon glow of the blue and red layers is a guaranteed way to beat the heat with style.
If you enjoyed this recipe, we’d love to see your creations! Tag us or leave a comment below with your favorite childhood drink memory. Don’t forget to save this to your “Summer Vibes” board on Pinterest so you can find it every time the temperature climbs!