There is a specific kind of magic that happens when a deep, dark chocolate brownie meets a buttery, golden chocolate chip cookie. But when you hide a whole Reese’s peanut butter cup inside that union, you move beyond mere baking and into the realm of culinary engineering. These Peanut Butter Cup Stuffed Brookies are designed for the enthusiast who craves texture, scale, and that undeniable “ooze” factor.
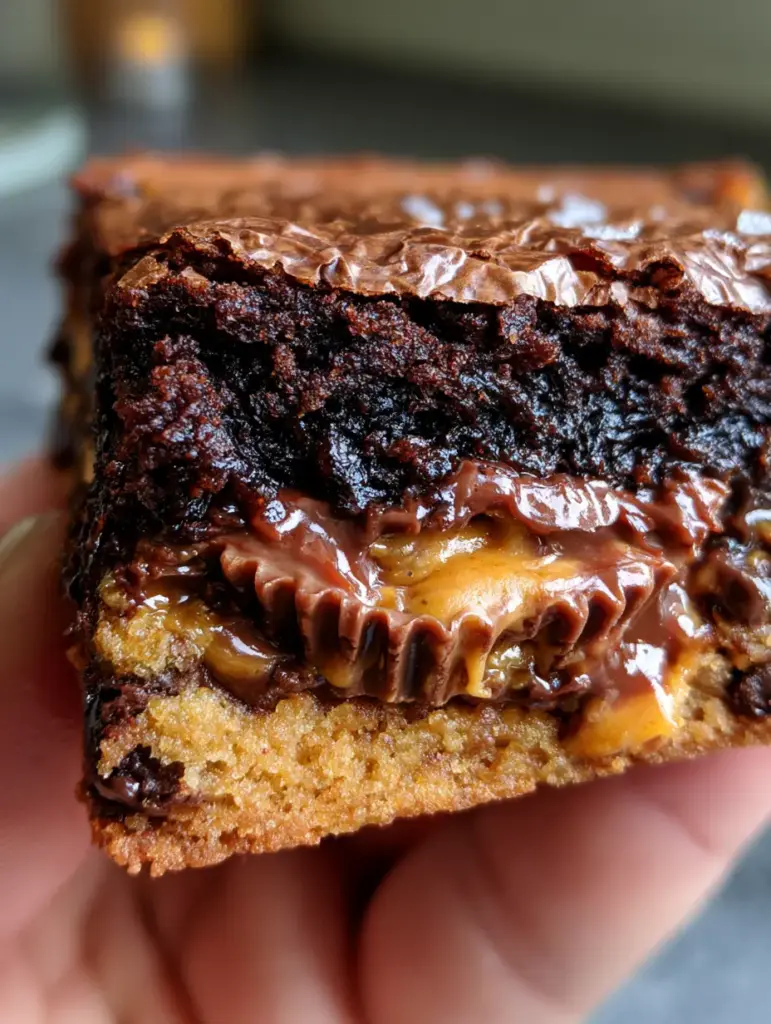
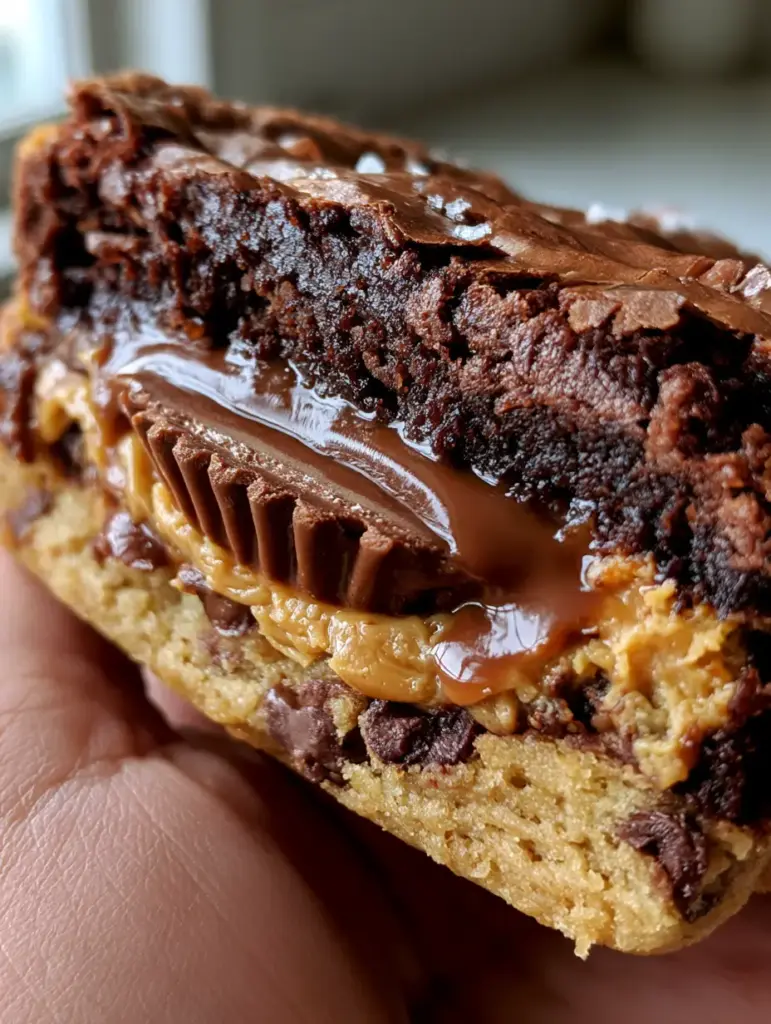
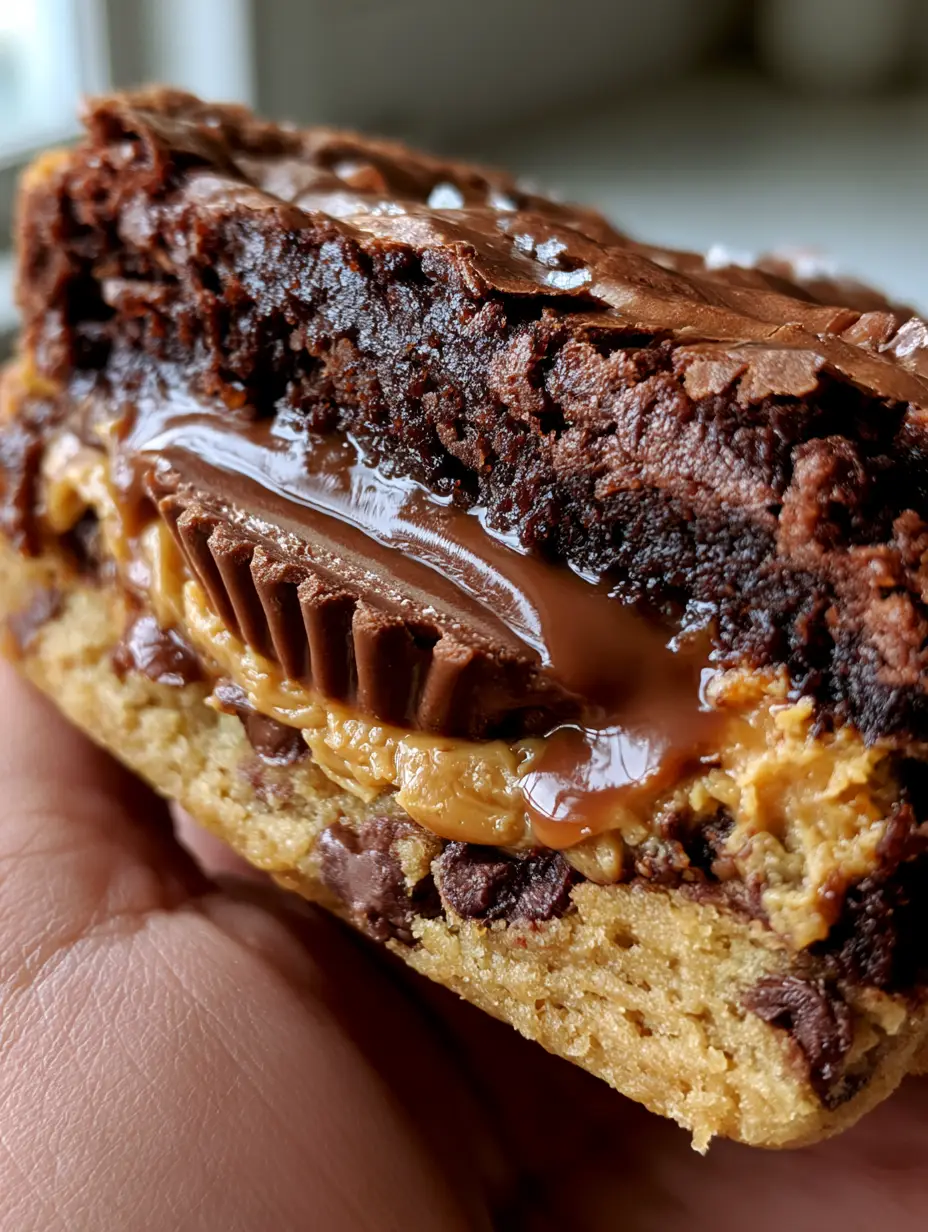
Imagine holding a thick, heavy slice that requires both hands to steady. As you pull it apart, the shiny, paper-thin crinkle crust of the brownie layer shatters like glass, revealing a molten peanut butter center that flows over a soft cookie base. This is the handheld masterpiece your dessert rotation has been missing, perfected with a touch of flaky sea salt to balance the intense decadence.
Why These Peanut Butter Cup Stuffed Brookies Are the Ultimate Indulgence
- The Crinkle-Top Perfection: We utilize a specific sugar-egg aeration technique to ensure that signature, parchment-like brownie crust that cracks beautifully under your thumb.
- Triple-Layer Texture: You get the crunch of the golden cookie base, the fudgy density of the dark chocolate brownie, and the liquid gold of a melted peanut butter cup.
- Scientifically Balanced: While this is an extreme dessert, the addition of semi-sweet chocolate and a coarse sea salt finish prevents the sweetness from becoming overwhelming.
- Instagram-Ready Scale: These are thick, sturdy bars designed to look just as impressive on a cooling rack as they do in a handheld macro shot.
Foundational Elements for Fudgy Brownie & Golden Cookie Layers
To achieve the visual and structural results seen in our professional kitchen, you cannot skip on quality. Every ingredient serves a structural purpose in maintaining the “stuffed” architecture of these Peanut Butter Cup Stuffed Brookies.
Unsalted Butter (1 cup / 227g): Melted butter provides the fudgy base for the brownie top, while softened creamed butter gives the cookie base its necessary lift and golden hue. High-fat European style butter is recommended for the richest flavor profile.
Granulated and Light Brown Sugar: We use a 1:1 ratio in the cookie base for chewiness, but increase the granulated sugar in the brownie batter to 1.5 cups (300g) to help create that essential shiny top crust.
Dark Cocoa Powder (3/4 cup / 75g): Dutch-processed cocoa is vital here. It provides the “deep dark chocolate” visual contrast against the golden cookie layer and the bright orange peanut butter center.
Whole Reese’s Peanut Butter Cups (12-16 standard size): These are the “molten” heart of the recipe. We recommend chilling them in the freezer for 20 minutes before assembly so they hold their shape during the initial blast of oven heat.
Semi-Sweet Chocolate Chips (1 cup / 175g): Folded into the cookie dough, these provide pockets of melted chocolate that anchor the bottom layer’s structure. If you love variety, you might also enjoy these stuffed chocolate treats for a similar gooey experience.
Flaky Sea Salt: This is not just a garnish; it is a functional ingredient. The large crystals provide a visual “pop” against the dark brownie and a sharp contrast to the creamy milk chocolate of the peanut butter cups.
The Pro Baker’s Tool Kit
To replicate the “extreme macro” handheld look, you need even baking and clean edges. A standard 9×9 inch (23x23cm) metal baking pan is superior to glass for this recipe, as it conducts heat faster to set the brownie edges while leaving the center molten.
You will also need parchment paper with a generous overhang. This allows you to lift the entire block of Peanut Butter Cup Stuffed Brookies out of the pan once cooled, ensuring you don’t destroy the delicate crinkle top while slicing. A high-quality whisk is essential for the brownie layer to beat the eggs into the sugar for that parchment-thin crust.
Master the Layers: Step-by-Step Instructions
Phase 1: Preparing the Golden Chocolate Chip Base
In a large bowl, cream 1/2 cup (113g) of softened butter with 1/2 cup (100g) granulated sugar and 1/2 cup (110g) packed brown sugar. Beat until the mixture is pale and fluffy, which usually takes about 3 minutes on medium-high speed.
Add one large egg and 1 tsp (5ml) vanilla extract, mixing until just combined. Fold in 1.5 cups (190g) all-purpose flour, 1/2 tsp (3g) baking soda, and 1/2 tsp (3g) salt. Finally, stir in 1/2 cup (90g) of the semi-sweet chocolate chips. The dough should be thick and pliable, reminiscent of classic bakery-style cookie dough.
Phase 2: The Art of the Molten Peanut Butter Center
Line your baking pan with parchment. Press the cookie dough into an even layer across the bottom. Now, take your chilled peanut butter cups and press them firmly into the dough in rows of 4×4.
The goal is to have the cookie dough slightly “hug” the sides of the peanut butter cups. This ensures that as they melt, the peanut butter flows inward rather than leaking out to the edges of the pan and burning.
Phase 3: Achieving the Signature Paper-Thin Crinkle Top
This is the “technical” part of the Peanut Butter Cup Stuffed Brookies. Melt 1/2 cup (113g) butter and whisk it while hot with 1 cup (200g) granulated sugar. The heat helps dissolve the sugar, which is the secret to a shiny top.
Whisk in two large eggs one at a time, beating vigorously for at least 2 minutes. You are looking for the batter to turn slightly pale. Fold in 1/2 cup (60g) cocoa powder, 1/2 cup (65g) flour, and the remaining chocolate chips. The batter should be glossy and thick enough to hold a ribbon shape when lifted.
Phase 4: The Assembly and Final Bake
Pour the brownie batter gently over the peanut butter cups. Use an offset spatula to spread it to the corners, being careful not to dislodge the cups. Sprinkle the surface generously with the remaining chocolate chips and a heavy pinch of flaky sea salt.
Bake at 350°F (175°C) for 35-40 minutes. Look for the visual cues: the edges should be set and slightly pulling away from the parchment, while the top has formed that beautiful, cracked, paper-thin crust. The center should still have a very slight “jiggle” when shaken—this ensures the molten peanut butter center remains gooey.
Troubleshooting Your Brookie Textures
- Problem: No Crinkle Top. You likely didn’t beat the eggs and sugar long enough. The “meringue” layer formed by aeration is what creates that shine.
- Problem: The Center is Dry. Overbaking is the enemy of the Peanut Butter Cup Stuffed Brookies. Remember that the bars will continue to set as they cool in the pan.
- Problem: Layers are Mixing. Ensure your brownie batter is thick. If it’s too runny, it will seep under the cookie layer. Don’t over-melt your butter for the brownie base.
Keeping Your Brookies Fresh and Fudgy
These bars are best served slightly warm to maintain the molten center. However, they store beautifully at room temperature in an airtight container for up to 4 days. For a “fresh from the oven” feel, microwave a square for 10-15 seconds before eating.
You can also freeze these Peanut Butter Cup Stuffed Brookies. Wrap individual squares in plastic wrap and store them in a freezer bag for up to 3 months. Thaw at room temperature for an hour, or overnight in the fridge.
Perfect Pairings for an Over-the-Top Dessert
Because these brookies are incredibly rich, they pair perfectly with beverages that offer a bit of acidity or refreshing contrast. A tall glass of ice-cold milk is the classic choice, but for a summer party, consider serving them alongside electric blue lemonade for a fun color pop.
If you’re hosting an adult gathering, the deep chocolate and peanut butter notes are surprisingly well-complemented by dark fruit flavors. Try serving them with strawberry-infused cocktails to cut through the density of the fudgy brownie.
For more peanut butter inspiration, don’t miss our crunchy peanut butter bars or these elegant peanut butter and banana cupcakes.
Answers to Your Sweetest Brookie Questions
Yes, you can use mini cups, but you won’t get the same massive ‘molten ooze’ effect. Use about 3-4 mini cups per square to achieve a similar distribution.
They are best stored at room temperature in an airtight container to keep the center soft. Refrigeration will firm up the peanut butter center, making it less molten.
The key is to whisk the sugar and eggs vigorously for at least 2 minutes. This creates a meringue-like structure that rises and then cracks into a paper-thin, shiny crust as it bakes.
Yes, freezing the cups for 20-30 minutes helps them maintain their shape long enough for the brownie batter to set around them, resulting in a cleaner molten center.
A hard cookie base usually comes from over-creaming the butter/sugar or over-baking the pan. Aim for ‘just set’ edges while the brownie top still has a slight wobble.
The Definitive Peanut Butter Cup Stuffed Brookies Recipe
Peanut Butter Cup Stuffed Brookies: The Ultimate Molten Center Dessert
Ingredients
Equipment
Method
- Cream softened butter with sugars until pale and fluffy. Beat in egg and vanilla.
- Fold in flour, baking soda, and salt. Stir in chocolate chips.
- Press dough into the bottom of a parchment-lined 9x9 pan. Press whole peanut butter cups into the dough in rows.
- Whisk melted butter and sugar while hot. Add eggs and beat vigorously for 2 minutes until pale and glossy.
- Gently fold in cocoa powder and flour until no streaks remain. Stir in chocolate chips.
- Pour brownie batter over the cups. Smooth the top and sprinkle with sea salt.
- Bake at 350°F (175°C) for 35-40 minutes until the crinkle top is shiny and cracked.
Notes
Freeze the peanut butter cups for 20 minutes before baking to keep the center molten but not completely disintegrated.
Closing & Call to Action
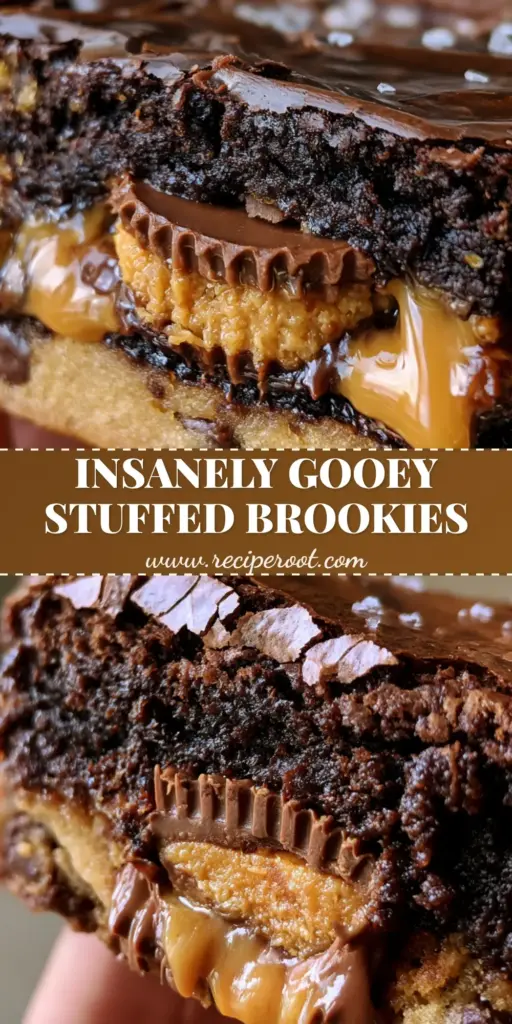
Mastering the Peanut Butter Cup Stuffed Brookies is a rite of passage for any serious home baker. The combination of textures—from the shattering crinkle top to the molten, oozing peanut butter center—creates a sensory experience that standard brownies simply can’t match. We can’t wait to see your handheld “scale” photos!
If you enjoyed this recipe, please leave a comment below and let us know how your layers turned out. Don’t forget to sign up for our newsletter for more deep-dive dessert tutorials, and save this recipe to your “Must-Bake” board on Pinterest.