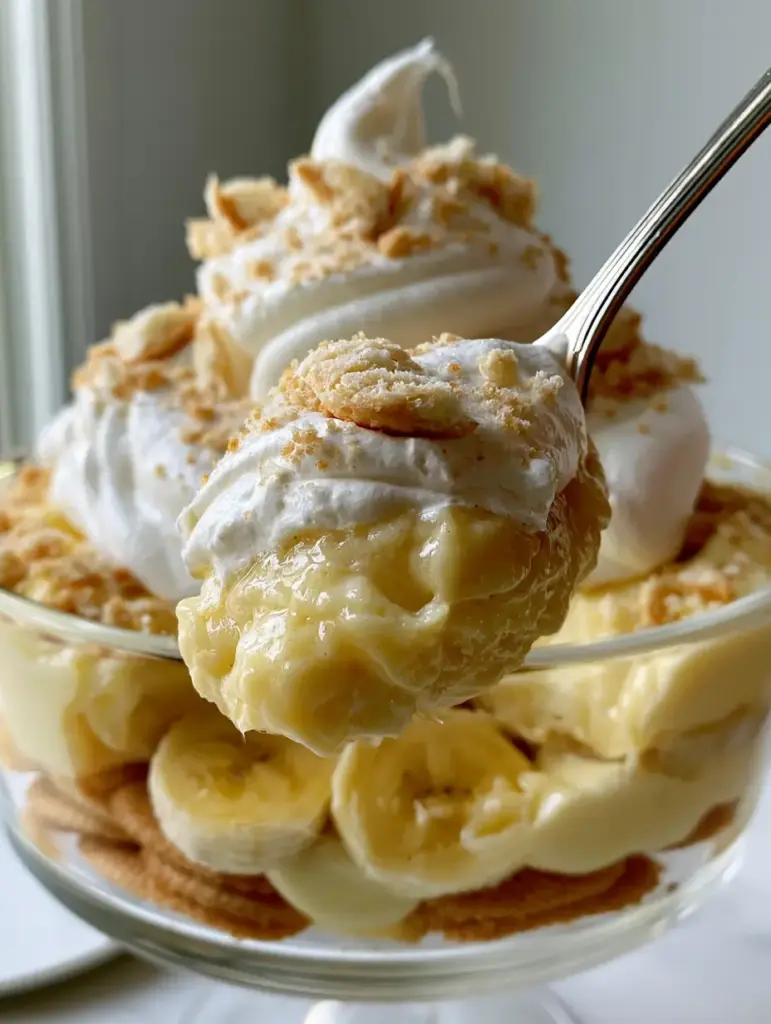
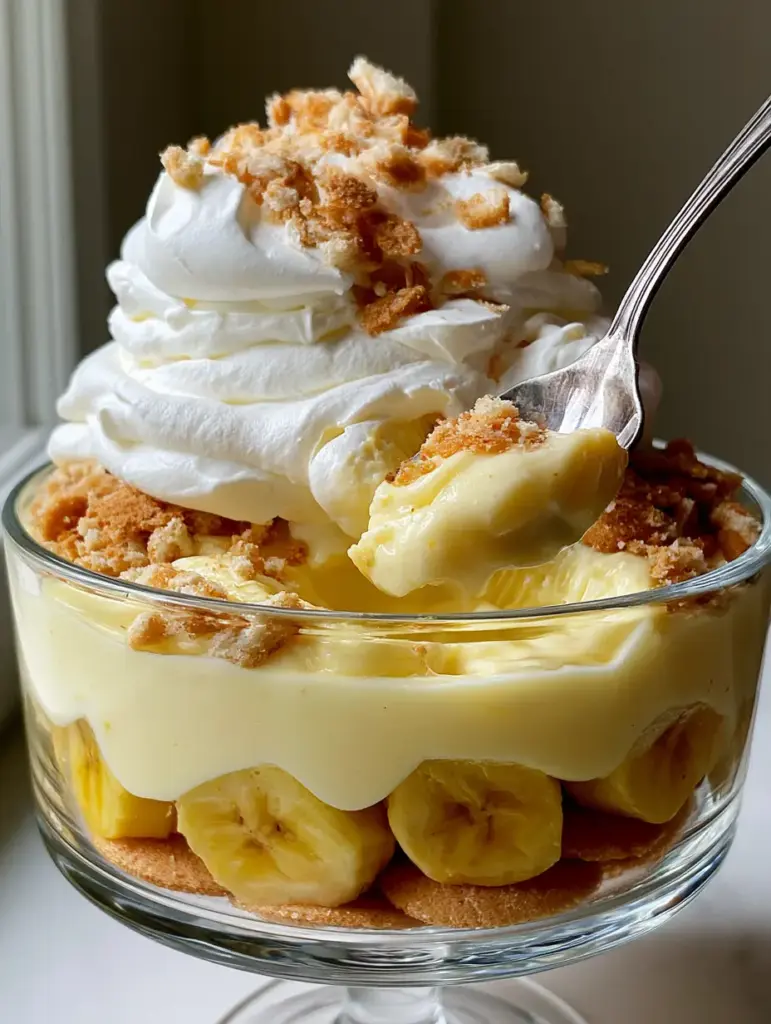
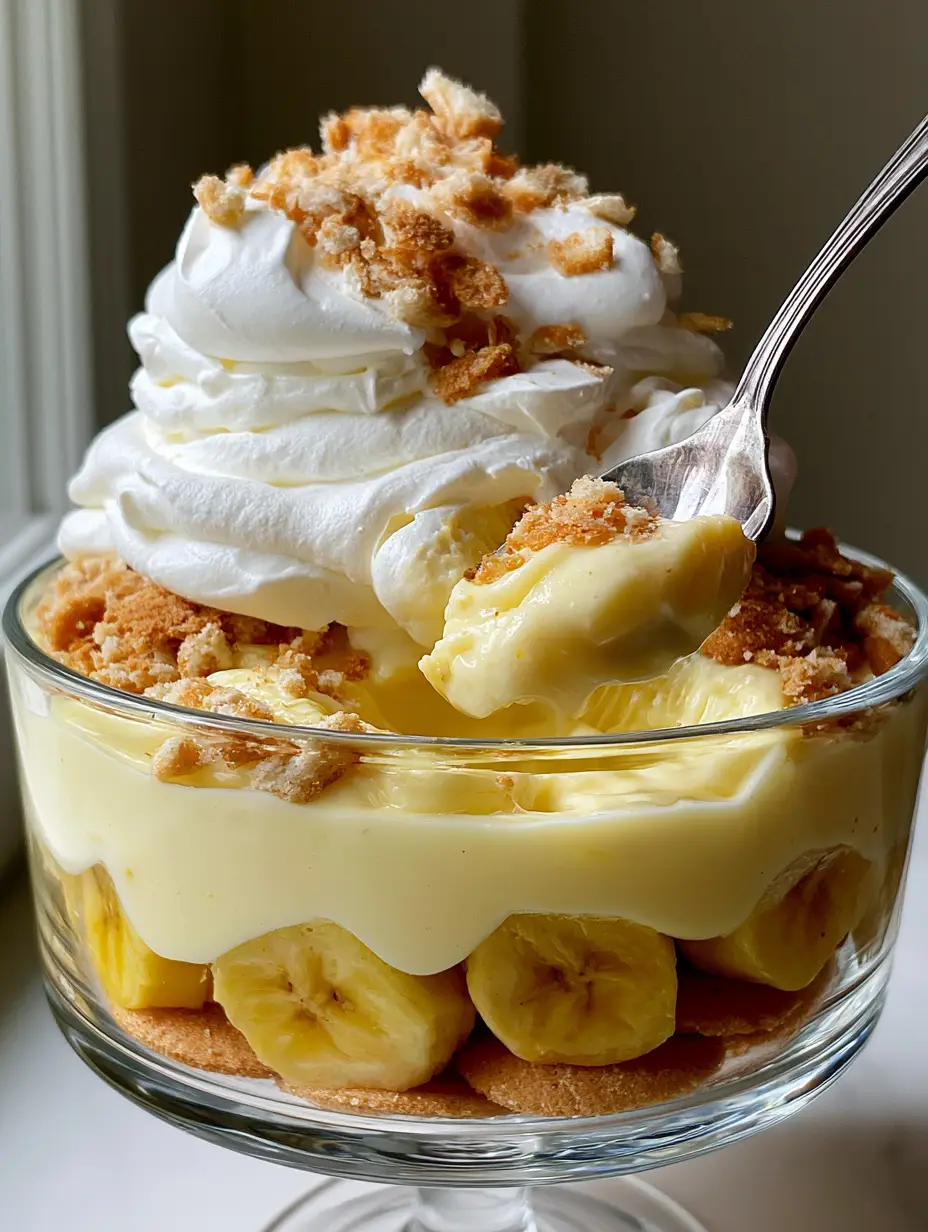
There is a specific visual magic that occurs when you assemble a truly authentic homemade banana pudding. It is not just about the flavor; it is about the architecture of the layers, the density of the custard, and that iconic “mountain” of fluffy whipped cream that commands attention in a clear glass trifle bowl.
This recipe is designed to recreate the exact sensory experience of a high-end Southern kitchen. We are moving far beyond instant mixes to a heavy, velvety, pale yellow vanilla custard that holds its shape on a silver spoon without a single drip or sag.
Whether you are preparing this for a Sunday dinner or a summer potluck, the goal is a stable, decadent dessert that looks as good as it tastes. By following this scientifically backed method, you will achieve the distinct, stable layers and golden-brown wafer crunch that define the ultimate homemade banana pudding.
The Culinary Blueprint: Why This Pudding Construction Works
- Unmatched Density: We utilize a high egg-yolk-to-milk ratio to ensure a custard that is noticeably thick and velvety, providing the structural integrity seen in professional food photography.
- Textural Contrast: By combining whole vanilla wafers with crushed wafer crumbs, we create a multi-dimensional crunch that persists even after the pudding has set.
- Sustained Stability: The whipped cream is whipped to stiff peaks, ensuring it stands as a massive, stable mountain rather than melting into the custard layer below.
- Visual Vibrancy: We prioritize ripe yellow bananas, sliced into thick rounds, to provide a bright pop of color against the creamy, pale yellow custard.
Essential Foundations: The Science of Your Ingredients
To achieve a result that matches our visual prompt—a heavy, non-dripping scoop—we must select ingredients that offer both flavor and structural reinforcement. Every element in this homemade banana pudding serves a specific culinary purpose.
Whole Milk and Heavy Cream: 3 cups (720ml) of whole milk provides the liquid base, while 1 cup (240ml) of heavy cream adds the fat content necessary for that luxurious, “heavy” mouthfeel. This combination ensures the custard is rich and opaque rather than translucent.
Granulated Sugar: 1 cup (200g) of sugar does more than sweeten; it interferes with the coagulation of egg proteins. This results in a smoother, more tender custard that remains stable during the layering process.
Cornstarch: 1/3 cup (40g) of cornstarch is our primary thickening agent. It provides the “gel” strength required for the custard to hold its shape when lifted by a silver spoon.
Egg Yolks: 6 large egg yolks are the secret to the pale yellow hue and the emulsified, velvety texture. Yolks provide lecithin, which binds the fats and liquids into a cohesive, thick sauce.
Pure Vanilla Extract: 1 tbsp (15ml) of high-quality vanilla is essential. Since this is a vanilla-forward dessert, the aromatic profile depends entirely on the quality of your extract.
Salt and Butter: A pinch of sea salt and 2 tbsp (30g) of unsalted butter are added at the end. The butter adds a professional sheen to the custard, while the salt balances the sweetness of the bananas.
Ripe Bananas: Use 5-6 large, ripe yellow bananas. Look for fruit with a few small brown “sugar spots” but no bruising, ensuring they are sweet but still firm enough to hold their shape in the trifle dish.
Vanilla Wafers: You will need 1 box (311g) of golden-brown vanilla wafers. We will use them whole for the base and sides, and crushed into fine crumbs for the topping to mimic the texture of a Southern bakery classic.
The Professional Toolkit for a Stunning Presentation
To achieve the “vertically oriented” beauty of a layered trifle, your equipment is just as important as your ingredients. Using a clear glass vessel is non-negotiable for showing off those distinct, stable layers.
You will need a 3-quart (approx. 3 liter) clear glass trifle bowl. The straight sides of a trifle dish allow the wafers and bananas to sit flush against the glass, creating that clean, professional look.
A heavy-bottomed saucepan is vital for the custard. It ensures even heat distribution, preventing the egg yolks from curdling or the milk from scorching on the bottom of the pan.
Lastly, a balloon whisk and a silicone spatula are your best friends. The whisk incorporates the cornstarch without lumps, while the spatula allows you to scrape every bit of thick custard from the pan into the bowl.
Mastering the Thick Southern Custard: A Step-by-Step Guide
1. Preparing the Dry Base and Scalding the Milk
In your heavy-bottomed saucepan, whisk together the sugar, cornstarch, and salt. This step is crucial because it coats the cornstarch granules in sugar, preventing them from clumping when the liquid is added.
Slowly pour in the whole milk and heavy cream while whisking constantly. Place the pan over medium heat and cook, stirring frequently, until the mixture begins to steam and slightly thicken—this should take about 6 to 8 minutes.
2. The Art of Tempering the Yolks
Place your 6 egg yolks in a medium heat-proof bowl and whisk them lightly. To prevent the eggs from scrambling, you must “temper” them by slowly drizzling about 1 cup (240ml) of the hot milk mixture into the yolks while whisking vigorously.
Once the yolks are warmed, pour the yolk mixture back into the saucepan with the remaining milk. This gradual temperature increase is what guarantees a smooth, professional-grade homemade banana pudding without any lumps of cooked egg.
3. Thickening to the Perfect Viscosity
Continue cooking the custard over medium heat, whisking constantly. You are looking for a specific sensory cue: the mixture will transition from a liquid to a heavy, pudding-like consistency that coats the back of a spoon.
Once large bubbles begin to “blub” to the surface, cook for exactly 1 more minute to fully hydrate the cornstarch. Remove from heat and stir in the butter and vanilla extract until the butter is melted and the custard is glossy and pale yellow.
Architecting the Layers: Constructing the Trifle
Before you begin layering, allow the custard to cool for about 15 minutes at room temperature, pressing a piece of plastic wrap directly onto the surface to prevent a skin from forming. This ensures the custard is thick enough to support the wafers without making them immediately soggy.
Creating the Foundation
Start by placing a single layer of whole vanilla wafers at the bottom of your clear glass trifle bowl. For a professional touch, stand some wafers vertically against the glass so the golden-brown circles are visible from the side.
The Fruit and Custard Rotation
Add a generous layer of thick-sliced bananas over the wafers. Use enough bananas so that they form a solid barrier. Pour one-third of your thick vanilla custard over the bananas, using your spatula to smooth it to the edges of the glass.
Repeat this process twice more: wafers, bananas, custard. By the time you reach the final layer of custard, it should be sitting just below the rim of the bowl, providing a stable platform for the whipped cream mountain.
Achieving the Massive Fluffy Whipped Cream Topping
To get the “stiff peaks” described in our visual blueprint, use 2 cups (480ml) of cold heavy whipping cream and 1/4 cup (30g) of powdered sugar. Beat on high speed until the cream is thick and holds its shape rigidly when the beaters are lifted.
Pile the whipped cream onto the top of the pudding. Do not smooth it out; instead, use a spoon to create swirls and “peaks” that give it a mountain-like appearance. This provides the “massive, stable” look that defines a high-end Southern dessert.
Finish by sprinkling a heavy layer of crushed vanilla wafer crumbs over the top. The contrast between the fluffy white cream and the golden-brown crumbs is the final touch for a picture-perfect homemade banana pudding.
Expert Tips for a Non-Drip Scoop
- Chill Time is Mandatory: For a scoop that doesn’t drip off the silver spoon, the pudding must refrigerate for at least 4 to 6 hours. This allows the cornstarch and egg yolks to fully set into a stable gel.
- Banana Placement: Don’t let the bananas touch the glass directly if you want them to stay yellow longer. Tucking them slightly inward and letting the custard seal the edges prevents oxidation.
- The Crumble Technique: For the best crumbs, place the wafers in a plastic bag and crush them with a rolling pin. You want a mix of fine dust and small chunks for the best visual appeal.
- Temperature Control: Never add the whipped cream to warm custard. If the custard hasn’t cooled significantly, the whipped cream will melt and lose its “massive mountain” structure.
Storage and Preservation
Banana pudding is best enjoyed within 24 to 48 hours of assembly. The wafers will naturally soften over time, moving from a “crunch” to a “cake-like” texture, which many Southern purists actually prefer.
Keep the dish tightly covered with plastic wrap in the refrigerator. We do not recommend freezing this recipe, as the custard can “weep” or separate once thawed, destroying the beautiful layers you worked so hard to create.
What to Serve With This Southern Delight
While this homemade banana pudding is a powerhouse on its own, it fits perfectly into a larger dessert spread. If you love the flavor profile of bananas and cream, you might also enjoy our banana pudding cheesecake for a more formal occasion.
For those who prefer a quicker version of these flavors on a weekday, our no-bake banana pudding offers a similar taste with less stove time. If you find yourself with extra bananas, consider prepping some banana pudding overnight oats for a decadent breakfast the next morning.
For a complete dessert table contrast, pair the creamy yellow pudding with something deep and rich, like our salted brownie crinkle cookies or even a vibrant red velvet banana pudding for a holiday twist.
Frequently Asked Culinary Questions
Yes, it is actually better when made 4-8 hours in advance. However, try not to exceed 24 hours before serving, as the bananas may begin to release moisture and the wafers can become overly soft.
While possible, instant pudding will not have the same ‘heavy’ density or rich, pale-yellow color as this scratch-made version. The structural integrity of the layers depends on the thickness of the egg-yolk-based custard.
The best way to prevent browning is to ensure the bananas are fully submerged or ‘sealed’ by the thick custard. This limits their exposure to air. Using bananas that are ripe but firm also helps maintain color.
For the best texture and a scoop that holds its shape, the pudding should be refrigerated for at least 4 to 6 hours. This allows the custard to firm up and the wafers to achieve a softened, cake-like consistency.
A runny pudding usually happens if the custard wasn’t cooked long enough to fully hydrate the cornstarch or if the egg yolks weren’t tempered correctly. Ensure the custard reaches a ‘blubbing’ boil for one minute while whisking.
The Master Homemade Banana Pudding Recipe
Homemade Banana Pudding: The Ultimate Thick and Creamy Southern Classic
Ingredients
Equipment
Method
- In a heavy-bottomed saucepan, whisk sugar, cornstarch, and salt until combined.
- Gradually whisk in the whole milk and heavy cream. Cook over medium heat, stirring constantly, until steaming.
- Whisk 1 cup of the hot milk mixture into the beaten egg yolks. Pour the tempered yolks back into the saucepan.
- Continue cooking and whisking until the mixture becomes thick and large bubbles pop on the surface. Cook for 1 more minute, then remove from heat.
- Stir in butter and vanilla extract until smooth. Let cool for 15 minutes with plastic wrap on the surface.
- Place a layer of vanilla wafers and sliced bananas in the bottom of a trifle dish.
- Spread 1/3 of the custard over the fruit. Repeat layers until all custard, bananas, and wafers (saving some for crumbs) are used.
- Beat heavy whipping cream and powdered sugar to stiff peaks. Pile onto the pudding.
- Top with crushed vanilla wafer crumbs. Refrigerate for 4-6 hours before serving.
Notes
Chill for at least 4 hours to let the layers set.
Conclusion: The Reward of Scratch-Made Quality
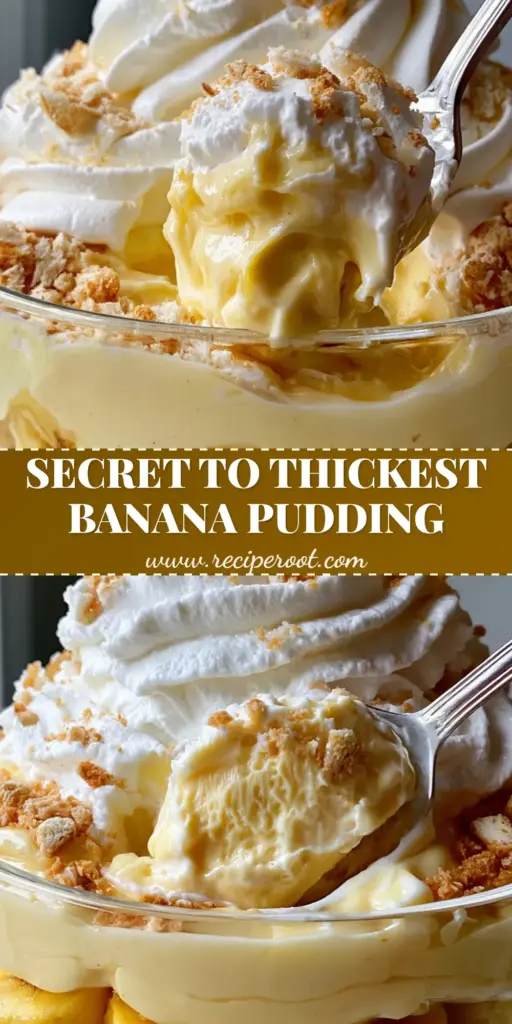
There is no substitute for the depth of flavor and the incredible density of a scratch-made custard. This homemade banana pudding represents the pinnacle of comfort food—rich, stable, and visually stunning. By focusing on the science of the custard and the architecture of the layers, you have created a dessert that is truly heirloom-quality.
We would love to see your creations! Share your photos and let us know how your layers turned out in the comments below. Don’t forget to follow us and save this recipe to your dessert boards on Pinterest for your next gathering.