The nilla wafer banana pudding cups represent the pinnacle of nostalgic comfort food, reimagined for the modern, elegant table. Forget the massive, messy trifle bowls of the past; these individual servings offer the perfect ratio of velvety custard, crisp cookie, and airy cream in every single bite.
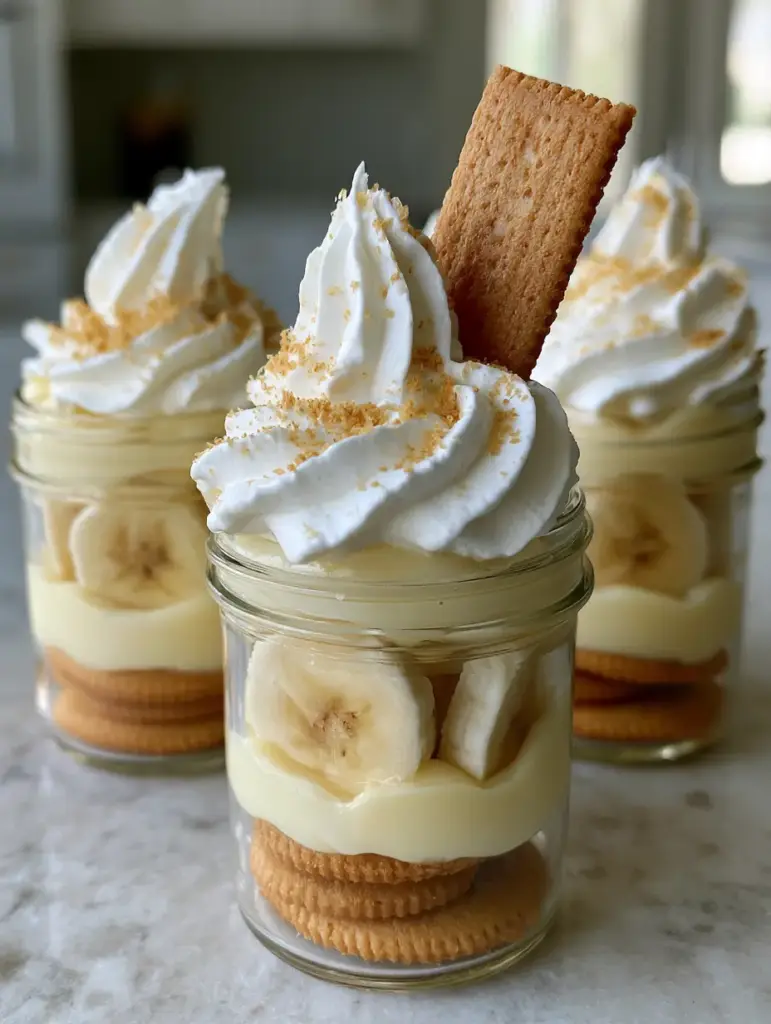
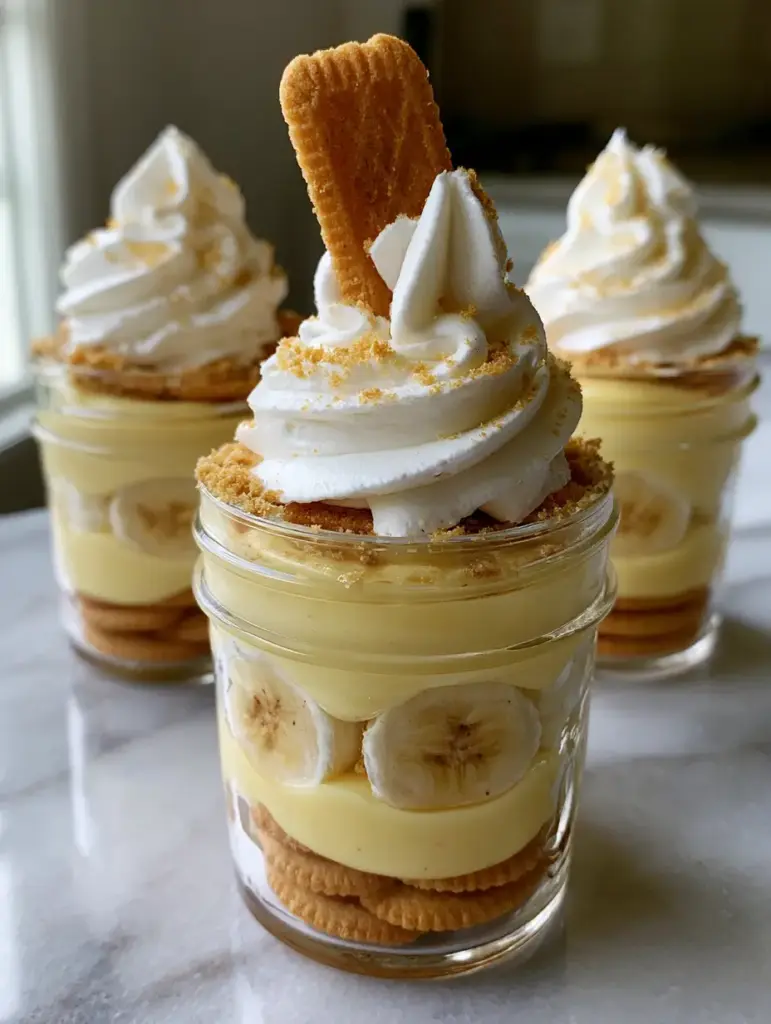
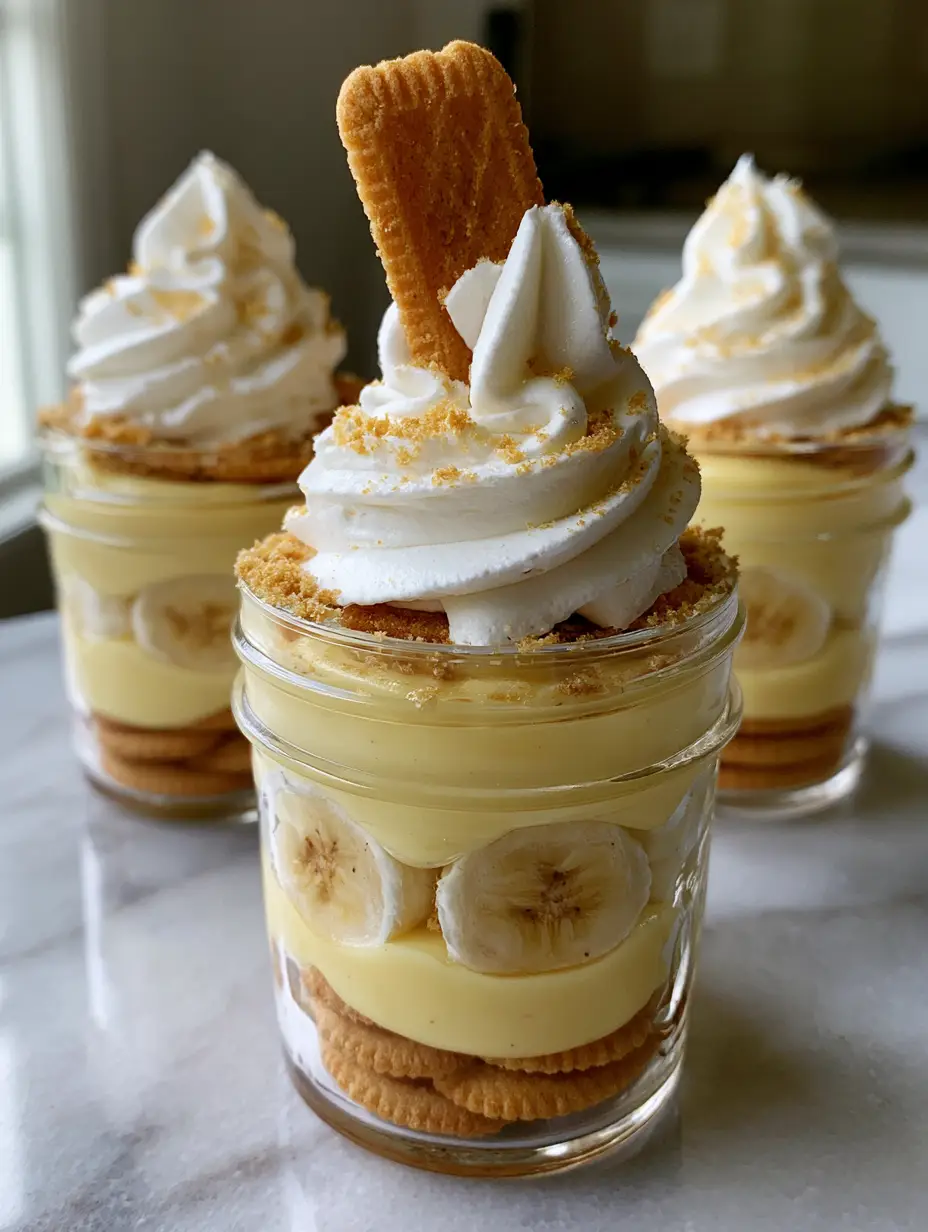
As you look at these elegant mini glass mason jars, the first thing you notice is the structural beauty of the layers. A solid foundation of whole golden-brown cookies supports a thick, pale yellow vanilla bean pudding that clings to the glass. Freshly sliced bananas provide a bright, creamy middle, all crowned by massive swirls of white whipped cream peaks and a fine dusting of golden cookie crumbs.
Whether you are hosting a sophisticated garden party or simply craving a portion-controlled indulgence, these nilla wafer banana pudding cups are designed to impress both the eyes and the palate. The combination of textures—from the crunch of the vertical wafer to the silky smoothness of the homemade custard—creates a sensory experience that store-bought mixes simply cannot replicate.
Why These Individual Banana Pudding Jars Outshine the Rest
- Structural Integrity: By using mini mason jars, we prevent the pudding from collapsing, ensuring every layer remains distinct and visually stunning from the first spoonful to the last.
- The Vanilla Bean Difference: Unlike artificial flavorings, we use real vanilla bean specks to create a “velvety pale yellow” hue and a deep, floral aroma that defines the custard.
- Perfect Portioning: These cups eliminate the “first scoop mess” of traditional banana pudding, making them ideal for gatherings where presentation is paramount.
- Contrasting Textures: We combine whole wafers for a softened “cake-like” base with a single crisp wafer tucked at a 45-degree angle for an immediate crunch.
The Essential Elements for Perfect Nilla Wafer Banana Pudding Cups
To achieve the exact visual and flavor profile described in our blueprint, every ingredient must serve a specific culinary purpose. We aren’t just making pudding; we are building a vertical dessert masterpiece.
Nilla Wafers (11 oz / 312g): You will need a full box to provide the “whole golden-brown” base layers and the “fine golden cookie crumbs” for the dusting. These cookies act as a sponge, absorbing just enough moisture from the pudding to become tender without losing their shape.
Whole Milk (3 cups / 720ml): Use full-fat dairy to ensure the pudding achieves that “thick velvety” consistency. The fat content is crucial for a mouthfeel that coats the tongue and carries the vanilla flavor.
Egg Yolks (4 large): The yolks provide the “pale yellow” color naturally while adding richness and stability to the custard. They act as the primary emulsifier, bridging the gap between the liquid milk and the solid starches.
Granulated Sugar (3/4 cup / 150g): This provides the necessary sweetness to balance the natural sugars in the bananas. It also aids in the tenderizing of the egg proteins during the cooking process.
Cornstarch (1/4 cup / 32g): This is our “invisible” structural engineer. It thickens the pudding to the point where it can support the weight of the “massive swirl” of whipped cream without sagging.
Vanilla Bean Paste or Pod (1 tbsp / 15ml): Look for the tiny black specks in the final product. This is the hallmark of high-end nilla wafer banana pudding cups and provides a much more complex flavor than extract alone.
Unsalted Butter (2 tbsp / 28g): Whisked in at the very end, butter adds a glossy sheen to the pudding and a silky finish that feels luxurious on the palate.
Ripe Bananas (3 large): Select bananas that are yellow with just a few brown spots. They should be firm enough to hold their “circular slice” shape but ripe enough to offer maximum sweetness.
Heavy Whipping Cream (1.5 cups / 360ml): This must be ice-cold to achieve the “airy white whipped cream peaks” seen in the visual prompt. High fat content is required for the peaks to hold their shape vertically.
Powdered Sugar (1/4 cup / 30g): We use powdered sugar for the topping because the added cornstarch in the sugar helps stabilize the whipped cream for hours.
Professional Tools for a Gallery-Worthy Finish
The right equipment turns a home kitchen into a professional pastry station. To match the handheld, authentic look of our smartphone photo, you’ll need the following:
Mini Glass Mason Jars (4 oz or 8 oz): The clear glass is essential for showcasing the layers. Ensure they are wide-mouthed for easy filling.
Heavy-Bottomed Saucepan: This prevents the milk and sugar from scorching during the custard-making process. Even heat distribution is the secret to a smooth pudding.
Fine-Mesh Sieve: Even the best pastry chefs get occasional lumps. Straining your finished pudding ensures that “velvety” texture is guaranteed.
Piping Bag with a Large Round Tip: While you can spoon the cream, a piping bag is the only way to achieve the “massive swirl of airy white peaks” that look professionally styled.
The Culinary Blueprint: Constructing Your Pudding Cups
Creating the Velvety Vanilla Bean Custard
In your heavy-bottomed saucepan, whisk together the sugar, cornstarch, and a pinch of salt. Gradually pour in the 3 cups (720ml) of milk while whisking constantly to prevent cornstarch clumps. Add your vanilla bean paste now so the heat can release the aromatic oils.
Cook over medium heat, stirring continuously with a silicone spatula. You must scrape the bottom and corners of the pan. Once the mixture begins to bubble and thicken, temper your egg yolks by slowly adding a half-cup of the hot milk mixture to the yolks, then pouring the yolk mixture back into the pan. This prevents “scrambled eggs” in your dessert.
Continue cooking for 2 more minutes until the pudding is thick and glossy. Remove from heat and stir in the butter. Immediately pass the pudding through a fine-mesh sieve into a bowl. Cover with plastic wrap, pressing it directly onto the surface of the pudding to prevent a skin from forming. Chill for at least 2 hours.
Preparing the Fresh Components
While the pudding sets, slice your bananas into 1/4 inch (0.6cm) rounds. If you aren’t assembling immediately, toss them in a teaspoon of lemon juice to prevent browning, though the pudding layers will naturally seal them from air once assembled.
For the “golden cookie crumbs,” place 10 Nilla wafers in a zip-top bag and crush them with a rolling pin until they resemble fine sand. Set these aside for the final flourish.
The Art of the Layered Assembly
Place two or three whole Nilla wafers at the bottom of each mini mason jar. This creates the “foundation layer” described in our visual prompt. Spoon a generous layer of the chilled, thick vanilla bean pudding over the cookies.
Press 4-5 banana slices against the glass walls so they are visible from the outside, then fill the center with more pudding. Repeat the cookie and pudding layers until you are about a half-inch from the rim.
Whip your heavy cream and powdered sugar until stiff peaks form. Using your piping bag, create a massive, circular swirl that rises above the rim of the jar. This should look like “airy white peaks.”
The Final Forensic Touches
This is where the nilla wafer banana pudding cups truly come to life. Take one whole, crisp Nilla wafer and tuck it vertically into the side of the whipped cream at a 45-degree angle. Finally, take a pinch of your cookie dust and sprinkle it lightly over the top. The contrast of the white cream against the golden dust is the hallmark of an authentic, high-quality dessert.
Expert Tips for Success
- The “Snap” Test: Ensure the wafer you tuck into the top is added just before serving. This provides the sensory contrast of a crisp cookie against the softened wafers inside the jar.
- Temperature Control: Never add warm pudding to the jars. It will cause the bananas to weep moisture and the whipped cream to melt instantly.
- Vanilla Quality: If you don’t have vanilla bean paste, use the seeds from one whole pod. The visual presence of the “specks” is what elevates this from a snack to a gourmet dessert.
- Avoid Over-Mixing: Once the whipped cream hits stiff peaks, stop immediately. Over-whipping will turn it into butter, ruining the “airy” aesthetic.
Storage and Make-Ahead Advice
These nilla wafer banana pudding cups are best enjoyed after they have sat in the refrigerator for at least 4 hours, but no more than 24. This window allows the cookies in the base to soften to a cake-like consistency while the bananas remain bright and firm.
We do not recommend freezing these cups. The custard will break and become grainy upon thawing, and the bananas will lose their structural integrity. For the best experience, assemble the pudding and fruit up to 12 hours in advance, but add the whipped cream and the final “45-degree wafer” just before your guests arrive.
What to Serve With This Elegant Dessert
Since these pudding cups are rich and creamy, they pair beautifully with a spread of other textures. Consider serving them alongside a plate of soft pudding cookies or for a seasonal twist, try a spiced snickerdoodle.
If you are looking for other ways to use Nilla wafers, you might enjoy our banana pudding dessert bars or the decadent mini banana pudding cheesecakes. If you love the flavor but want something warmer, our banana pudding tres leches is a fantastic alternative for a sit-down dinner.
Frequently Asked Questions
Yes, but the ‘cup’ format ensures perfect portioning and prevents the whipped cream from collapsing under its own weight during serving.
While possible, instant mix lacks the structural thickness and pale yellow vanilla bean specks required for the professional look and velvety texture of this recipe.
The thick pudding acts as a seal against oxygen. To be safe, ensure the bananas are fully submerged in pudding or tossed lightly in lemon juice before layering.
They are best within 24 hours. After that, the Nilla wafers can become too soggy and the bananas may begin to soften excessively.
This is usually caused by not cooking the cornstarch long enough. Ensure the mixture bubbles for at least 1-2 minutes to fully activate the thickening properties.
The Complete Nilla Wafer Banana Pudding Cups Recipe
Nilla Wafer Banana Pudding Cups: The Ultimate Individual Layered Dessert
Ingredients
Equipment
Method
- In a saucepan, whisk sugar, cornstarch, and milk. Add vanilla bean paste. Heat over medium while stirring.
- Once bubbling, whisk 1/2 cup hot liquid into egg yolks. Pour yolk mixture back into pan and cook 2 minutes until thick and velvety.
- Whisk in butter. Strain through a sieve. Cover with plastic wrap touching the surface and chill until cold.
- Place 2-3 whole Nilla wafers at the bottom of each mason jar. Top with a layer of thick pudding.
- Add a middle layer of fresh circular banana slices, pressing some against the glass for visual appeal.
- Pipe a massive swirl of airy white whipped cream peaks on top. Tuck one crisp wafer at a 45-degree angle and sprinkle with crushed cookie dust.
Notes
For the crispest top cookie, add the 45-degree angle wafer immediately before serving.
Closing & Call to Action
There is something undeniably magical about a dessert that looks as good as it tastes. These nilla wafer banana pudding cups bring a touch of class to a Southern staple, combining the “thick velvety” textures of homemade custard with the playful crunch of the world’s favorite vanilla cookie.
If you made these for your next event, we want to hear about it! Did you opt for the mini mason jars or a different glass vessel? Leave a comment below and let us know your thoughts. Don’t forget to share your creations on Pinterest and tag us so we can see your beautiful “airy white peaks!”


