There is something inherently celebratory about the deep, crimson hues of red velvet paired with the nostalgic comfort of a classic Southern dessert. This Red Velvet Banana Pudding is not just a treat; it is a visual and textural masterpiece designed to be the centerpiece of any gathering. By merging the cocoa-kissed richness of moist cake crumbs with the silky, vanilla-flecked embrace of professional-grade custard, we create a dessert that transcends the ordinary.
Inspired by the sharp, distinct layers found in high-end bakery trifles, this recipe focuses on structural integrity and flavor balance. We move beyond simple “pudding from a box” to deliver a gourmet experience. Every spoonful offers a contrast between the crunch of a golden wafer and the velvet-smooth finish of our specialized cream cheese whipped topping.
Why This Red Velvet Banana Pudding Will Become Your New Signature Dessert
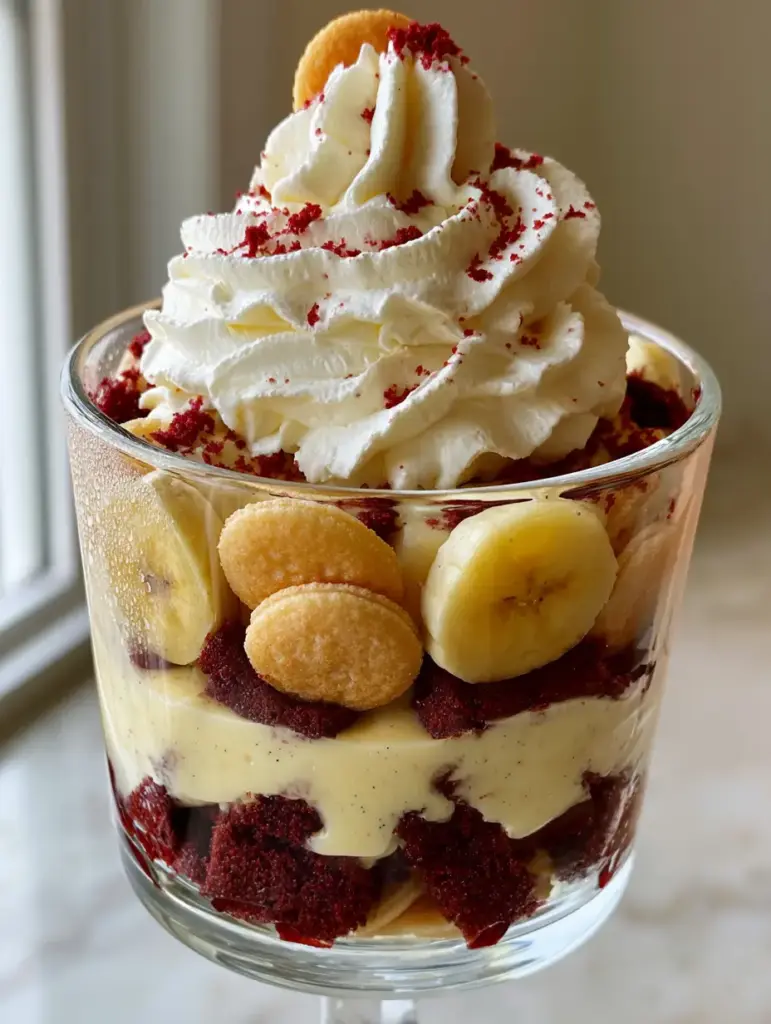
- Visual Architectural Excellence: The sharp, distinct layers of dark red cake and pale yellow custard create a stunning contrast that looks professional even for a novice baker.
- Stabilized Textures: Unlike traditional puddings that can weep or become soggy, our use of stabilized cream cheese whipped cream ensures stiff peaks that hold their shape for hours.
- Multi-Dimensional Flavor: We balance the sweetness of the bananas with the slight tang of cream cheese and the earthy depth of premium cocoa.
- Hydrated Fruit Integrity: Using professional techniques, we ensure the banana slices remain firm and hydrated, preventing the unappealing browning often seen in layered desserts.
Essential Components for a Vibrant Red Velvet Trifle
To achieve the visual result of a tall, elegant clear glass trifle jar, every ingredient must serve a specific culinary purpose. Here is what you will need for your Red Velvet Banana Pudding masterpiece.
Moist Red Velvet Cake: You will need 4 cups (approx. 400g) of prepared red velvet cake. The cake must be moist enough to crumble into “chunky” pieces without turning into fine dust, providing the essential dark red foundation.
Whole Milk and Heavy Cream: Use 3 cups (720ml) of whole milk for the pudding and 2 cups (480ml) of heavy cream for the topping. The high fat content is non-negotiable for achieving the “custard-like” thickness and “stiff peaks” described in our visual blueprint.
Vanilla Bean Paste: 1 tbsp (15ml) of vanilla bean paste is preferred over extract. This provides those visible vanilla bean specks that signal high-quality craftsmanship in the pale yellow pudding layer.
Full-Fat Cream Cheese: 8 oz (225g) of brick-style cream cheese is the secret to our stabilized topping. It adds a necessary weight and velvet-smooth texture that standard whipped cream lacks.
Firm Yellow Bananas: 4-5 large bananas that are perfectly yellow with minimal spotting. We need them to be firm enough to slice into perfectly round discs that hold their shape against the moist layers.
Golden Vanilla Wafers: 1 box (approx. 300g) of crisp vanilla wafers. These provide the “crisp golden” element that offers a textural break between the softer pudding and cake layers.
Foundational Invisible Ingredients: Do not forget 1/2 cup (100g) of granulated sugar for the custard, 3 tbsp (24g) of cornstarch for thickening, and a pinch of fine sea salt to enhance the cocoa notes in the red velvet cake.
Professional Tools for Trifle Success
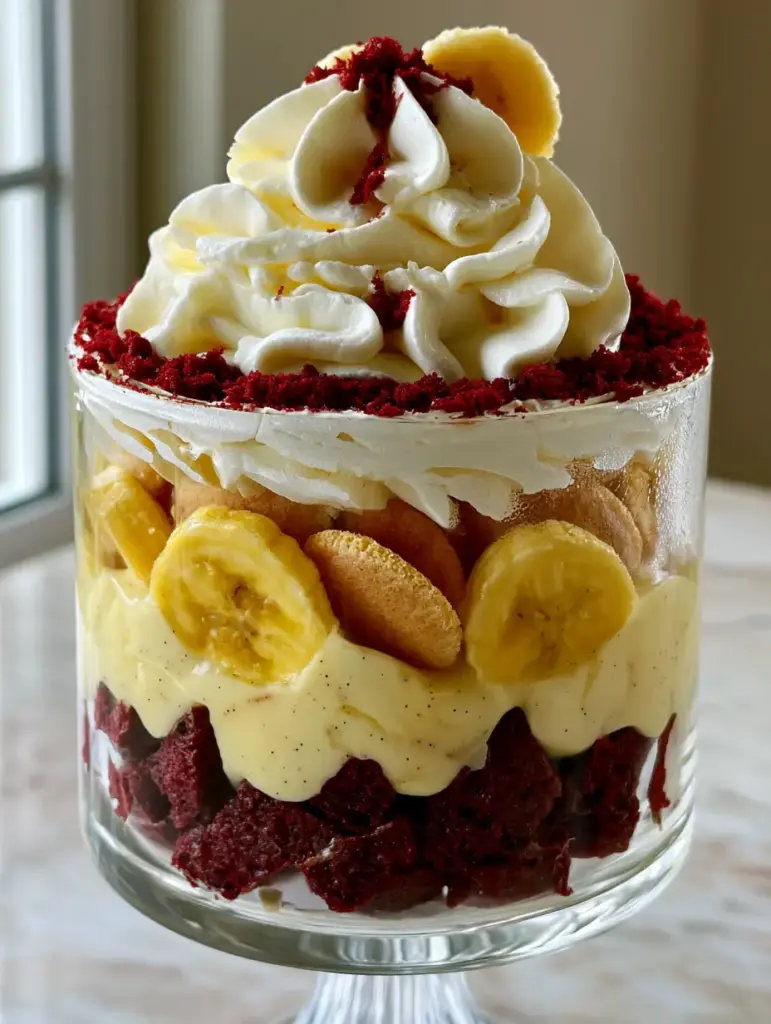
To replicate the high-quality smartphone photo look of this Red Velvet Banana Pudding, you will need a 3-quart (2.8L) clear glass trifle bowl or jar. The transparency is vital for showcasing the “distinct, sharp layers” that make this dish so appealing.
A heavy-bottomed saucepan is required for the custard to ensure even heat distribution and prevent scorching. Additionally, a stand mixer or electric hand mixer is essential for whipping the cream cheese and heavy cream into those iconic stiff peaks. Finally, a large piping bag with a star tip will help you achieve the “massive, structured swirl” on the top of the jar.
Building the Masterpiece: Step-By-Step Assembly
Phase 1: Crafting the Velvet Vanilla Custard
In your heavy-bottomed saucepan, whisk together 1/2 cup (100g) sugar, 3 tbsp (24g) cornstarch, and a pinch of salt. Slowly pour in 3 cups (720ml) of whole milk while whisking constantly to ensure no lumps form. This is the foundation of our pale yellow, custard-like banana pudding.
Place the pan over medium heat. Continue whisking until the mixture thickens enough to coat the back of a spoon—this usually takes about 8-10 minutes. Remove from heat and immediately stir in 1 tbsp (15ml) vanilla bean paste and 2 tbsp (30g) of unsalted butter for a glossy finish. Transfer to a bowl, cover with plastic wrap (touching the surface), and chill until firm.
Phase 2: Preparing the Red Velvet Foundation
While the custard chills, take your prepared red velvet cake and gently break it into chunky crumbles. You want a mix of small bits and larger 1-inch pieces. This variety creates the “chunky, moist dark red velvet cake crumbles” mentioned in the visual prompt. If you are a fan of unique red velvet applications, you might also enjoy a banana pudding cheesecake which uses similar flavor profiles.
Phase 3: Slicing for Longevity
Slice your bananas into 1/4-inch (0.6cm) rounds. To ensure they look “firm and hydrated” and do not brown, toss them lightly in 1 tsp (5ml) of lemon juice. This acidity stalls oxidation without altering the flavor profile significantly. This technique is standard in high-end homemade banana pudding preparation.
Phase 4: Whipping the Stabilized Cream Cheese Topping
In a cold bowl, beat 8 oz (225g) of softened cream cheese with 1/2 cup (60g) of powdered sugar until completely smooth. Slowly stream in 2 cups (480ml) of very cold heavy cream. Increase the speed to high and whip until the mixture forms stiff, structured peaks. The texture should be velvet-smooth and capable of holding a deep swirl.
Phase 5: The Art of Layering
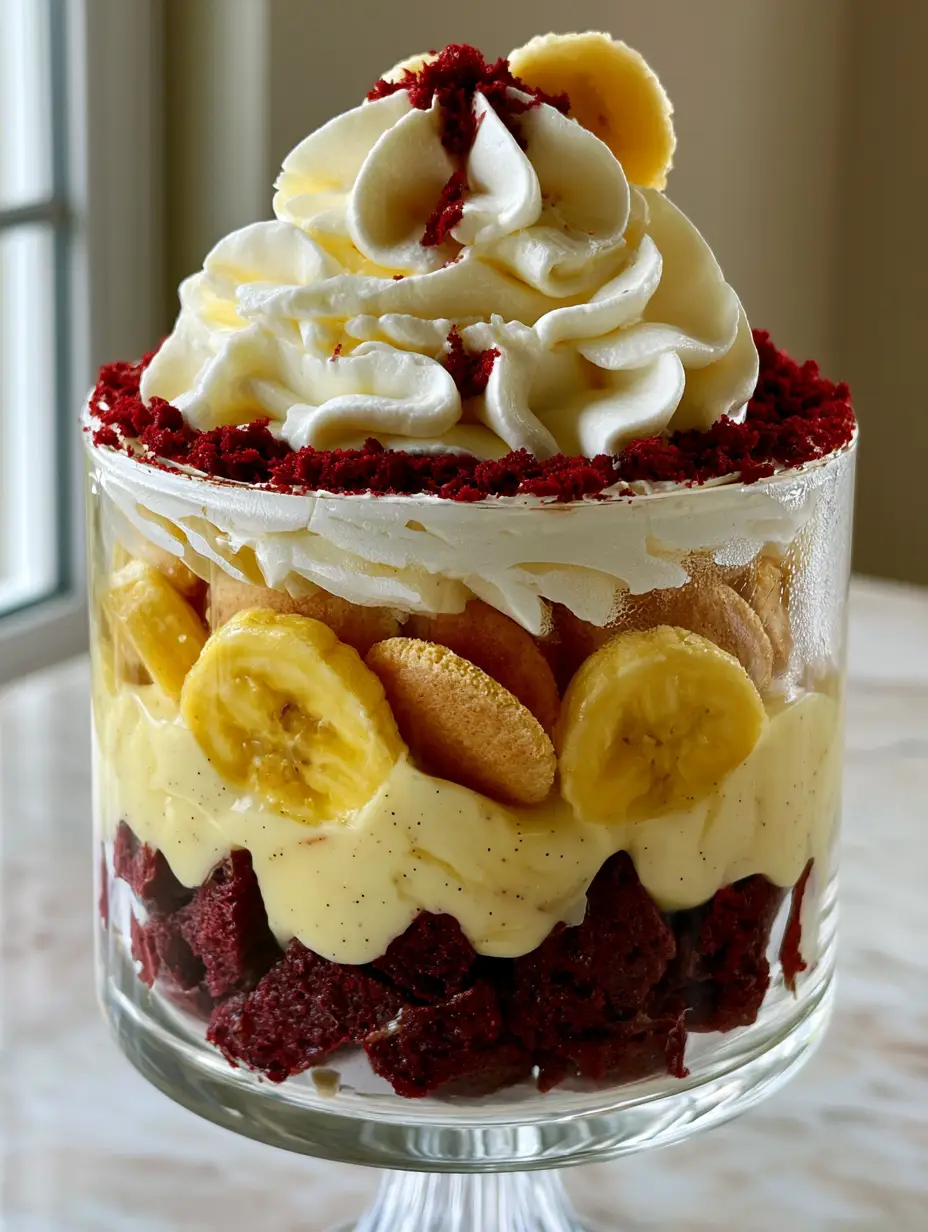
Start with a generous base of red velvet cake crumbs at the bottom of the glass jar. Next, carefully spoon a layer of the chilled vanilla custard over the cake. Press golden vanilla wafers and firm banana slices vertically against the glass walls for a decorative look before filling the center with more pudding.
Repeat the layers until you reach the top of the jar. This creates the “sharp layers” required for that professional aesthetic. If you prefer a faster version, you could adapt these layering techniques to a no-bake banana pudding recipe.
Expert Tips for the Perfect Red Velvet Banana Pudding
- Temperature Control: Ensure your custard is completely chilled before layering. If it is even slightly warm, it will melt the whipped cream and cause the red velvet crumbs to bleed color into the yellow pudding.
- Wafer Placement: For the best texture, place some wafers in the center of the pudding to soften into a cake-like consistency, while keeping the ones against the glass for a slight “crisp golden” visual.
- The Condensation Effect: To get the “slight condensation” look from the Midjourney prompt, chill the finished trifle in the refrigerator for at least 4 hours and bring it out into a room-temperature environment 10 minutes before photographing.
- Cocoa Dusting: Use a fine-mesh sieve for the final garnish of cocoa or cake crumbs. This ensures a “fine dusting” rather than clumps, maintaining the elegant feel of the dessert.
Storing and Serving Your Trifle
This Red Velvet Banana Pudding is best served after it has rested in the refrigerator for at least 4 to 6 hours. This allows the wafers to soften slightly and the flavors to meld. However, it should be consumed within 48 hours to ensure the bananas remain hydrated and the cake doesn’t become overly soggy.
We do not recommend freezing this dessert. The cellular structure of the bananas will break down upon thawing, and the cream cheese whipped cream may lose its stabilized texture, resulting in a watery mess. Keep it chilled until the moment of serving.
What to Pair With This Indulgent Treat
Because this dessert is rich and creamy, it pairs beautifully with a sharp, acidic beverage. A cold glass of milk is a classic choice, but for a brunch setting, consider serving it alongside a refreshing green juice to balance the palate. If you are hosting a larger dessert party, these trifles look stunning next to a tray of salted brownie crinkle cookies or even chewy brownie cookies for a full chocolate-themed spread.
Common Questions About Layered Banana Pudding
Yes, a boxed mix works perfectly! Just ensure the cake is fully cooled before crumbling so the pieces stay chunky and don’t turn into a paste.
Toss the fresh banana slices in a small amount of lemon juice before layering. The acid prevents oxidation, keeping them firm and hydrated without affecting the sweet flavor.
For peak texture, serve within 4-6 hours. It will stay delicious for up to 48 hours, though the wafers will continue to soften over time.
Cooked custard is superior for trifles. It provides a thicker, more ‘custard-like’ consistency and a cleaner flavor profile that holds the weight of the red velvet crumbs.
You likely need more stabilization. This recipe uses full-fat cream cheese as a stabilizer. Ensure your heavy cream is ice-cold and beat until you see true stiff peaks.
The Ultimate Red Velvet Banana Pudding Recipe
Red Velvet Banana Pudding: The Ultimate Indulgent Southern Trifle
Ingredients
Equipment
Method
- Combine sugar, cornstarch, and salt in a saucepan. Whisk in milk and cook over medium heat until thickened and bubbly.
- Remove from heat; stir in vanilla bean paste and butter. Cover with plastic wrap and chill until firm.
- Beat cream cheese and powdered sugar until smooth. Gradually add heavy cream and whip to stiff peaks.
- Slice bananas into rounds and toss with lemon juice to prevent browning.
- In a trifle jar, layer red velvet crumbs, then custard, then wafers and bananas. Repeat until full.
- Pipe the cream cheese topping in a massive swirl and dust with fine cocoa or cake crumbs.
Notes
Ensure the custard is completely cold before assembling to prevent color bleeding.
Closing & Call to Action
Creating this Red Velvet Banana Pudding is an exercise in culinary art and patience. The reward is a dessert that tastes as vibrant as it looks, with every layer offering a new discovery of flavor and texture. Whether you are making this for a holiday or a simple Sunday dinner, it is guaranteed to leave an impression.
Did you try this recipe? We would love to see your sharp layers! Leave a comment below and let us know how your stabilized cream cheese topping turned out. Don’t forget to share your creations and follow us on Pinterest for more visually stunning recipes!