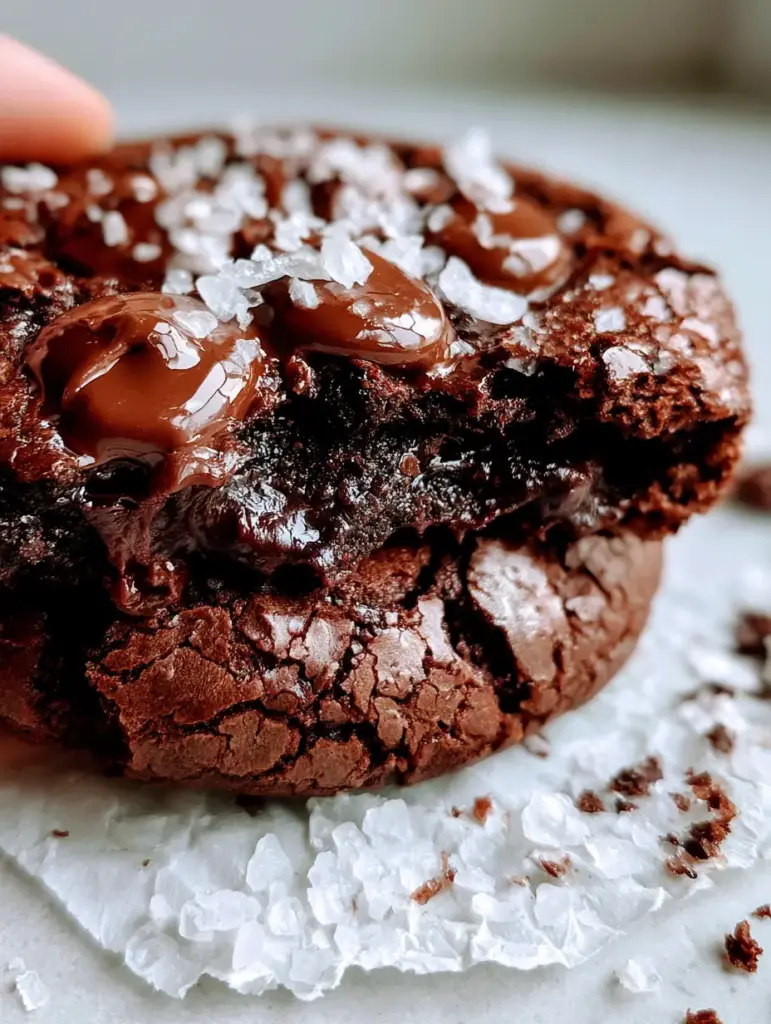
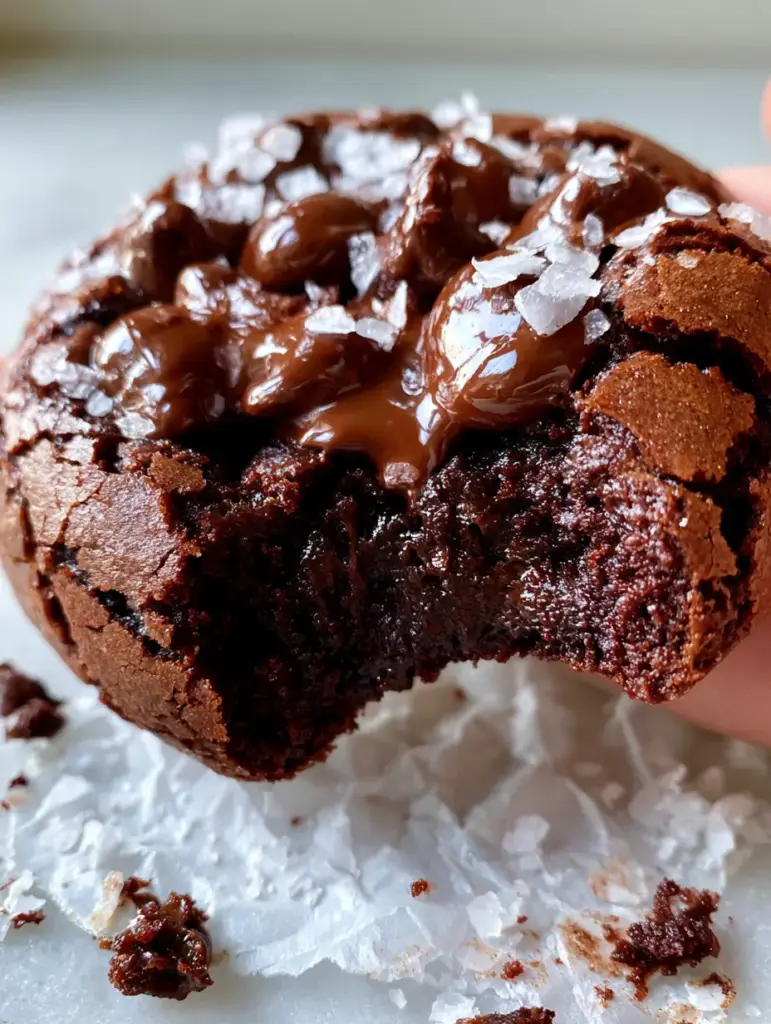
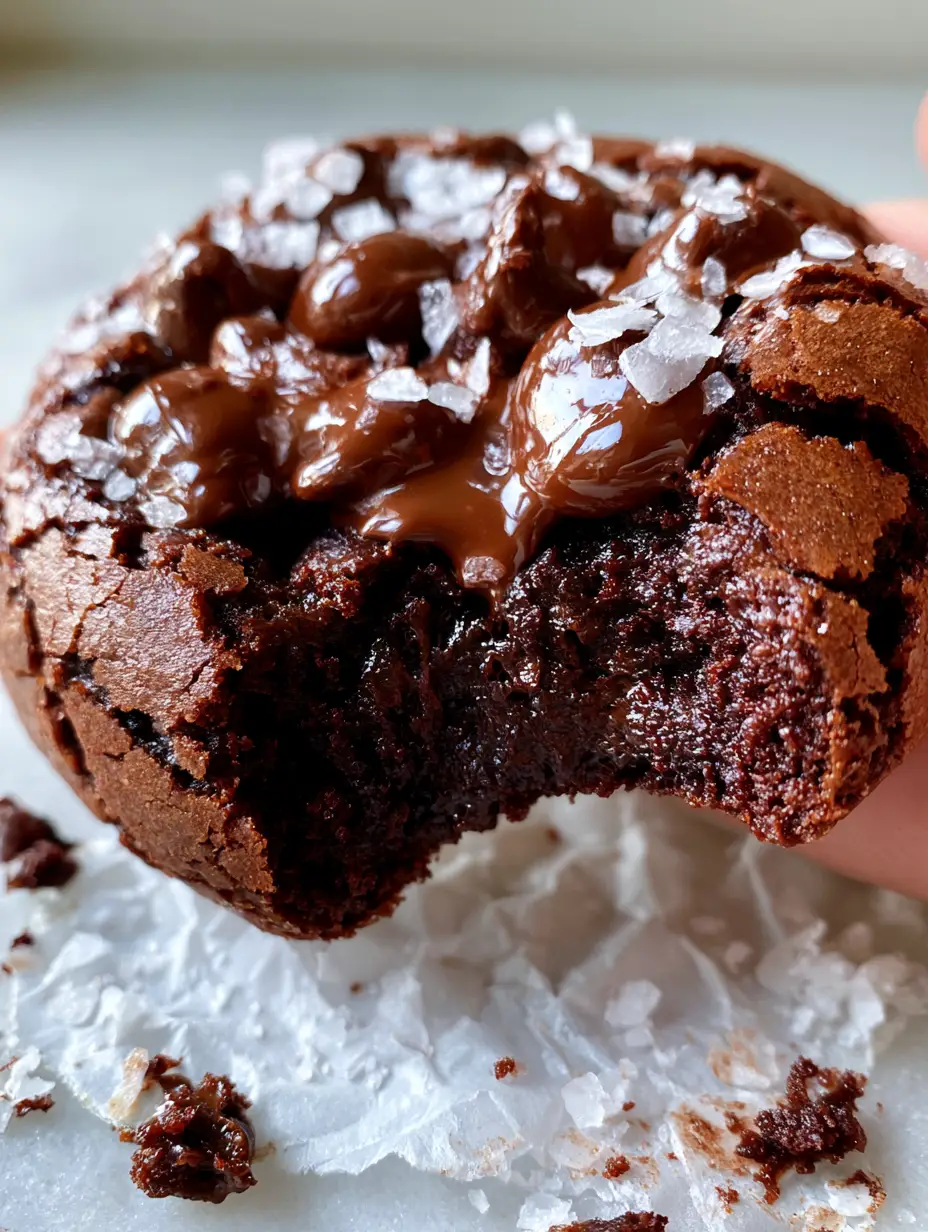
There is a specific kind of magic that happens when the world of a decadent, fudgy brownie collapses into the portable form of a cookie. These Salted Brownie Crinkle Cookies are not just another dessert; they are a masterclass in texture, flavor balance, and visual artistry. Imagine a cookie so rich and dark that it looks like volcanic rock, only to be shattered by a paper-thin, shiny crackled crust that yields to a steaming, molten center.
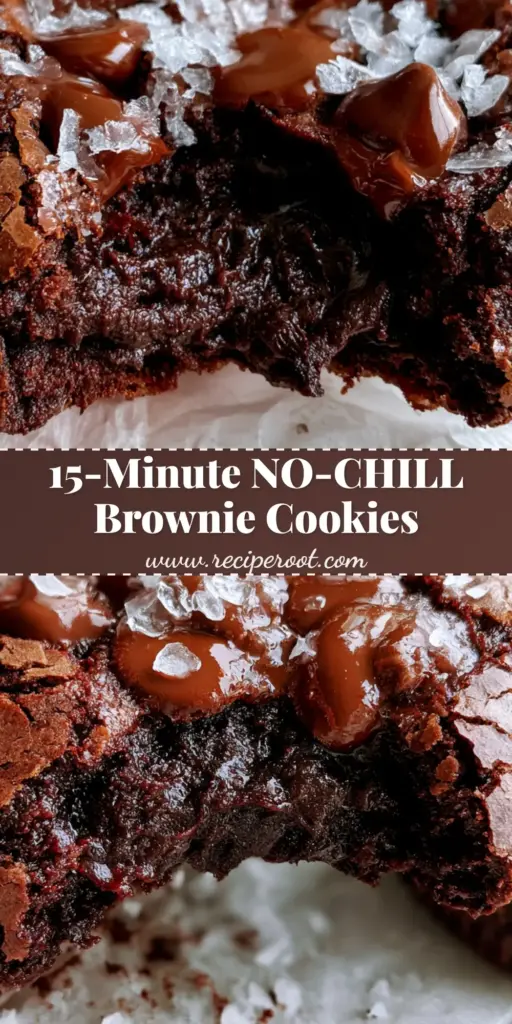
The first time you pull one of these apart, you will see exactly what makes them legendary. The deep cocoa-colored fissures across the surface contrast beautifully with glossy pools of semi-sweet chocolate, all highlighted by the bright, translucent sparkle of Maldon sea salt. This is the recipe for those who demand more from their cookies—more chocolate, more texture, and a more sophisticated salt-to-sweet ratio.
In this guide, we are going to dive deep into the science of the meringue-like top and the secrets to achieving that elusive “molten” interior. Whether you are a seasoned baker or a weekend enthusiast, these Salted Brownie Crinkle Cookies will become the crown jewel of your recipe box. Get ready to transform high-quality dark chocolate and simple pantry staples into a professional-grade handheld masterpiece.
Why These Fudgy Chocolate Masterpieces Outshine Every Other Recipe
When we set out to develop the perfect Salted Brownie Crinkle Cookies, we had a very specific visual and sensory checklist. We didn’t just want a “chocolate cookie”; we wanted a brownie in disguise. Here is what sets this specific version apart from the rest of the pack:
- The Iconic Meringue Crust: We use a specific sugar-beating technique to ensure a delicate, shiny, and paper-thin top that crackles the moment your teeth touch it.
- A Truly Molten Heart: By balancing the ratio of fats to flour, these cookies remain steaming and gooey in the center long after they’ve left the oven.
- Double Chocolate Depth: A combination of 70% dark chocolate and semi-sweet chips creates a complex flavor profile that isn’t just sweet—it’s intensely chocolatey.
- The Finishing Touch: Large, flaky Maldon sea salt flakes provide a high-relief texture and a sharp contrast that makes the dark chocolate flavors “pop” on the palate.
- Professional Aesthetic: Every cookie features deep, cocoa-colored fissures and glossy chocolate pools that look like they belong in a high-end artisanal bakery.
The Essential Ingredients for Your Salted Brownie Crinkle Cookies
To achieve the results seen in our visual blueprint, every ingredient must serve a structural and flavor-based purpose. We don’t use fluff—we use culinary science. Here is what you need to gather for your Salted Brownie Crinkle Cookies.
High-Quality Dark Chocolate (70% Cocoa): 8 oz (225g). This is the foundation of the fudgy dough; using a bar rather than chips for the base ensures a smoother melt and a more intense cocoa flavor.
Unsalted Butter: 1/2 cup (115g). The butter provides the necessary fat for a rich mouthfeel and helps create the “molten” center when combined with the chocolate.
Large Eggs: 2 units (approx. 100g). At room temperature, these are whipped with sugar to create the meringue structure responsible for that shiny, crackled top.
Granulated White Sugar: 3/4 cup (150g). Sugar isn’t just for sweetness; it’s the key to the crust. When beaten with eggs, it creates the thin film that shatters upon baking.
Light Brown Sugar: 1/4 cup (50g). This adds moisture and a hint of molasses, ensuring the center of the Salted Brownie Crinkle Cookies stays “gooey” rather than cakey.
Dutch-Processed Cocoa Powder: 1/3 cup (30g). This provides the deep, dark color and the “deep cocoa-colored fissures” described in our visual guide while balancing acidity.
All-Purpose Flour: 3/4 cup (95g). We use a relatively low amount of flour to keep the protein structure weak, which results in a fudgy, almost molten texture.
Baking Powder: 1/2 tsp (2.5g). This “invisible” ingredient provides just enough lift to create the fissures and cracks as the cookies expand and then settle.
Fine Sea Salt: 1/4 tsp (1.5g). Incorporated into the dough to enhance the chocolate’s natural notes from within.
Semi-Sweet Chocolate Chips: 1/2 cup (90g). These are folded in at the end and pressed onto the surface to create those “glossy pools” of melted chocolate.
Maldon Flaky Sea Salt: 1 tbsp (approx. 5g). These large, translucent flakes are the final touch for that signature high-relief texture and salty-sweet balance.
Tools for Achieving the Perfect Crinkle and Crackle
To replicate the handheld smartphone photo look, you need more than just a bowl and a spoon. Precision is everything when you want that ultra-fudgy center. Having the right gear ensures your Salted Brownie Crinkle Cookies come out perfectly every time.
First and foremost, you need a high-quality electric hand mixer or a stand mixer. You cannot achieve the meringue-like top by hand; you need the mechanical power to beat the eggs and sugar for the full 5 minutes until they are thick and pale. You’ll also need a heat-proof glass bowl to create a double boiler for melting your dark chocolate and butter gently without scorching.
A standard cookie scoop (about 2 tablespoons in size) is vital for ensuring all cookies are the same size, which leads to even baking. Finally, don’t forget the white parchment paper. Not only does it prevent sticking, but it’s the exact backdrop seen in our visual prompt, providing that clean, authentic kitchen feel.
Step-by-Step Instructions: Mastering the Salted Brownie Crinkle Cookies
1. Melting the Dark Chocolate Base
In a medium heat-proof bowl, combine your 8 oz (225g) of chopped dark chocolate and 1/2 cup (115g) of unsalted butter. Set the bowl over a pot of simmering water (a double boiler), ensuring the bottom of the bowl doesn’t touch the water. Stir constantly with a silicone spatula until the mixture is glossy and completely smooth. Remove from heat and let it cool slightly while you prepare the egg mixture.
2. The Meringue Secret: Whipping Eggs and Sugars
In a large mixing bowl, combine the 2 large eggs, 3/4 cup (150g) of granulated sugar, and 1/4 cup (50g) of light brown sugar. Using your mixer, beat on high speed for at least 5 to 6 minutes. Visual Cue: You are looking for the “ribbon stage.” The mixture should triple in volume, become very pale, and when you lift the beaters, the batter should fall back in a thick trail that holds its shape for a few seconds. This is the only way to get that shiny crackled top.
3. Integrating the Chocolate and Dry Ingredients
Gently pour the slightly cooled melted chocolate and butter mixture into the egg mixture. Use a spatula to fold them together until just combined. Sift in the 3/4 cup (95g) of flour, 1/3 cup (30g) of Dutch-process cocoa, 1/2 tsp baking powder, and 1/4 tsp fine salt. Sensory Cue: Fold gently until no streaks of white flour remain. The dough will be thinner than a standard chocolate chip cookie recipe, appearing more like a thick brownie batter.
4. The Final Fold and Shaping
Fold in half of your semi-sweet chocolate chips. Use your cookie scoop to drop rounded tablespoons of dough onto your parchment-lined baking sheets. Space them at least 2 inches apart, as they will spread. Once scooped, press the remaining semi-sweet chips into the tops of each dough ball. This ensures you get those “glossy pools” of chocolate on the surface.
5. The Precision Bake
Bake at 350°F (175°C) for exactly 9–11 minutes. Visual Cue: Do not overbake! You want to remove them when the edges are set, the tops have formed deep fissures and a shiny crust, but the centers still look slightly soft and underdone. The “molten” center happens during the cooling process. Immediately upon removing them from the oven, sprinkle generously with the Maldon sea salt flakes.
Expert Tips for Success with Salted Brownie Crinkle Cookies
- Work Quickly: Once the flour is mixed in, the clock is ticking. The “crinkle” top is formed by the meringue structure, which begins to break down if the dough sits too long. Bake your batches immediately.
- Use Room Temp Eggs: Cold eggs will seize the melted chocolate and prevent the sugars from dissolving properly during the whipping phase.
- The “Pan Bang” Trick: If your cookies aren’t cracking as much as you’d like, gently tap the baking sheet on the oven rack halfway through baking. This encourages the surface to shatter into those beautiful fissures.
- Quality of Chocolate: Since chocolate is the primary flavor, avoid using only chips for the dough base. Real baking bars (70% cocoa) have less stabilizers and provide a much better “melt” for that ultra-fudgy dough.
Storage, Reheating, and Freezing Advice
These Salted Brownie Crinkle Cookies are at their absolute peak about 10 minutes after they come out of the oven, while the center is still steaming and molten. However, they store remarkably well. Keep them in an airtight container at room temperature for up to 3 days. The crust may soften slightly over time, but the interior will remain incredibly fudgy.
If you want to recapture that “just-baked” molten experience, pop a cookie in the microwave for 8–10 seconds. This will re-melt the chocolate chips and the center. You can also freeze the baked cookies for up to 2 months. To thaw, simply leave them at room temperature or warm them gently in the oven at 300°F (150°C) for 5 minutes.
What to Serve With Your Decadent Brownie Cookies
While a glass of cold milk is the classic choice, these Salted Brownie Crinkle Cookies are sophisticated enough for more creative pairings. If you are hosting a brunch, these pair beautifully with a strawberry cold foam topped coffee for a fruity, creamy contrast to the dark chocolate.
For those who love a dessert spread, consider serving these alongside a lighter option like no-bake lemon pie to cleanse the palate between rich bites. If you have extra chocolate chips left over, you might even consider prepping some chocolate chip cookie dough overnight oats for a coordinated breakfast the next morning.
Frequently Asked Questions
No. Unlike other cookie doughs, this one should be baked immediately. Chilling the dough breaks down the meringue structure required for the crinkle top.
For this specific recipe, you need both. The melted dark chocolate provides the fudgy, molten structure, while the cocoa powder provides the deep flavor and dark fissures.
Do not overbake! Take the cookies out when the edges are set but the center still looks slightly soft. They will firm up as they cool while maintaining that gooey interior.
Maldon Flaky Sea Salt is the professional choice. Its large, thin flakes provide a clean saltiness and a beautiful translucent visual without being overwhelmingly salty.
This is almost always due to under-beating the eggs and sugar. You must beat them for at least 5-6 minutes until the mixture is pale and reaches the ‘ribbon stage’ to form that meringue-like crust.
The Ultimate Salted Brownie Crinkle Cookies Recipe
Salted Brownie Crinkle Cookies: The Ultimate Guide to Ultra-Fudgy Perfection
Ingredients
Equipment
Method
- Melt dark chocolate and butter in a double boiler until smooth. Let cool slightly.
- Beat eggs and sugars on high for 5-6 minutes until pale, thick, and tripled in volume.
- Fold melted chocolate into the eggs, then gently fold in sifted dry ingredients.
- Scoop dough onto parchment paper. Top with chocolate chips.
- Bake at 350°F (175°C) for 9-11 minutes. Sprinkle with Maldon salt immediately.
Notes
Do not overbake! The centers should be soft when pulled out to ensure a molten texture.
Final Thoughts on These Fudgy Chocolate Delights
Baking the perfect Salted Brownie Crinkle Cookies is a rewarding experience that combines the best of chemistry and culinary art. By following the whipping techniques and using high-quality dark chocolate, you create a treat that is as visually stunning as it is delicious. The contrast of the shiny, crackled crust against the gooey molten center and the sharp flake of sea salt creates a sensory experience that is truly unparalleled.
We hope you enjoy making (and eating!) these as much as we do. If you enjoyed this recipe, please leave a comment below and tell us how yours turned out! Don’t forget to follow us on Pinterest and share your photos with the community. Happy baking!