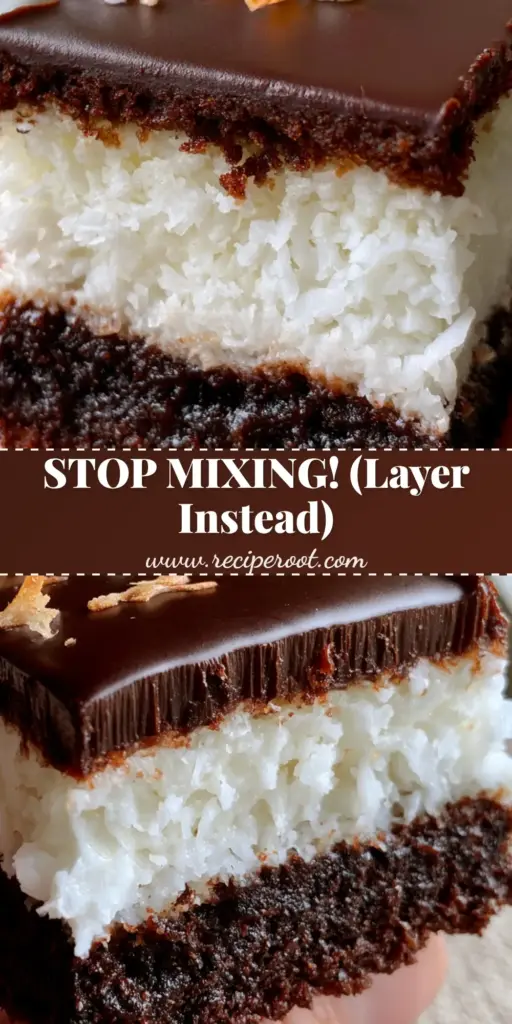
Mounds brownies are the ultimate indulgence for anyone who lives for the combination of dark chocolate and sweet, tropical coconut. These aren’t your average boxed treats; we are talking about a dense fudgy dark chocolate brownie base topped with a thick moist shredded coconut filling that mimics the iconic candy bar perfectly. If you have ever bitten into a Mounds bar and wished there was a rich, chewy brownie involved, this recipe is your dream come true.
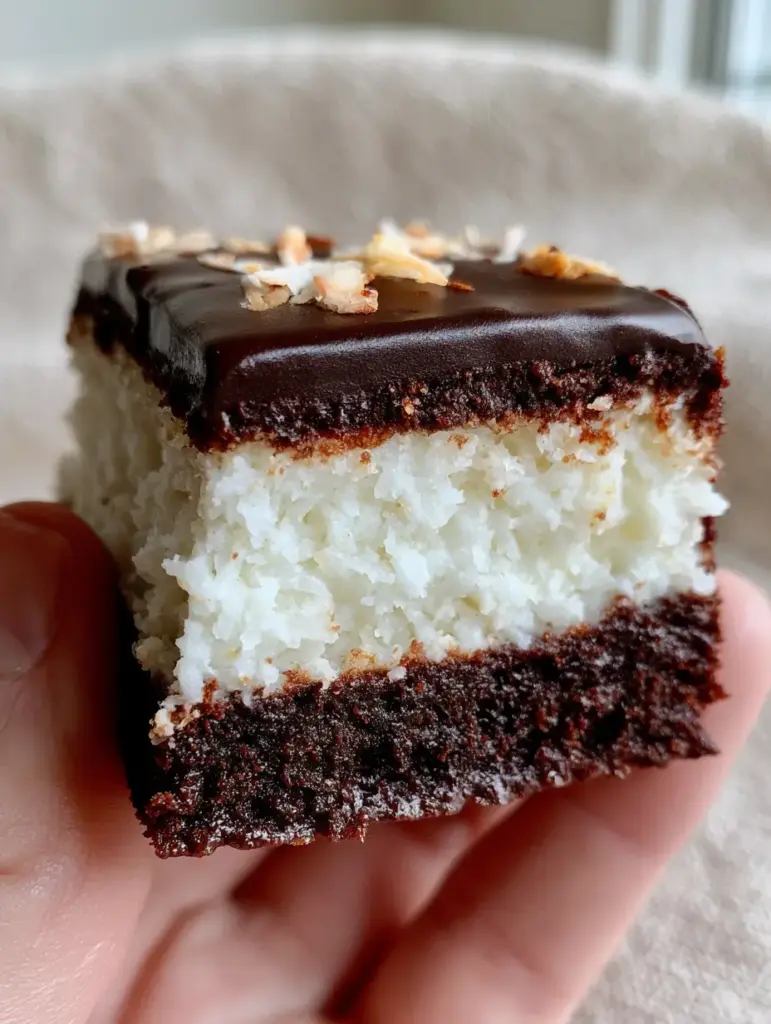
The beauty of these Mounds brownies lies in the stark, beautiful contrast of colors and textures. You get a deep, almost black cocoa base, a snowy white, 1-inch thick coconut center, and a glossy dark chocolate ganache that pulls it all together. Just like our popular Bounty brownies, this recipe focuses on high-quality chocolate and a moist filling that stays tender for days.
Why You Will Obsess Over These Layered Coconut Brownies
- The Ultimate Texture Contrast: You experience a fudgy, chewy bottom, a creamy and moist coconut middle, and a silk-smooth ganache topping.
- Clean, Sharp Edges: Thanks to a specific chilling technique, every slice looks like it came from a high-end gourmet bakery.
- Better Than Candy Bars: By using Dutch-processed cocoa and real heavy cream, the flavor is deeper and more sophisticated than anything in a wrapper.
- Perfect Vertical Height: These are “tall” brownies, designed to look impressive on a dessert platter or your Pinterest feed.
If you love layered chocolate treats, you might also want to check out our Samoa brownies for a caramel twist or these indulgent peanut butter stuffed brownies. But today, it is all about the coconut.
The Essential Ingredients for Mounds Brownies Success
To achieve that visual recipe blueprint look, every ingredient serves a specific culinary purpose. We aren’t just making a snack; we are building a masterpiece of culinary science.
The Fudgy Dark Chocolate Foundation
Unsalted Butter (1 cup / 225g): We melt the butter to ensure a dense, fudgy texture rather than a cakey one. Fat is the carrier for flavor here.
Granulated Sugar (2 cups / 400g): This provides sweetness and helps create that classic “crackly” brownie top (though it will be covered by coconut!).
Dutch-Processed Cocoa Powder (3/4 cup / 75g): This is vital for the dark chocolate sheen. Dutch cocoa is less acidic and provides a darker, richer color than natural cocoa.
Large Eggs (4): These act as the binder. We want them at room temperature so they emulsify perfectly into the batter.
All-Purpose Flour (1 cup / 125g): A lower ratio of flour to fat ensures the Mounds brownies stay ultra-moist and dense.
The Snowy White Coconut Core
Sweetened Shredded Coconut (4 cups / 400g): The star of the show. Using shredded rather than flaked coconut ensures the 1-inch thick layer holds its shape when cut.
Sweetened Condensed Milk (1 can / 400g): This provides the “glue” and the moisture. It keeps the coconut layer from becoming dry or crumbly.
The Glossy Ganache & Garnish
Dark Chocolate Chips (1.5 cups / 250g): Use at least 60% cacao for that glossy dark chocolate finish that isn’t overly sweet.
Heavy Cream (3/4 cup / 180ml): This creates the ganache’s silky texture. It must be full-fat for the best mouthfeel.
Toasted Coconut Flakes (2 tbsp): A light garnish to add a crunch and visual interest to the glossy ganache glaze.
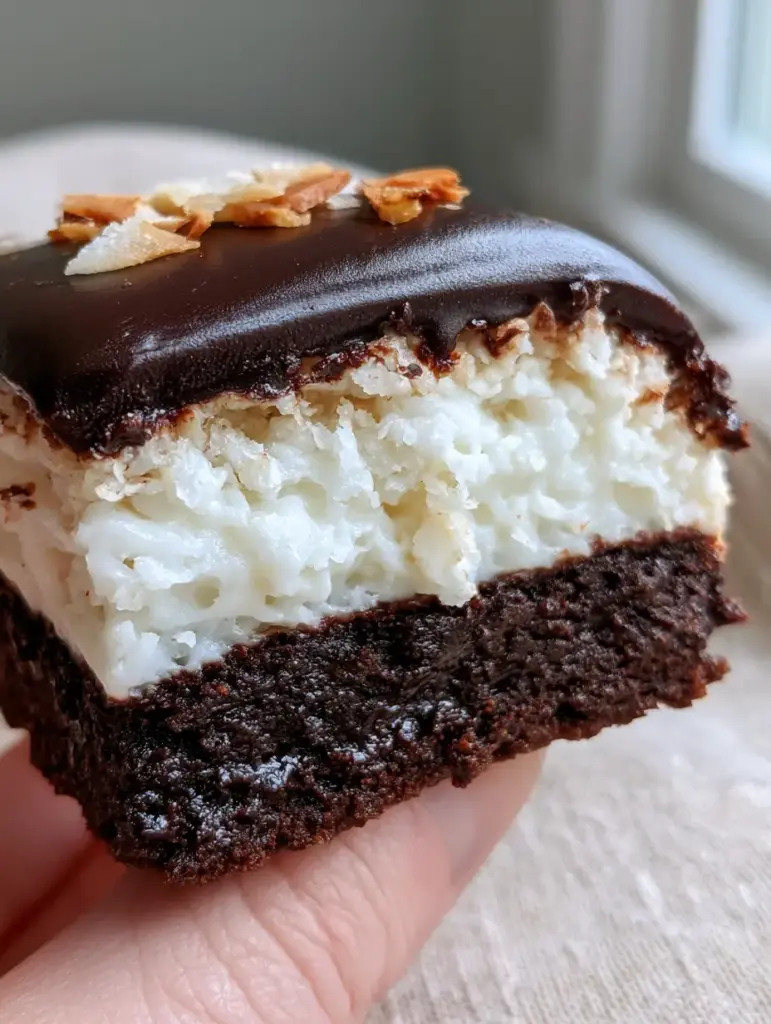
Mastering the Triple-Layer Dark Chocolate Technique
Creating Mounds brownies requires patience, especially during the cooling phases. Follow these steps to ensure those clean-cut edges shown in the Midjourney prompt.
Step 1: Baking the Fudgy Brownie Base
Preheat your oven to 350°F (175°C) and line a 9×9 inch (23x23cm) pan with parchment paper. Ensure the paper hangs over the sides; this is the secret to removing the brownies for perfectly clean vertical cuts.
Whisk your melted butter and sugar vigorously. Add the eggs one at a time, followed by the cocoa powder and salt. Fold in the flour gently until just combined. Visual Cue: The batter should be thick, dark, and have a moist sheen.
Bake for 25-30 minutes. The center should be set but still slightly soft to the touch. Let the base cool completely before adding the next layer. This prevents the coconut layer from sinking into the brownie.
Step 2: Crafting the 1-Inch Coconut Layer
In a medium bowl, combine the sweetened shredded coconut and the sweetened condensed milk. Stir until every flake is saturated. It should look like snowy, wet white gold.
Spread this mixture over the cooled brownie base. Use an offset spatula to press it down firmly. You want an even, thick coconut filling that reaches all the way to the corners. This pressure is what ensures the layers stay together when sliced.
Step 3: Pouring the Glossy Dark Chocolate Ganache
Heat your heavy cream until it just begins to simmer (do not boil!). Pour the hot cream over your dark chocolate chips and let it sit for 5 minutes. Pro Tip: Patience here prevents the ganache from breaking or looking grainy.
Whisk slowly from the center outward until a glossy dark chocolate ganache forms. Pour this over the coconut layer, tilting the pan to ensure it coats the entire surface evenly. Sprinkle your toasted coconut flake garnish sparingly across the top for that gourmet look.
Step 4: The Critical Chill for Clean Edges
Place the entire pan in the refrigerator for at least 2 hours (4 hours is better). The ganache and coconut layer must be fully set. When ready to serve, lift the parchment paper “sling” out of the pan. Use a sharp chef’s knife dipped in hot water (and wiped dry) to make clean, sharp vertical cuts.
Expert Tips for Success
- Room Temperature Ingredients: Always ensure your eggs are not cold. This prevents the fat in the brownie batter from seizing, ensuring a dense fudgy result.
- Don’t Overbake: Brownies continue to cook in the pan after they are removed from the oven. Pull them out when a toothpick has a few moist crumbs attached.
- Use the Right Pan: A metal pan provides sharper corners than glass, which is essential for that clean-cut edge aesthetic.
- Toasting the Garnish: Toast your coconut flakes in a dry skillet over medium heat for only 2-3 minutes. They go from white to burnt very quickly!
- Internal Link Check: If you love the “stuffed” brownie concept, try our marshmallow brownies next.
Storage, Reheating & Freezing
Storage: Because of the condensed milk and cream, these Mounds brownies are best stored in an airtight container in the refrigerator for up to 5 days. The cold temperature actually enhances the fudgy texture of the base.
Freezing: These freeze beautifully! Wrap individual squares in plastic wrap and then foil. They will stay fresh for up to 3 months. Thaw in the fridge overnight before serving.
Reheating: We actually recommend eating these chilled or at room temperature to maintain the integrity of the glossy ganache. If you must have them warm, a 10-second zap in the microwave is plenty.
What to Serve With Mounds Brownies
These are rich, so they pair best with something that cuts through the sweetness. A glass of cold milk is classic, but a cup of strong black coffee or an espresso really highlights the dark chocolate brownies notes. For an over-the-top dessert, serve a slice alongside a scoop of vanilla bean ice cream.
If you’re looking for more chocolate inspiration, our full brownie collection has everything from classic fudgy squares to avant-garde treats like these marshmallow peanut butter brownies.
Frequently Asked Questions
You can, but the ‘Mounds’ flavor profile specifically relies on the contrast of dark chocolate and coconut. Using milk chocolate would turn them into ‘Almond Joy’ style brownies (minus the almonds).
It is not recommended. The sweetened shredded coconut provides the classic texture and moisture needed to bond with the condensed milk for that thick, 1-inch layer.
Yes, because of the dairy in the coconut layer and the ganache, these should be kept in the refrigerator. They also taste best and stay fudgiest when chilled.
Chill the brownies for at least 2-4 hours. Use a sharp chef’s knife, dip it in hot water, wipe it dry, and make one clean vertical slice. Repeat the dipping and wiping for every single cut.
A dull ganache usually happens if the cream wasn’t hot enough or if it was over-stirred. Ensure you let the hot cream sit on the chips for 5 minutes before gently whisking.
The Ultimate Mounds Brownie Recipe Card
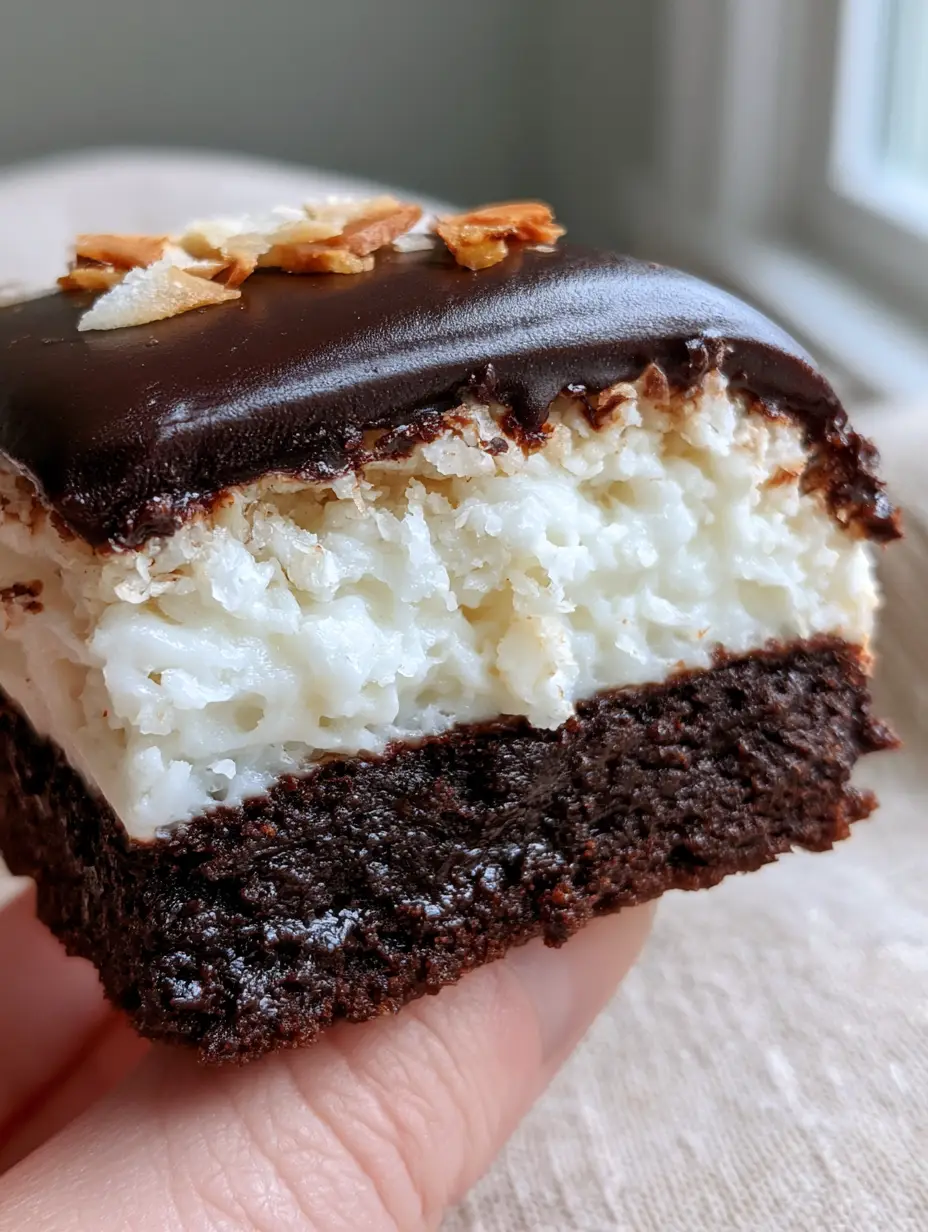
Mounds Brownies with a Thick Coconut Layer and Glossy Ganache
Ingredients
Equipment
Method
- Preheat oven to 350°F (175°C). Line pan with parchment. Whisk melted butter and sugar, add eggs, cocoa, and flour. Mix until moist and glossy.
- Spread batter in pan and bake for 25-30 minutes. Cool completely in the pan.
- Combine shredded coconut and condensed milk until fully saturated.
- Spread over the cooled brownie base, pressing firmly to create a 1-inch thick, even layer.
- Heat cream and pour over chocolate chips. Let sit for 5 mins, then whisk until glossy.
- Pour ganache over coconut, sprinkle with toasted flakes, and chill for 2-4 hours before slicing with a hot knife.
Notes
Dutch-processed cocoa is essential for the dark color.
Save This Recipe To Pinterest!
Love this recipe? Make sure to Pin it to your Desserts board so you never lose it! We love seeing your creations—tag us or share a photo of your Mounds brownies in the comments below. Don’t forget to leave a 5-star rating if these satisfied your coconut cravings!