When you cannot decide between the chewy, buttery edges of a classic cookie and the deep, decadent soul of a fudge brownie, brookie cookies are the only answer. This isn’t just a simple mix; it is a culinary architecture project that layers two distinct worlds into a single, hand-held masterpiece.
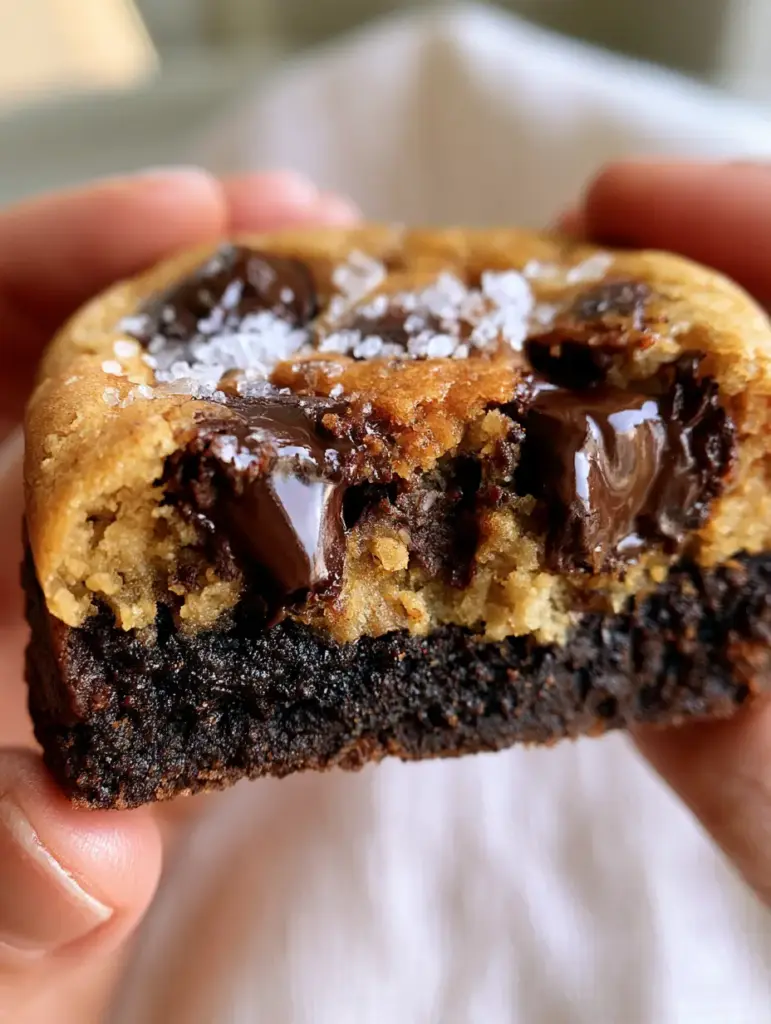
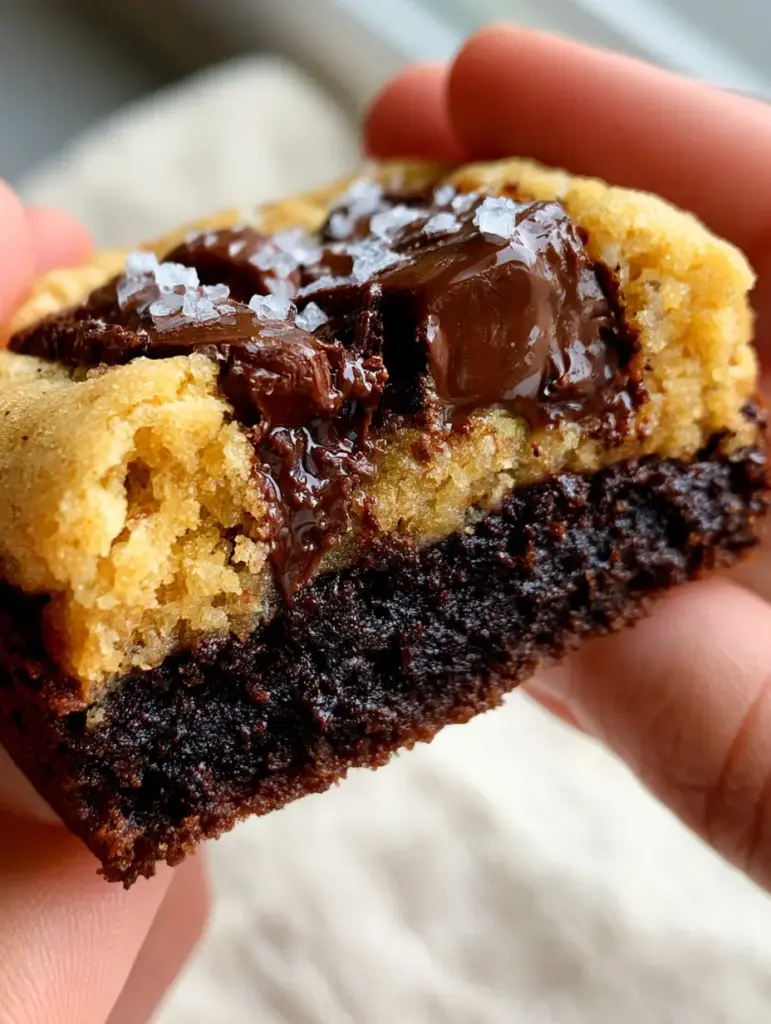
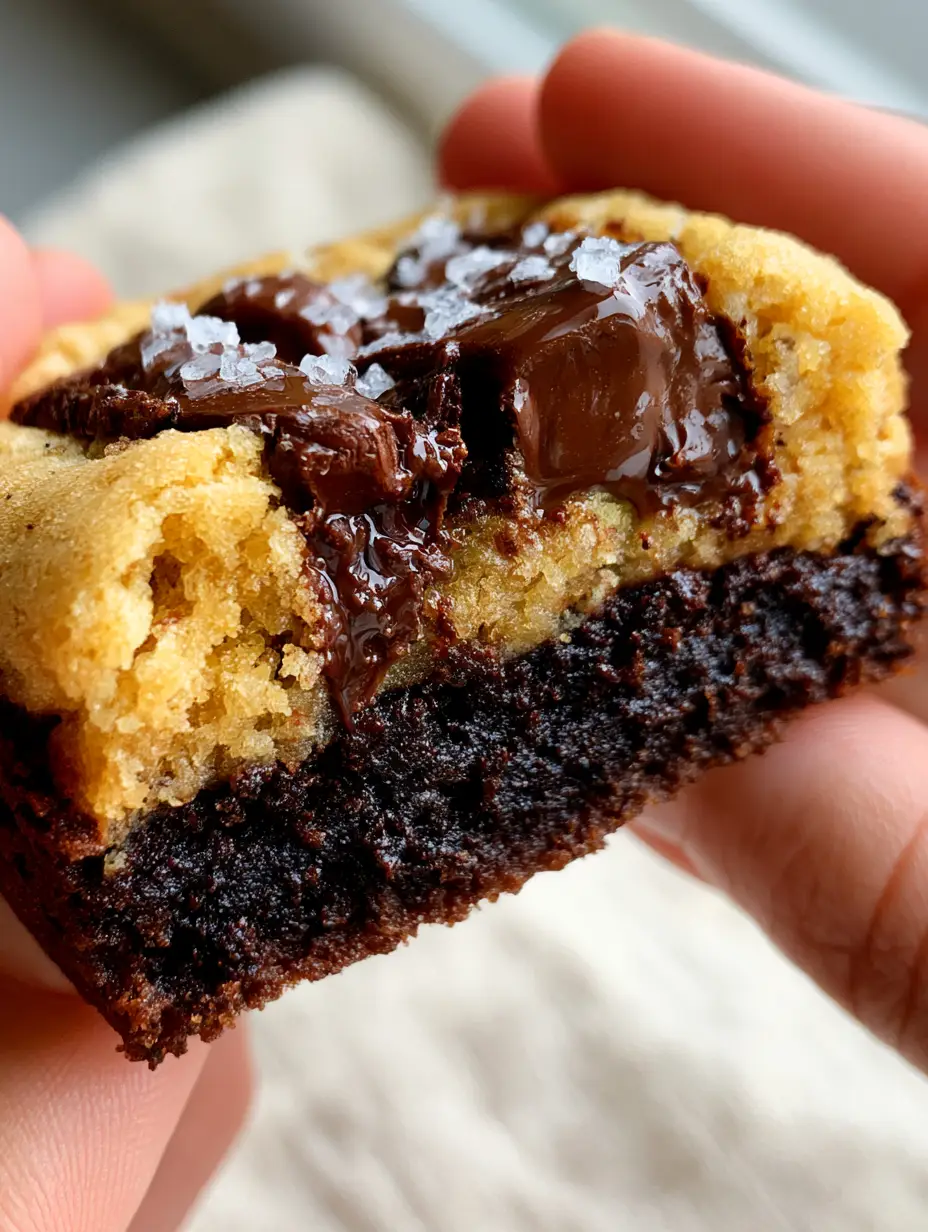
Imagine a base of dark, intense cocoa that melts in your mouth, topped with a golden, buttery dough studded with semi-sweet chocolate pools. The result is a texture profile that hits every sensory note—from the crackle of a paper-thin crust to the moist, set center that defies logic.
Our brookie cookies are designed to replicate the high-end bakery experience right in your home kitchen. We have meticulously tested the hydration levels of both doughs to ensure they bake at the same rate, preventing the common pitfall of a dry cookie top and a raw brownie bottom.
Why These Multi-Layered Brookie Cookies Stand Out
- Dual-Texture Engineering: You get a dense, dark cocoa fudgy brownie foundation paired with a soft, golden-tan chocolate chip cookie layer.
- The Signature Gloss: A high-gloss, paper-thin crinkle-top crust that shatters slightly when you bite into it, signaling a perfectly dissolved sugar structure.
- Premium Chocolate Pools: By using large semi-sweet chocolate chunks instead of standard chips, we create glistening, melted reservoirs of cocoa throughout the cookie.
- Sensory Finish: A light dusting of flaky sea salt crystals balances the rich sweetness and enhances the complex notes of the dark cocoa.
The Essential Pantry Staples for the Perfect Cookie-Brownie Hybrid
To achieve the visual and textural perfection seen in our brookie cookies, every ingredient serves a specific chemical purpose. We aren’t just mixing; we are conducting edible science.
Unsalted Butter (225g / 1 cup + 115g / 0.5 cup): We use melted butter in the brownie base for that fudgy, dense crumb and softened butter in the cookie top for aeration and structure.
Dark Cocoa Powder (90g / 0.75 cup): Specifically look for Dutch-processed cocoa to achieve that signature “dark cocoa fudgy” appearance and a smooth, non-acidic chocolate flavor.
Granulated and Brown Sugars: The white sugar provides the crisp crinkle top and structural integrity, while the brown sugar adds moisture and a hint of molasses to the cookie layer.
Large Eggs (4 total): Three eggs go into the brownie base to create the meringue-like top, while one egg provides the lift and chew for the chocolate chip layer.
All-Purpose Flour: This provides the protein structure needed to keep the two layers distinct without them merging into a muddy mess during the bake.
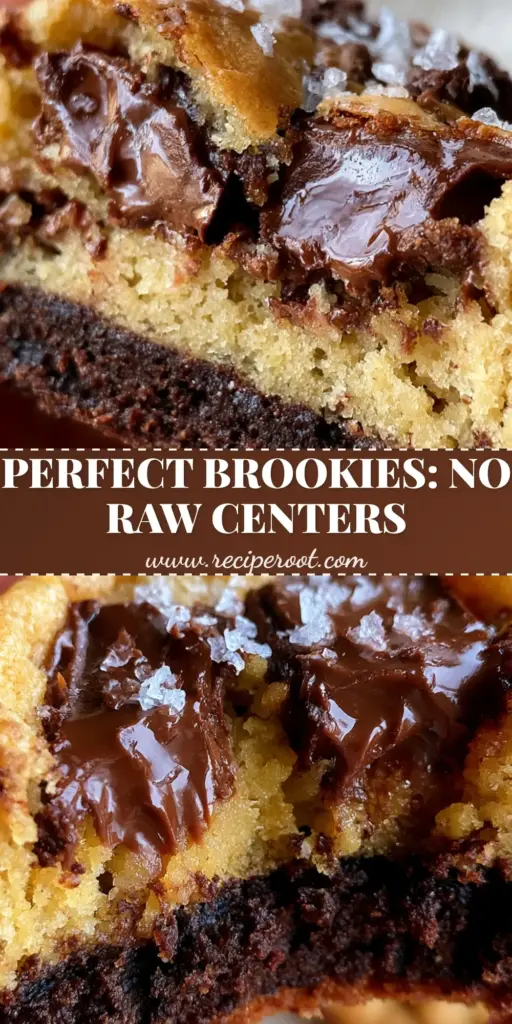
Semi-Sweet Chocolate Chunks (175g / 1 cup): Chunks contain less stabilizers than chips, allowing them to melt into the “glistening” pools of chocolate visible in our macro shots.
Flaky Sea Salt: This is the crucial final garnish that elevates the recipe from a standard sweet to a gourmet dessert by highlighting the dark chocolate notes.
Pro-Grade Kitchen Tools for Professional Results
Achieving the perfect brookie cookies requires more than just a bowl and spoon; you need the right tools to manage the two different dough consistencies.
You will need two separate mixing bowls to prevent the dark cocoa from bleeding into the golden cookie dough prematurely. A high-quality whisk is essential for the brownie base to incorporate enough air into the eggs and sugar for that crinkle crust.
A standard 2-tablespoon (30ml) cookie scoop is vital for the brownie base, while a smaller 1.5-tablespoon (22ml) scoop helps portion the cookie dough top. This ensures every one of your brookie cookies is uniform and bakes evenly.
Finally, heavy-duty rimmed baking sheets lined with parchment paper are non-negotiable. The parchment ensures the fudgy brownie bottoms don’t stick and allows for easy removal once they are perfectly set.
Mastering the Art of Layering Your Brookie Cookies
The secret to the perfect brookie cookies lies in the sequence of operations. You cannot rush the layering process if you want those two distinct, beautiful tiers.
Crafting the Intense Dark Cocoa Fudgy Brownie Foundation
Start by melting your butter and whisking in the granulated sugar and dark cocoa powder while the butter is still warm. This “blooms” the cocoa, intensifying the flavor and ensuring the sugar begins to dissolve immediately.
Whisk in the eggs one at a time, beating vigorously for at least 2 minutes. You are looking for a visual change—the batter should become glossy and slightly pale, which is the secret to the paper-thin crinkle top.
Gently fold in the flour and salt until just combined. The batter should be thick, dark, and incredibly fragrant, providing a sturdy foundation for the cookie dough that will sit on top.
Whipping Up the Golden Buttery Chocolate Chip Topping
In your second bowl, cream the softened butter with both granulated and brown sugars until light and fluffy. This creates the “golden-tan” color and soft edges described in our visual blueprint.
Add the egg and vanilla extract, beating until smooth. When adding your dry ingredients, ensure you don’t overmix, as this would make the cookie layer tough rather than tender.
Fold in the semi-sweet chocolate chunks. These chunks should be large enough to remain visible on the surface, creating those glistening, melted spots after the brookie cookies exit the oven.
Assembly and The Secret to the Glossy Crinkle Crust
Preheat your oven to 350°F (175°C). Scoop a 2-tablespoon (30ml) mound of brownie dough onto your prepared sheet, leaving plenty of space between each.
Take a 1.5-tablespoon (22ml) portion of the chocolate chip cookie dough and gently press it onto the center of the brownie mound. Do not flatten it completely; the weight of the cookie dough will naturally spread the brownie base.
Bake for 11-13 minutes. You are looking for the “visual cues”: the cookie edges should be a light golden-brown, and the brownie base should have developed a high-gloss, crackled surface.
Insider Secrets for a Paper-Thin Crinkle Top
- The Sugar Dissolution Rule: If your sugar isn’t fully incorporated into the warm butter and eggs in the brownie base, you won’t get that glossy crust. Whisk until the batter looks like liquid silk.
- Don’t Overbake: These cookies will look slightly soft when they come out. They will “set” as they cool, preserving the moist, fudgy center that makes brookie cookies so addictive.
- Chunk Placement: For the best visual result, press a few extra chocolate chunks into the top of the cookie dough right before it goes into the oven.
- The Salt Timing: Sprinkle the flaky sea salt the second the tray comes out of the oven. The residual heat helps the crystals “tack” onto the melting chocolate chunks.
Keeping Your Batch Fresh and Fudgy
To maintain the distinct layers of your brookie cookies, store them in a single layer in an airtight container at room temperature for up to 4 days. If you stack them too early, the moisture from the brownie base can soften the crisp top of the cookie layer.
For long-term storage, these cookies freeze beautifully. Wrap them individually in plastic wrap and store them in a freezer bag for up to 3 months. Thaw at room temperature for a snack that tastes like it was just pulled from the oven.
If you prefer a “just baked” experience, pop a room-temperature cookie in the microwave for 8-10 seconds. This will re-melt the chocolate chunks and soften the fudgy center without losing the integrity of the crinkle top.
What to Serve with These Decadent Chocolate Treats
A rich dessert like brookie cookies demands a thoughtful pairing. For the ultimate indulgence, serve these alongside a glass of cold milk or a scoop of vanilla bean ice cream.
If you are hosting a summer gathering, these cookies pair excellently with our dragon fruit lemonade for a bright, acidic contrast. For the adults, a tropical cherry rum cocktail offers a sophisticated fruity note that cuts through the dark cocoa.
If you love this hybrid concept, you must try our Oreo stuffed chocolate chip cookies or the incredibly popular peanut butter cup stuffed brookies. For a lighter fruit-forward option, our strawberry shortcake cookies are always a crowd-pleaser.
Common Troubleshooting for the Perfect Brookie
Yes, but chunks contain less lecithin than chips, allowing them to melt into the ‘glistening pools’ seen in the photos. Chunks provide a better visual and textural experience.
Natural cocoa is more acidic and lighter in color. For the specific ‘dark cocoa fudgy’ look and deep flavor in the prompt, Dutch-processed is highly recommended.
While not strictly necessary for this recipe, chilling the chocolate chip cookie dough for 30 minutes can help create thicker, taller layers if your kitchen is very warm.
Ensure your brownie batter is thick and your cookie dough is slightly chilled or firm. Place the cookie dough gently on top of the brownie base without pressing too hard.
A crinkle top occurs when sugar is properly dissolved in the eggs and butter, creating a meringue-like film. Ensure you whisk the eggs into the brownie batter for at least 2 full minutes.
The Official Recipe for Fudgy Brownie Chocolate Chip Brookie Cookies
Brookie Cookies: The Ultimate Fudgy Brownie and Chocolate Chip Mashup
Ingredients
Equipment
Method
- In a large bowl, whisk melted butter, 400g sugar, and dark cocoa powder. Add 3 eggs and whisk vigorously for 2 minutes until the batter is glossy and thick.
- Gently fold in 155g flour and a pinch of salt until just combined. Set aside.
- In a separate bowl, cream softened butter with brown and white sugars until light. Beat in the egg and vanilla.
- Mix in 250g flour and baking soda, then fold in the semi-sweet chocolate chunks.
- Scoop 2 tbsp of brownie dough onto parchment-lined sheets. Top with 1.5 tbsp of cookie dough. Bake at 350°F (175°C) for 11-13 minutes.
- Immediately sprinkle with flaky sea salt while the chocolate chunks are still glistening.
Notes
Use chunks instead of chips for the best melting properties.
Final Thoughts on This Ultimate Dessert Mashup
Mastering brookie cookies is a rite of passage for any serious home baker. The contrast between the dark, fudgy brownie and the golden, buttery cookie is a culinary harmony that never fails to impress.
We hope this guide helps you achieve that perfect, glossy crinkle top and those glistening chocolate pools. If you enjoyed this recipe, please leave a comment below and share your results with us!
Don’t forget to follow us on Pinterest for more decadent dessert inspiration and to save this recipe to your “Baking Goals” board.