Frankenstein pretzels are the ultimate fusion of salty, crunchy satisfaction and spooky, neon-green creativity. When October rolls around, there is a distinct craving for treats that look as impressive as they taste, and these chocolate-dipped delights hit every mark. From the vibrant satin finish of the green coating to the chaotic zig-zag of matte black hair, these pretzels are a visual masterpiece for any Halloween spread.
Creating these treats is less about “baking” and more about “edible engineering.” You aren’t just dipping a snack; you are bringing a little crunchy monster to life using simple pantry staples. Whether you are hosting a haunted house party or looking for a fun afternoon activity with the kids, these Frankenstein pretzels offer a high-impact aesthetic with very little technical difficulty.
In this guide, we will break down the science of the perfect candy melt dip and the art of the royal icing “hair” application. You will learn how to achieve that professional smartphone-photo-worthy finish that makes your treats stand out on the dessert table. Let’s dive into the laboratory and start creating!
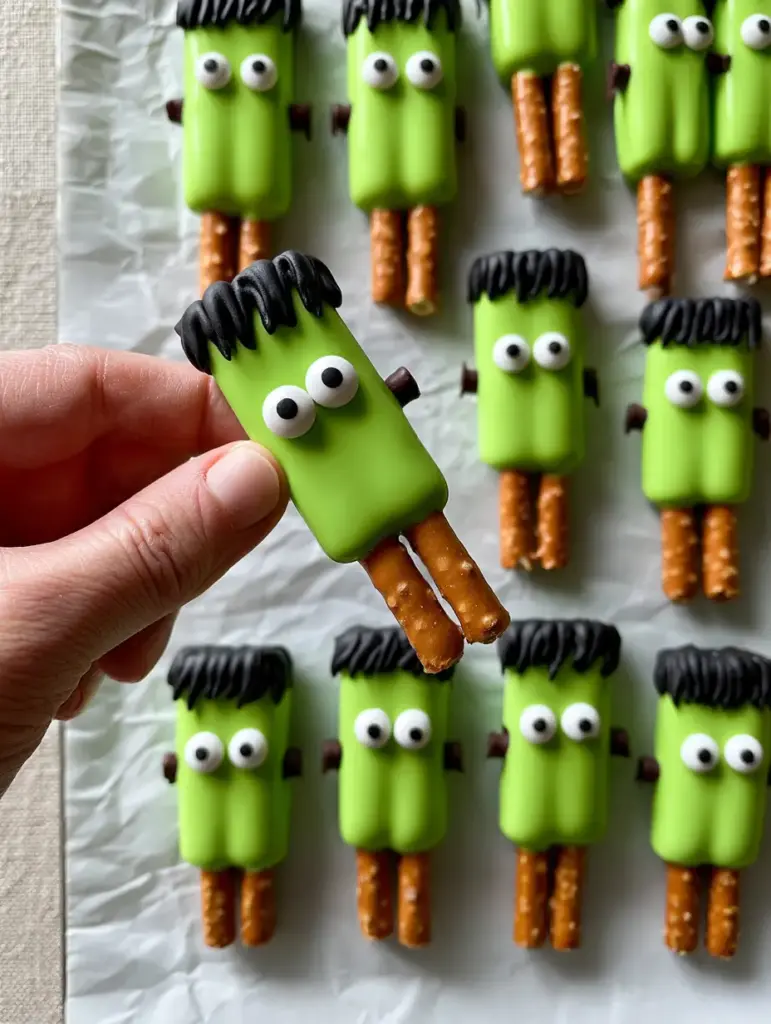
Why You Will Love These Monstrous Halloween Snacks
- Perfect Texture Contrast: You get a thick, satisfying crunch from the salted pretzel rod paired with a smooth, melt-in-your-mouth candy coating.
- Vibrant Visual Appeal: The neon “slime green” wafers provide a stunning satin finish that pops against the matte black royal icing.
- Customizable Personality: By using mismatched candy eyeballs, every Frankenstein pretzel develops its own unique, spooky character.
- Simple Ingredient List: This recipe uses accessible items like dark chocolate sprinkles and pretzel rods to create a professional-looking result.
- High Vertical Impact: Their long, slender shape makes them perfect for tall glass jars or as the centerpiece of a themed dessert board.
The Essential Spooky Pantry Checklist
Long Salted Pretzel Rods: Look for thick, sturdy rods that are approximately 7-8 inches (18-20cm) long. These provide the structural backbone for your monster and the necessary salt to balance the sweet coating.
Vibrant Green Candy Wafers: You will need about 12 oz (340g) of neon or “slime green” candy melts. These are specifically formulated to melt smoothly and set with a professional satin finish without the need for tempering.
Coconut Oil or Paramount Crystals: Adding 1 tsp (5ml) of oil to your melted wafers is a pro-secret for achieving a thin, pourable consistency. This ensures the coating is smooth and glossy rather than clumpy and thick.
Black Royal Icing: This is used for the “hair” because it dries hard and matte, providing a stark contrast to the green face. You can buy pre-made tubes or whip up a quick batch using powdered sugar and black food gel.
Edible White Candy Eyeballs: These small sugar discs give the Frankenstein pretzels their life. Using mismatched sizes adds to the “stitched together” aesthetic of the classic monster.
Dark Chocolate Jimmies: These tiny chocolate sprinkles act as the “bolts” on the side of the monster’s head. Their dark color and cylindrical shape are perfect for this anatomical detail.
Parchment Paper: A clean sheet of crumpled white parchment paper is essential for a non-stick drying surface. It also serves as the perfect rustic background for your final food photography.
Professional Kitchen Gear for Precision Dipping
To achieve the look of a professional recipe developer, you need the right tools for the job. A tall, narrow glass or microwave-safe silicone measuring cup is the best vessel for dipping your Frankenstein pretzels. This allows you to submerge the rods three-quarters of the way down without needing an excessive amount of melted candy.
You will also want a small piping bag or a zip-top bag with the corner snipped off for the royal icing hair. A pair of tweezers is a “forensic” culinary tool that helps you place the chocolate sprinkle bolts and candy eyeballs with surgical precision, preventing messy fingerprints on the satin green finish.
How to Craft the Perfect Frankenstein Pretzels
Melting the Neon Green Candy Coating
Begin by placing your green candy wafers in a microwave-safe tall glass. Heat them in 30-second intervals at 50% power, stirring thoroughly between each session to prevent scorching. Once the wafers are mostly melted, add your coconut oil and stir until the mixture is fluid and has a glossy, satin-like sheen.
The Perfect Dip and Set Technique
Hold a pretzel rod by one end and dip it three-quarters of the way into the green coating. Lift it straight up and gently tap your wrist to allow excess coating to drip back into the glass. You want a smooth, even layer that isn’t so thick that it puddles when you place it on the parchment paper. Place the dipped rod onto the crumpled parchment and let it sit for about 30 seconds before adding the eyes.
Engineering the Monster Face and Sprinkle Bolts
While the green coating is still slightly tacky, press two mismatched candy eyeballs into the upper third of the green section. Immediately take two dark chocolate sprinkles and press them into the sides of the “head” near the bottom of where the hair will be. These are your bolts. If the coating sets too fast, you can use a tiny dot of melted candy to “glue” them on later.
Piping the Messy Royal Icing Hair
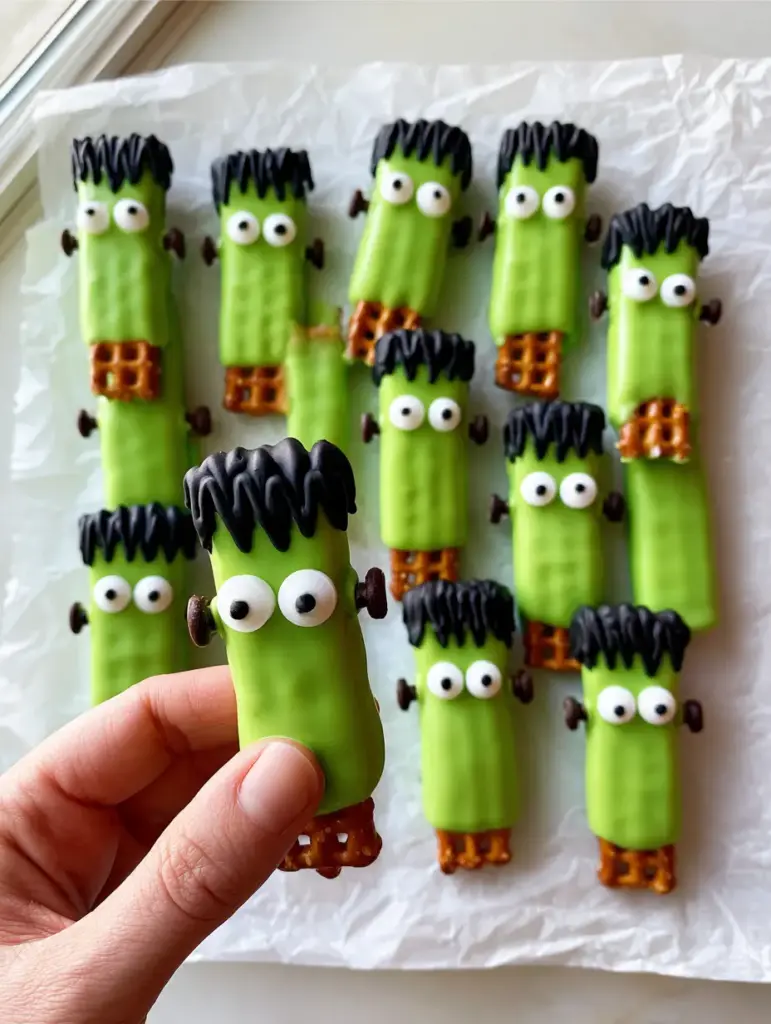
Once the green coating has fully hardened (about 15-20 minutes), it is time for the hair. Using your black royal icing, pipe a thick, messy zig-zag pattern across the very top of the green section. Don’t worry about being perfect; Frankenstein’s hair is supposed to look rugged and unkempt. The matte finish of the icing will develop as it air-dries, creating a beautiful texture against the green glaze.
Pro Secrets for a Smooth Satin Finish
- Avoid Moisture: Even a single drop of water can cause candy melts to “seize,” turning them into a grainy, unworkable paste. Ensure all your tools are bone-dry.
- The Wrist Tap: To get that perfectly smooth surface seen in the Midjourney prompt, tap your wrist, not the glass. This vibration is gentler and prevents the pretzel from breaking.
- Room Temperature Matters: If your kitchen is too cold, the candy will set too fast, making it hard to attach the eyes. If it’s too hot, the coating might streak. Aim for a comfortable 70°F (21°C).
- Crumple the Paper: Crumpling the parchment paper before laying it out creates tiny air pockets that help the pretzels release easily without leaving large “feet” of excess chocolate at the base.
Keeping Your Monsters Fresh and Crunchy
Frankenstein pretzels are relatively hardy, but they do best when stored in a cool, dry place. Place them in an airtight container in a single layer, or separate layers with sheets of parchment paper to prevent the royal icing from sticking to the green coating of the pretzel above it.
Do not refrigerate these treats. The humidity in a refrigerator can cause the salt on the pretzels to liquefy, making the pretzel rod soggy and causing the candy eyeballs to “bleed” black ink. At room temperature, these will stay fresh and crunchy for up to two weeks.
The Ultimate Halloween Party Spread
These Frankenstein pretzels are the perfect vertical element for a themed dessert table. Pair them with hot cocoa charcuterie boards for a cozy, spooky movie night. The salty-sweet profile also complements other autumn favorites beautifully.
If you are looking for more hand-held treats, consider serving these alongside classic snickerdoodles or pumpkin chocolate chip cookies. For a more decadent spread, a slice of rich chocolate pie provides the perfect dark backdrop for these neon-green monsters. If you have leftover candy eyeballs, they work wonderfully as decorations on festive peanut butter balls.
Spooky Snacks FAQ
Yes, you can melt white chocolate and add green oil-based food coloring. Do not use water-based coloring, as it will cause the chocolate to seize and become lumpy.
Use a small piping tip and move your hand in a rapid, shaky zig-zag motion. The goal is intentional chaos—embrace the uneven lines to mimic Frankenstein’s rugged look.
If the green coating has already set, use a toothpick to dab a tiny bit of leftover melted candy or royal icing onto the back of the eyeball to act as glue.
The key is low and slow. Use 50% power in the microwave and stir every 30 seconds. Even if the wafers look solid, the residual heat will help them melt as you stir.
This usually happens due to humidity or refrigeration. The salt on the pretzel rod attracts moisture, which softens the crunch. Store them in an airtight container at room temperature.
The Official Frankenstein Pretzels Recipe
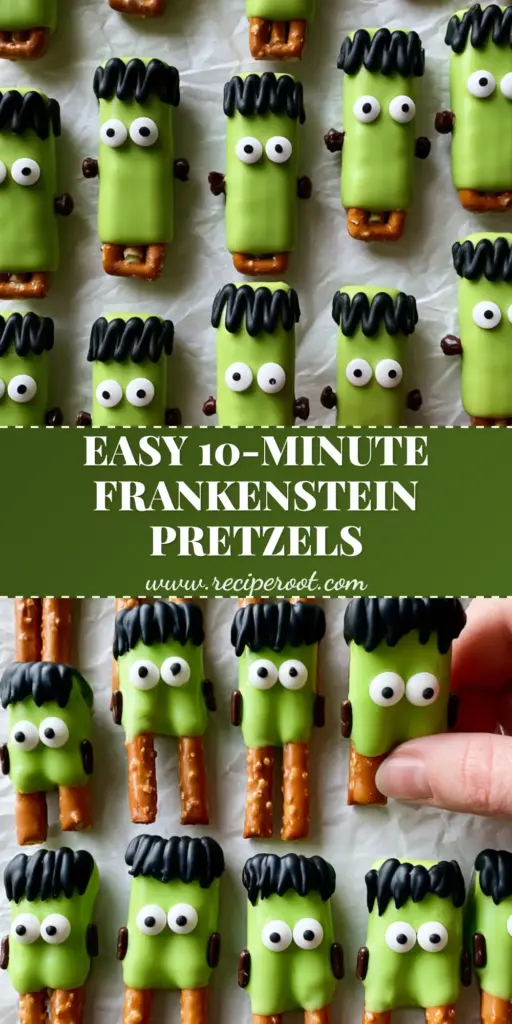
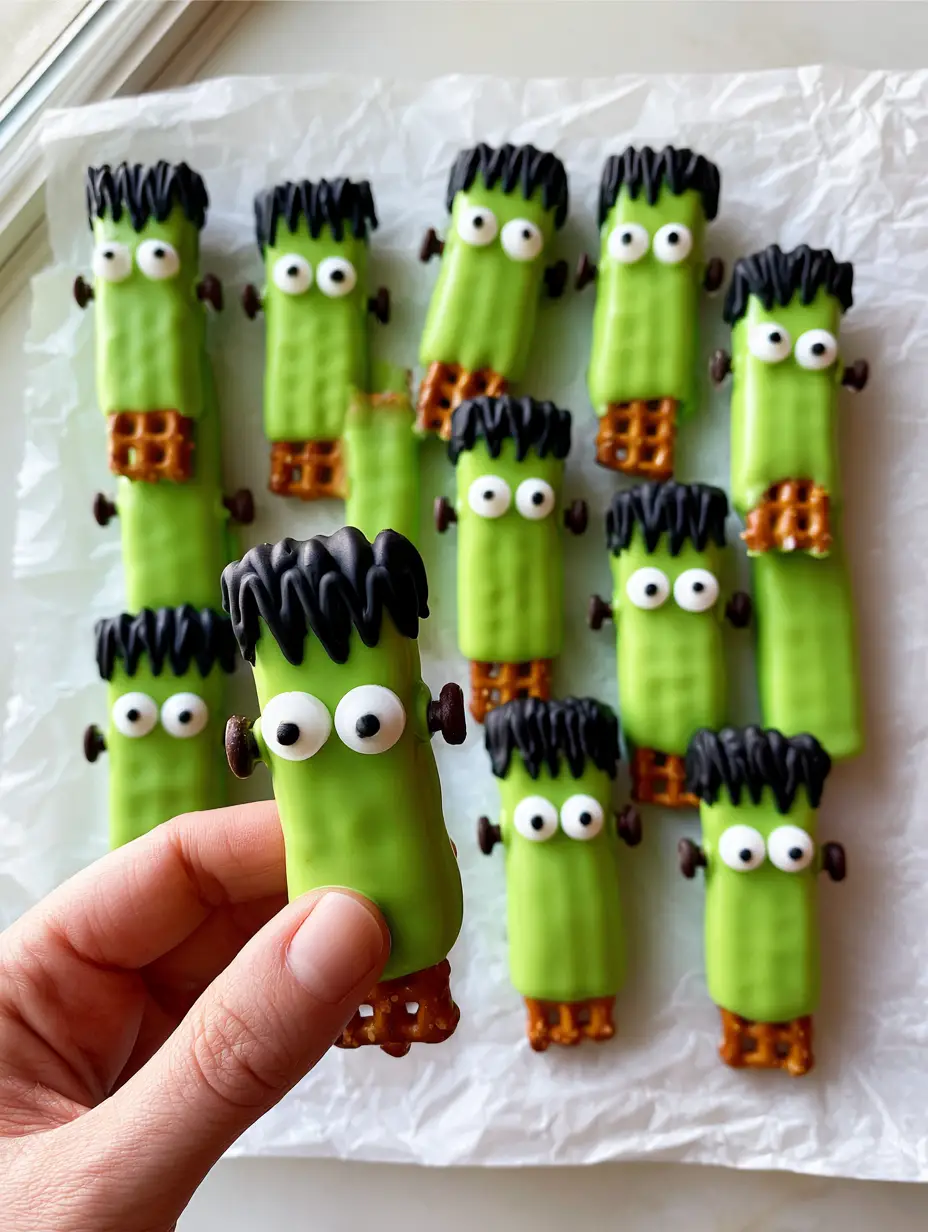
Frankenstein Pretzels: Easy Spooky Halloween Treats
Ingredients
Equipment
Method
- Place green candy wafers in a tall glass and microwave in 30-second bursts at 50% power, stirring until smooth.
- Stir in the coconut oil (5ml) until the mixture reaches a smooth, satin-finish consistency.
- Dip each pretzel rod three-quarters of the way into the green coating, tapping your wrist to remove excess.
- Place on parchment paper. While wet, add mismatched candy eyeballs and dark chocolate sprinkle bolts to the sides.
- Once the green coating is set, pipe a messy zig-zag of black royal icing across the top for the hair.
Notes
Store at room temperature to avoid soggy pretzels caused by fridge condensation.
Bring Your Monsters to Life!
Frankenstein pretzels are a testament to how simple ingredients can be transformed into something spectacular with just a bit of culinary logic. The vibrant colors and fun textures make them a hit for both the eyes and the palate. Whether you’re a seasoned pro or a kitchen novice, these treats are guaranteed to be the star of your Halloween celebrations.
If you made these monsters, we want to see your creations! Leave a comment below telling us how they turned out, and don’t forget to share your photos and follow us on Pinterest for more spooky inspiration. Happy haunting and happy snacking!