There is a nostalgic magic in the air when you pull a batch of fresh, homemade pop tarts out of the oven. Forget the foil-wrapped, dry pastries of your childhood; we are elevating this breakfast classic into a gourmet experience. Imagine a crust so buttery it shatters into dozens of visible layers, giving way to a steaming, ruby-red core of real fruit.
These aren’t just snacks; they are a culinary achievement that combines the technical precision of a French pastry with the soulful comfort of a home kitchen. By mastering a few simple lamination techniques, you can achieve that sought-after golden-brown finish that puts store-bought versions to shame. The contrast between the opaque vanilla bean glaze and the bright red nonpareil sugar makes these a visual masterpiece on any brunch table.
Whether you are looking for a weekend project or a way to impress guests at your next gathering, this recipe delivers professional results. We have meticulously balanced the tartness of the chunky strawberry filling with a sweet, thick glaze to create the ultimate handheld pastry. Let’s dive into the science and soul of the perfect toaster pastry.
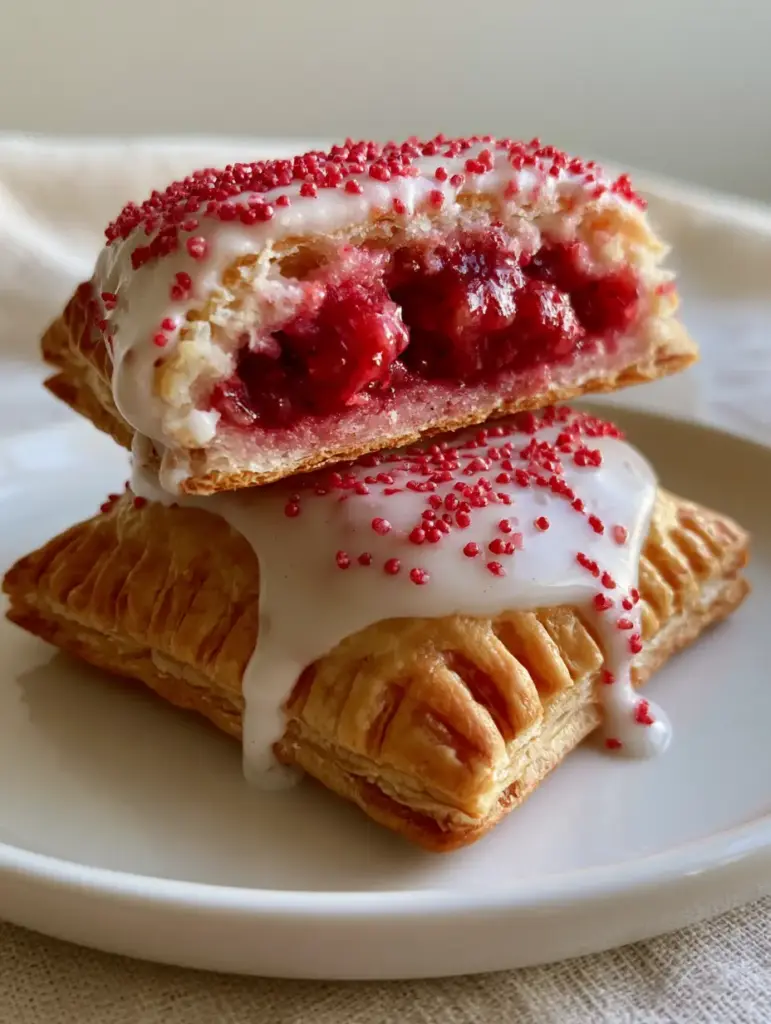
Why These Handheld Pastries Outshine Every Store-Bought Alternative
- Unrivaled Flakiness: Unlike the crumbly, shortbread-like texture of commercial brands, these feature a multi-layered pastry that mimics the structure of a high-end croissant.
- Real Fruit Intensity: The filling is a thick, chunky reduction of fresh berries, providing a “steaming core” of bright ruby-red flavor that is both sweet and naturally acidic.
- Artisanal Aesthetic: With perfectly crimped edges and a thick, dripping vanilla bean glaze, these pastries look like they walked straight out of a professional bakery window.
- Customizable Sweetness: By controlling the glaze and the sugar in the dough, you can ensure a balanced flavor profile that isn’t cloyingly sweet.
- Sensory Delight: From the snap of the golden-brown crust to the delicate scatter of red sugar pearls, every bite offers a symphony of textures.
The Essential Components for a Professional Pastry Result
To achieve the specific visual and structural results of these homemade pop tarts, you must select high-quality ingredients. The foundation of this recipe relies on the interaction between fat and flour to create those visible buttery layers.
All-Purpose Flour (375g / 3 cups): This provides the necessary protein structure to hold the heavy filling while remaining tender enough to shatter upon impact. It is the skeletal frame of your pastry.
Unsalted European-Style Butter (227g / 1 cup): High-fat butter is non-negotiable here; the lower water content ensures that the pastry stays crisp rather than soggy. Keep it ice-cold to prevent it from melting into the flour prematurely.
Granulated Sugar (25g / 2 tbsp): A small amount of sugar in the dough aids in the browning process, helping you achieve that perfect golden-brown baked finish. It also tenderizes the gluten slightly.
Ice Water (60-80ml / 4-5 tbsp): Cold water binds the dough together without activating the gluten too aggressively. Using ice-cold liquid is the secret to maintaining those distinct butter pockets.
Fresh Strawberries (450g / 3 cups): These form the heart of our thick chunky strawberry jam filling. Fresh berries provide a much more vibrant ruby-red color than pre-packaged jams.
Cornstarch (15g / 2 tbsp): This is our invisible structural hero, thickening the fruit juices so the filling doesn’t leak out during the baking process. It creates that “steaming core” consistency.
Powdered Sugar (240g / 2 cups): The base of our opaque white vanilla glaze. It provides the necessary body to sit thickly on top of the pastry without soaking in.
Vanilla Bean Paste (1 tsp / 5ml): While extract works, the paste adds those beautiful tiny black flecks to the glaze, signaling a premium flavor profile. It elevates the visual appeal significantly.
Red Nonpareil Sugar Sprinkles: These add a delicate scatter of texture and a pop of color that contrasts beautifully against the white glaze. They are the finishing touch for that iconic look.
Tools for Precision Crimping and Lamination
Creating professional homemade pop tarts requires more than just ingredients; you need the right tools to handle the delicate dough. A heavy rolling pin is essential for flattening the cold butter into thin sheets within the dough layers.
A pastry wheel or sharp pizza cutter allows for clean, straight edges, ensuring your rectangles are uniform for easy stacking. You will also need a sturdy dinner fork to create those classic crimped edges, which serve as both a decorative element and a structural seal.
A digital kitchen scale is highly recommended for measuring flour and butter by weight, ensuring the hydration levels are perfect every time. Finally, parchment paper or a silicone baking mat is vital for preventing the bottoms from over-browning while allowing for easy removal.
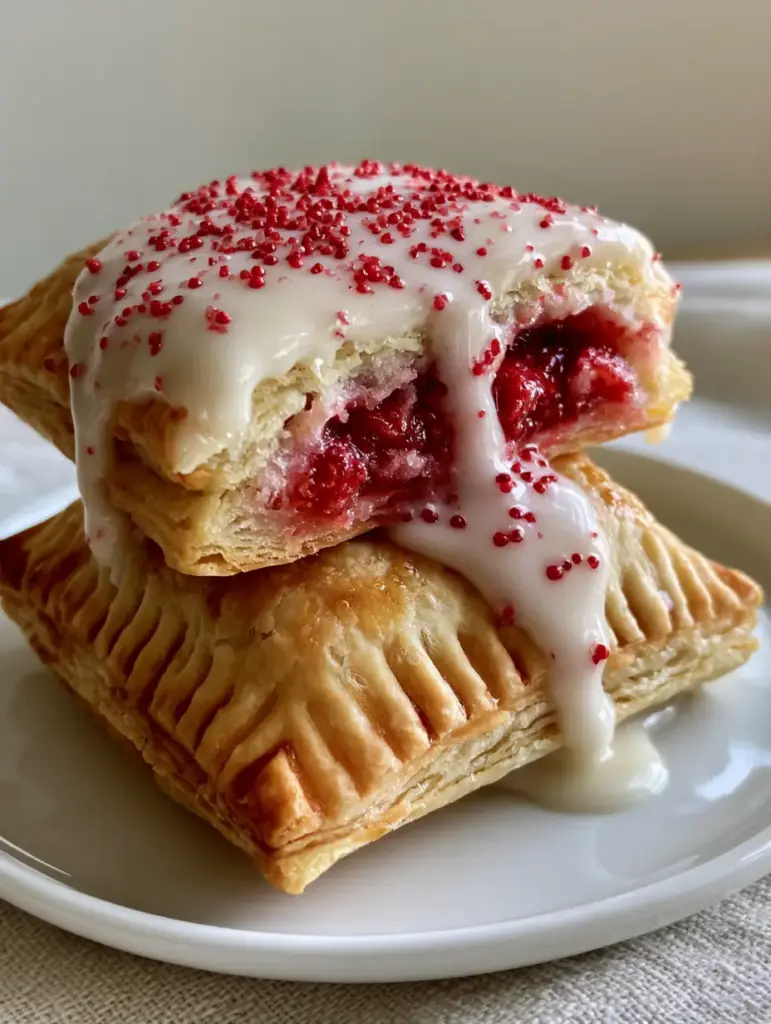
The Art of Crafting Multi-Layered Buttery Pastry
Mastering the Cold-Rub Technique
Start by combining your dry ingredients in a chilled bowl. Work the ice-cold butter into the flour using a pastry cutter or your fingertips, but stop when the butter pieces are the size of peas. You want visible chunks of fat; these will melt in the oven, creating steam that puffs the pastry into layers.
Slowly drizzle in the ice water, one tablespoon at a time. Toss the mixture with a fork until it just begins to come together. The dough should look shaggy and slightly dry—do not overwork it, or you will lose the flakiness that defines high-quality homemade pop tarts.
The Secret to Lamination-Lite
Turn the dough onto a lightly floured surface and gently pat it into a rectangle. Fold the dough into thirds, like a letter, then rotate it and repeat the process once more. This “lamination” creates the dozens of visible buttery layers seen in the visual blueprint.
Wrap the dough tightly in plastic wrap and chill for at least one hour. This rest period allows the gluten to relax and the butter to re-solidify, which is critical for preventing the pastry from shrinking or becoming tough during the bake.
Simmering the Chunky Strawberry Fruit Filling
Reducing the Berries for Maximum Flavor
While the dough chills, prepare the filling by combining chopped strawberries, sugar, and a splash of lemon juice in a small saucepan. Cook over medium heat, stirring occasionally, until the berries release their juices and begin to break down into a thick, chunky consistency.
Whisk the cornstarch with a teaspoon of water to create a slurry, then stir it into the bubbling fruit. Continue to simmer for another 2-3 minutes until the mixture is a deep, ruby-red and thick enough to coat the back of a spoon. Let the filling cool completely before assembly; hot filling will melt your pastry layers instantly.
Achieving the Perfect Steaming Core
The goal is a filling that doesn’t run. If you’ve ever made a strawberry rhubarb pie, you know how important it is to manage fruit moisture. A thick reduction ensures that when you snap the tart in half, the core stays put while still looking moist and vibrant.
Assembly, Crimping, and the Golden-Brown Finish
Cutting and Filling the Pastries
Roll the chilled dough out to a thickness of about 1/8 inch (3mm). Cut the dough into even rectangles, roughly 3×5 inches (7x12cm). Place half of the rectangles on a parchment-lined baking sheet and spoon a generous tablespoon of the cooled strawberry filling into the center of each.
Leave a 1/2-inch border around the edges. Brush the border lightly with an egg wash (one egg beaten with a teaspoon of water). Place a second rectangle of dough on top, pressing down gently to remove any air pockets around the fruit.
The Signature Crimp and Bake
Use the tines of a fork to press firmly around the edges of the pastry. This creates the classic crimped edges that are a hallmark of the homemade pop tarts aesthetic. Prick the tops of the pastries a few times with the fork to allow steam to escape—this prevents the filling from blowing out the sides.
Bake at 400°F (200°C) for 20-25 minutes. Look for a deep golden-brown baked finish. The smell of caramelizing butter and simmering strawberries will fill your kitchen, providing the first sensory cue that your pastries are nearing perfection.
Designing the Opaque White Vanilla Bean Glaze
Once the pastries have cooled completely on a wire rack, it is time for the crowning glory. Whisk together the powdered sugar, a tablespoon of heavy cream, and the vanilla bean paste. The glaze should be thick and opaque; if it is too runny, it will soak into the crust rather than sitting proudly on top.
Spoon the glaze over the center of each tart, letting it drip naturally down the sides. While the glaze is still wet, scatter a delicate layer of red sugar pearls over the top. This creates the high-contrast, professional look described in our visual recipe blueprint.
Pro Tips for Flawless Toaster Pastries
- Keep it Cold: If the dough feels soft or sticky at any point, put it back in the fridge for 10 minutes. Cold fat is the only way to get flaky layers.
- Don’t Overfill: It is tempting to add more jam, but too much filling will cause the pastry to leak and the bottom to become soggy.
- The Snap Test: A perfectly baked tart should have a distinct “snap” when broken in half, revealing the steaming core within.
- Glaze Consistency: Always test the glaze on a piece of parchment first. If it holds its shape, it is ready for the pastries.
Maximizing Your Pastry Shelf Life
These homemade pop tarts are best enjoyed the day they are made, especially while the crust is at its peak flakiness. However, you can store them in an airtight container at room temperature for up to three days. For longer storage, freeze the unglazed pastries for up to three months.
To reheat, place them in a 350°F (175°C) oven for 5-8 minutes until warmed through. Avoid using a traditional toaster for glazed tarts, as the sugar can melt and become a fire hazard. A toaster oven or air fryer works beautifully for reviving that golden-brown finish.
Creative Pairings and Serving Suggestions
These pastries are a star on their own, but they also pair beautifully with other homemade treats. If you are hosting a festive brunch, consider adding these to your 4th of July party ideas list for a red-white-and-blue theme.
For a complete dessert spread, you might serve these alongside cake pop recipes or even some brown butter espresso brownies for a mix of fruit and chocolate. If you want something refreshing to wash it down, a cold glass of coconut pineapple lemonade provides a tropical contrast to the rich strawberry filling.
Frequently Asked Questions
Absolutely! Air fry at 350°F (175°C) for 8-10 minutes. Watch closely as they brown faster in an air fryer than a traditional oven.
Yes, but ensure it is a high-quality, thick preserve. If it’s too runny, whisk in a little cornstarch before filling the pastries to prevent leaks.
Make sure to egg-wash the borders, crimp the edges firmly with a fork, and prick the top of the pastry to allow steam to escape during baking.
No, let them cool completely. If the pastry is hot, the glaze will melt and run off rather than staying thick and opaque.
Flakiness comes from cold butter chunks melting in the oven. If your butter melted during handling or you overworked the dough, the layers will disappear. Keep everything ice-cold!
The Ultimate Flaky Strawberry Homemade Pop Tarts Recipe
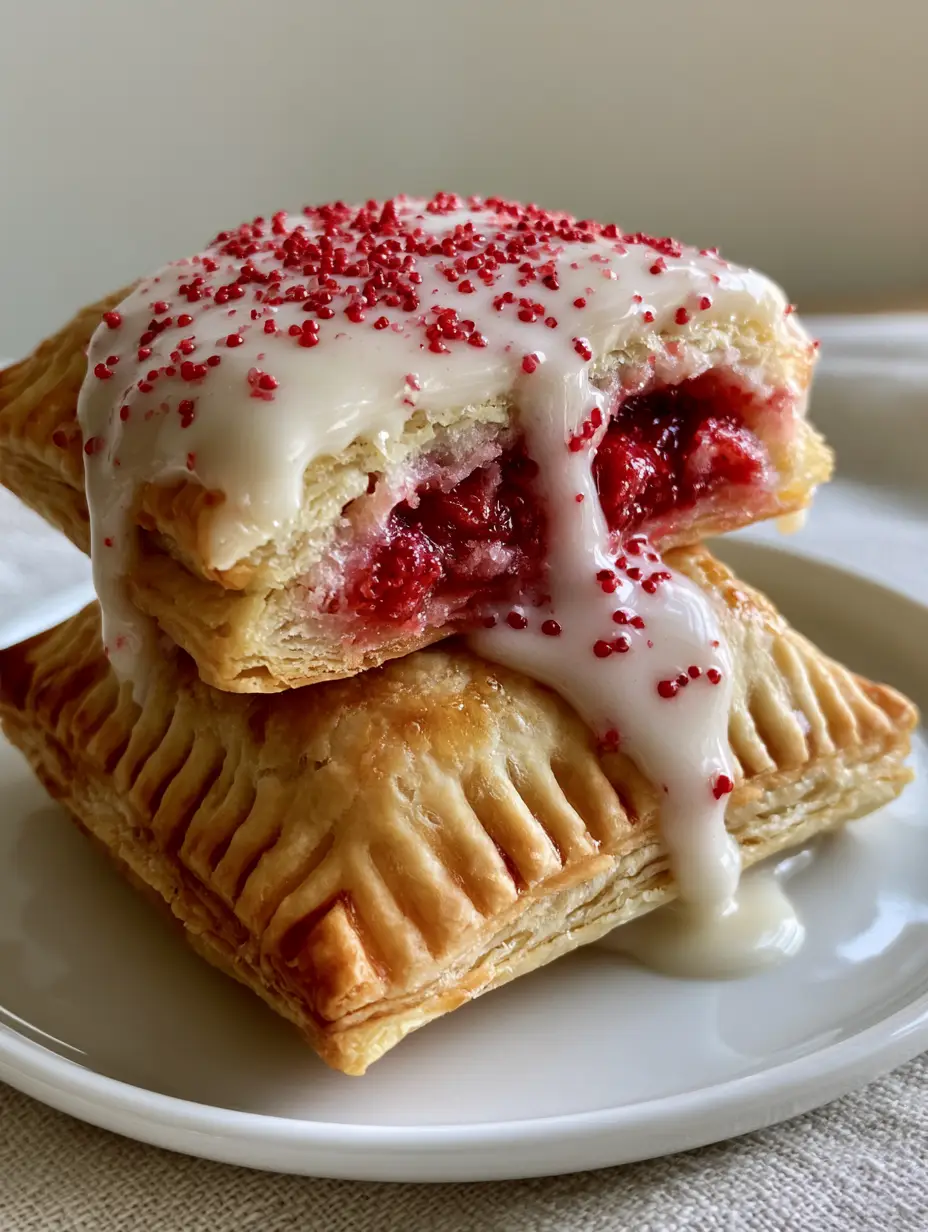
Homemade Pop Tarts with Flaky Buttery Crust and Chunky Strawberry Filling
Ingredients
Equipment
Method
- Whisk flour, salt, and sugar. Cut in cold butter until pea-sized chunks remain.
- Add ice water until dough holds. Fold into thirds twice to create layers, then chill for 1 hour.
- Simmer strawberries and sugar until chunky. Add cornstarch slurry and cook until thick and ruby-red. Cool completely.
- Roll dough to 1/8 inch. Cut into rectangles. Fill with 1 tbsp jam, top with dough, and crimp edges with a fork.
- Bake at 400°F (200°C) for 20-25 minutes until golden-brown and flaky.
- Whisk glaze ingredients. Drip over cooled tarts and top with red sugar pearls.
Notes
Use a fork to prick the tops for steam ventilation.
Conclusion: The Reward of Scratch-Made Excellence
Mastering the homemade pop tarts process is a rewarding journey for any home cook. The combination of a multi-layered buttery pastry and a vibrant, chunky fruit filling creates a snack that is lightyears beyond the processed versions. The time invested in chilling the dough and reducing the berries pays off the moment you see that thick vanilla glaze dripping down a perfectly golden crust.
We invite you to share your results and tag us in your photos! For more breakfast inspiration and decadent dessert ideas, follow us on Pinterest. Happy baking, and enjoy the flaky, fruity goodness of your own kitchen creations!


